Raspberry Pi Microwave

A few months ago, I was inspired by this post on Reddit, titled: Food items should have QR codes that instruct the microwave exactly what to do. Like high for 2 minutes, let stand 1 minute, medium 1 minutes..
I thought this was a pretty cool idea, and that it would be a fun project for a Raspberry Pi. I agreed with the people who thought using UPC barcodes would be better, since products already have them, so I went with a barcode scanner + online product database.
Here's a summary of the features that I've added to my microwave:
- Re-designed touchpad
- Nicer sounds
- Clock is automatically updated from the internet
- Can be controlled with voice commands
- Can use a barcode scanner to look up cooking instructions from an online database
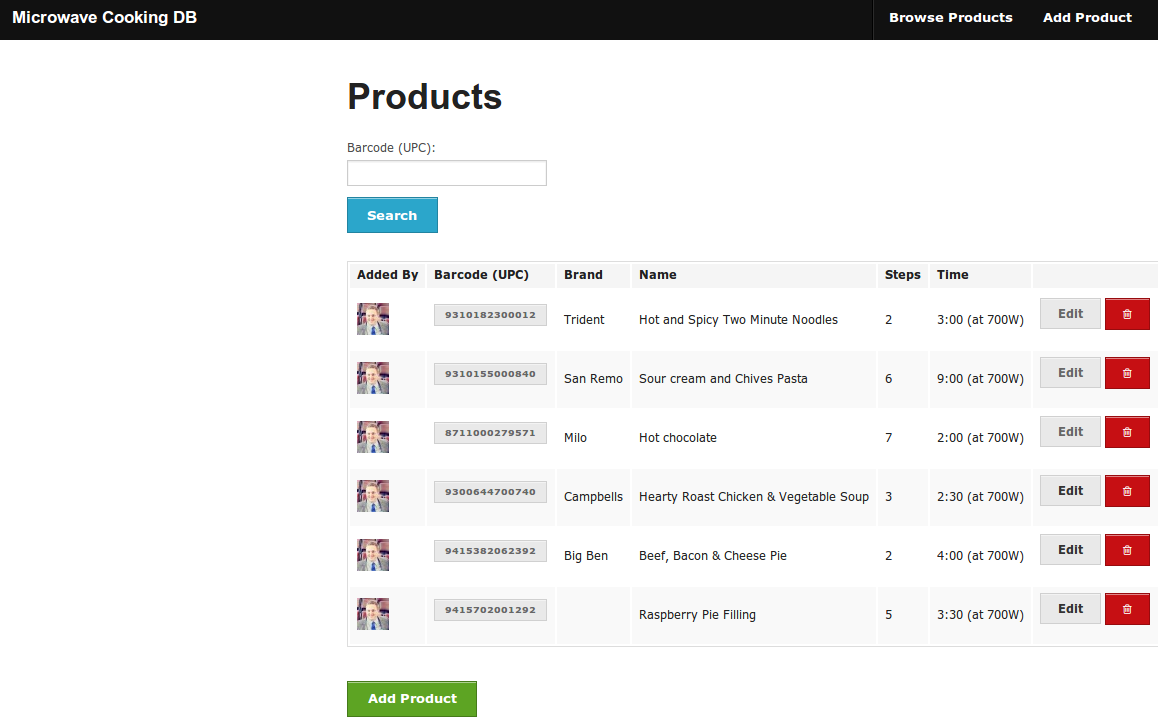
- There weren't any online microwave cooking databases around, so I made one: https://microwavecookingdb.com
- The microwave has a web page so you can control it from your phone (why not), and set up cooking instructions for products
- Tweets after it's finished cooking something (See https://twitter.com/rbmicrowave)
Demo Video
Using a Raspberry Pi to cook a Raspberry Pie


Hardware
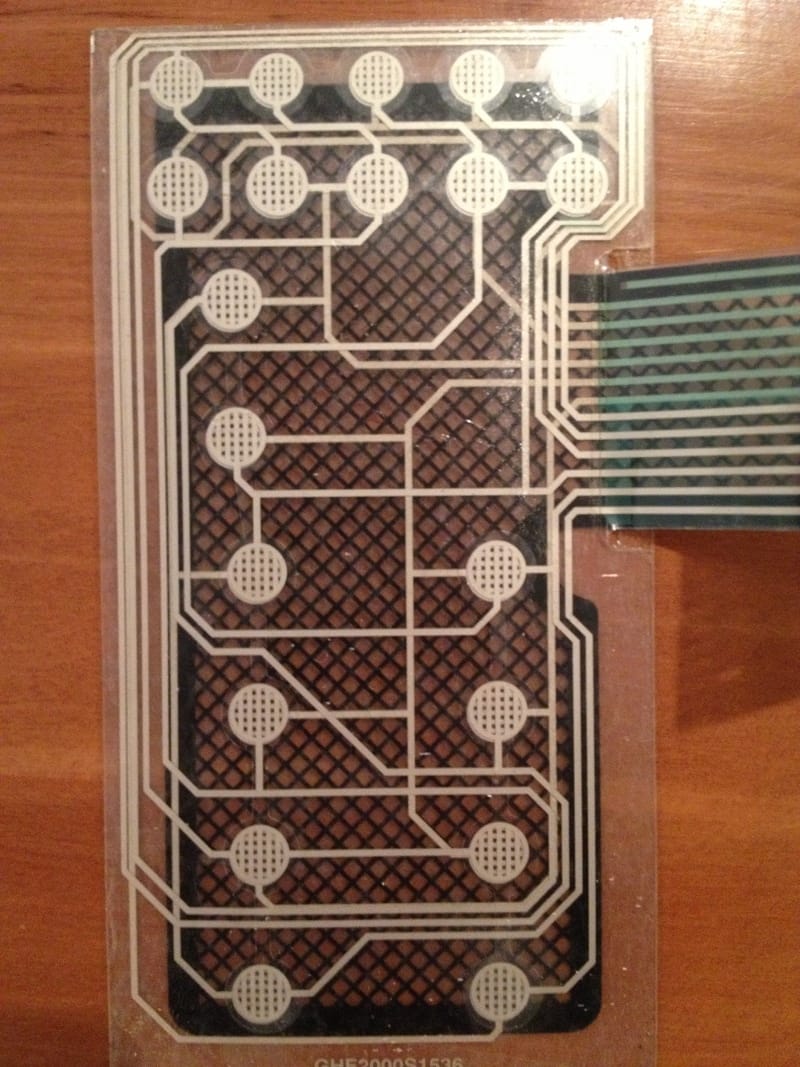
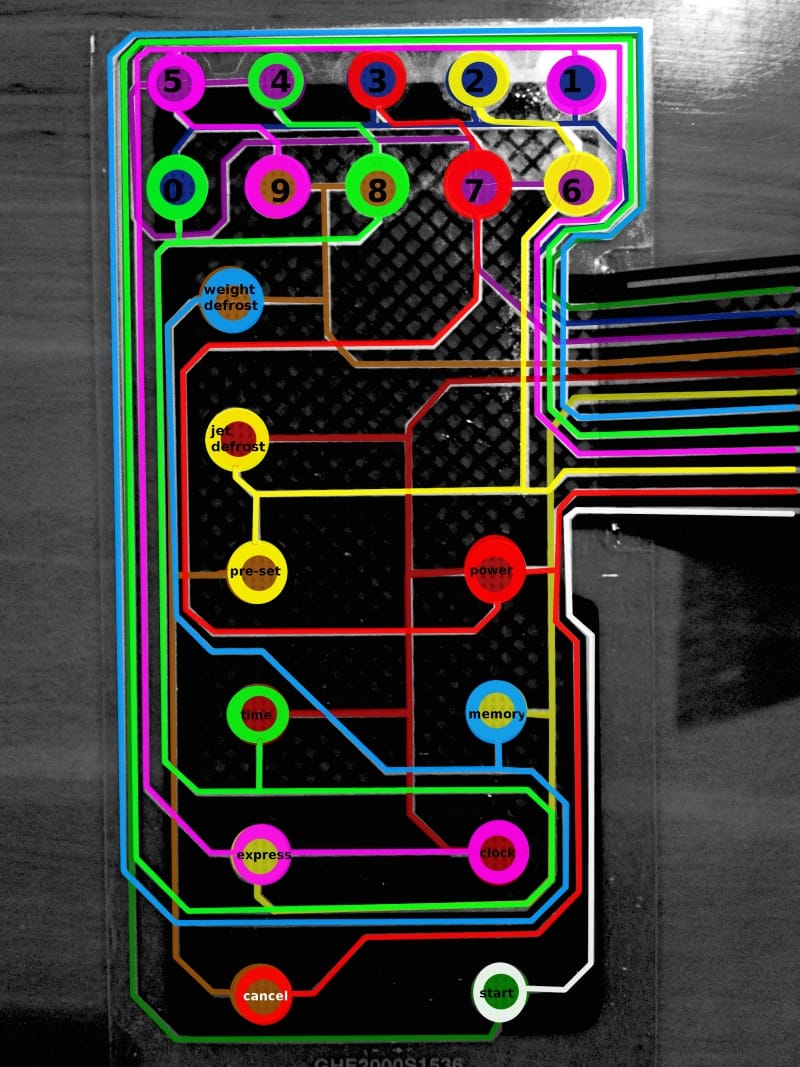
I used a microwave with a touchpad, and discovered that the touchpad was a button matrix. I took photos of the touchpad and traced the wires, so that I could tell which pins corresponded to which buttons.
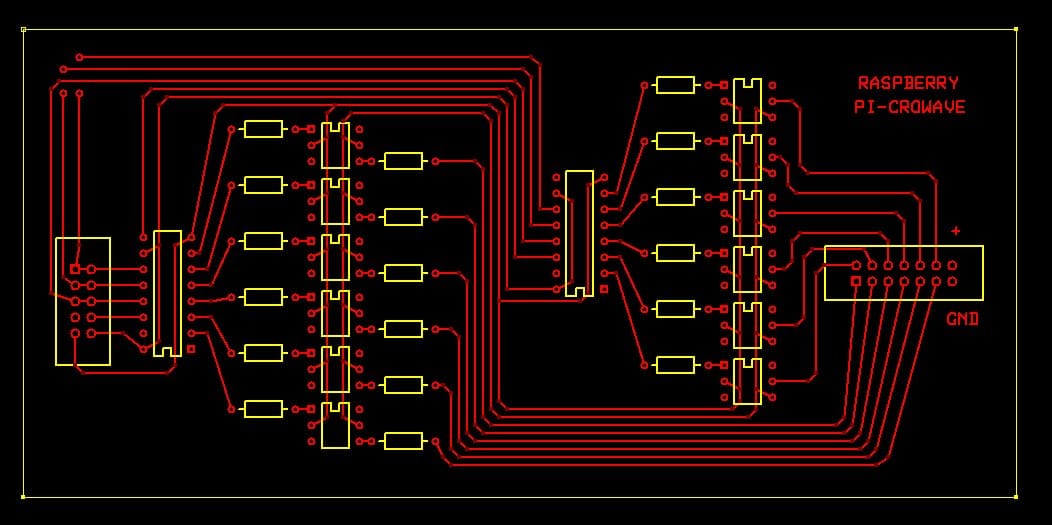
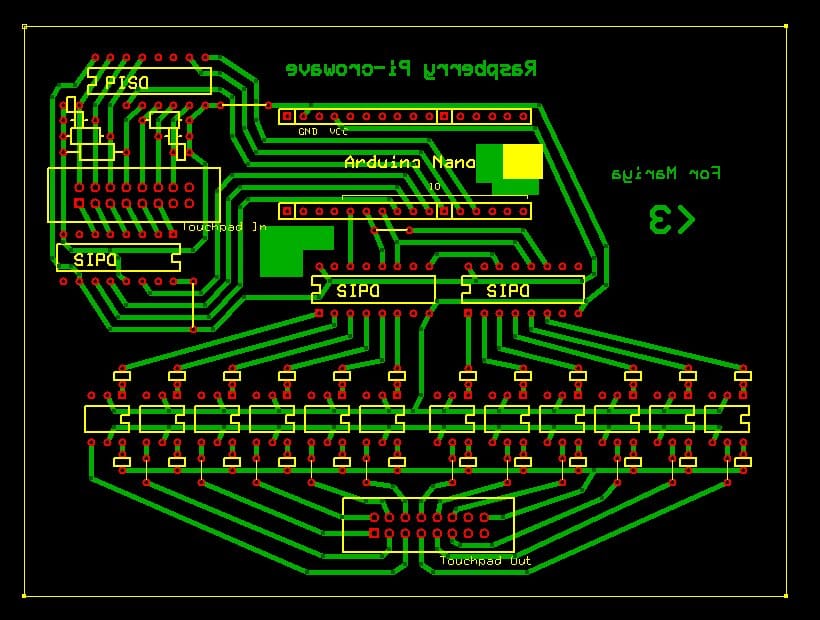
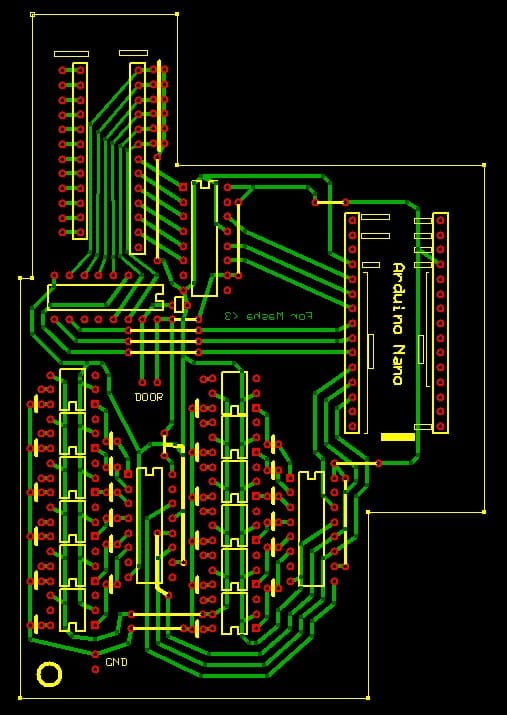
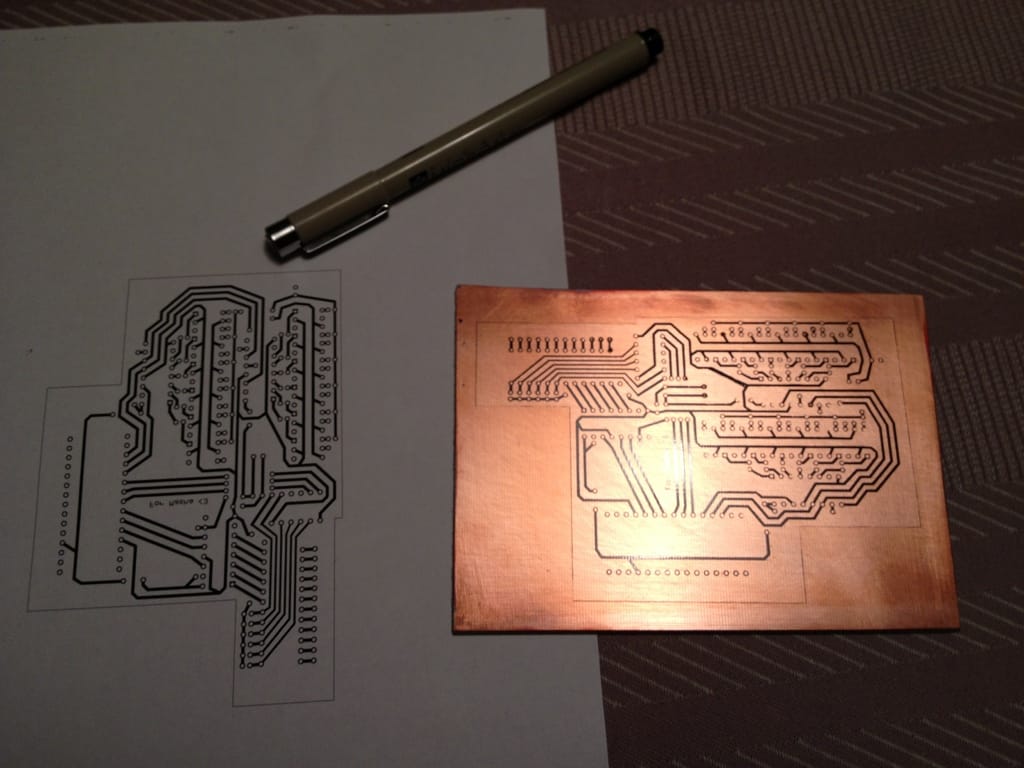
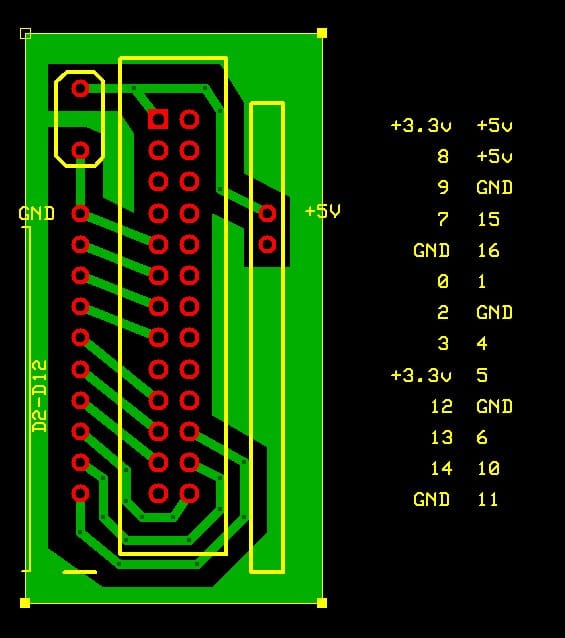
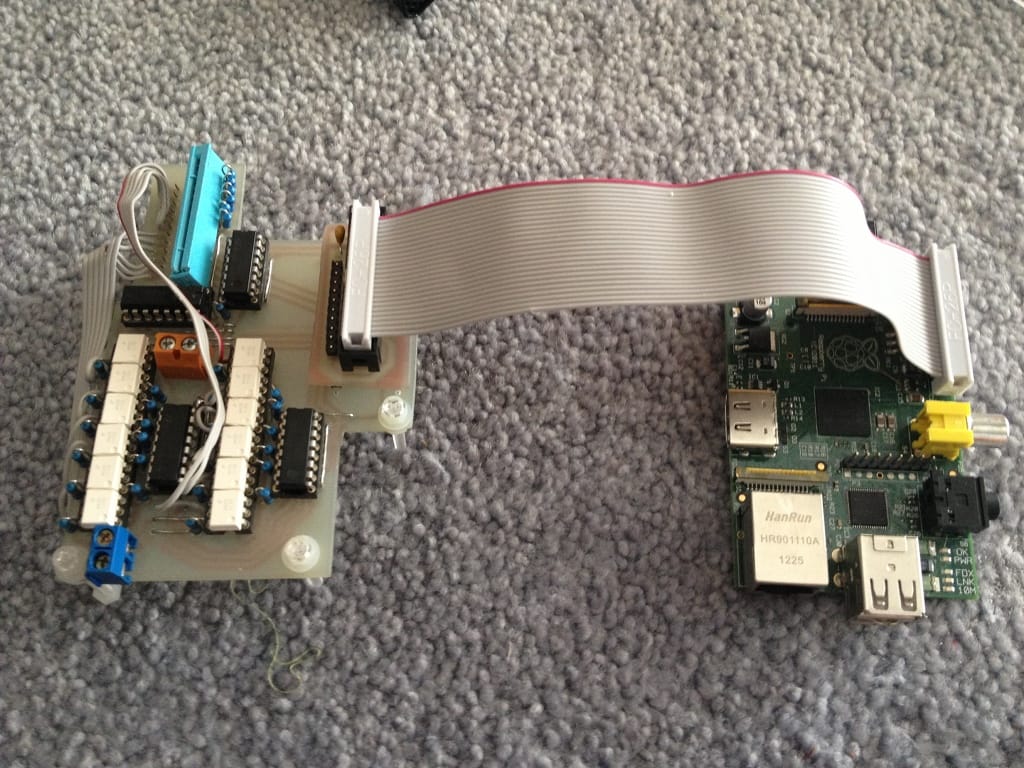
I initially wanted to put everything in a case outside the microwave, but I decided that it would be more challenging and fun to try and fit everything inside. Here's all the PCB revisions, before I settled on a design that would fit neatly on top of the microwave's original PCB.
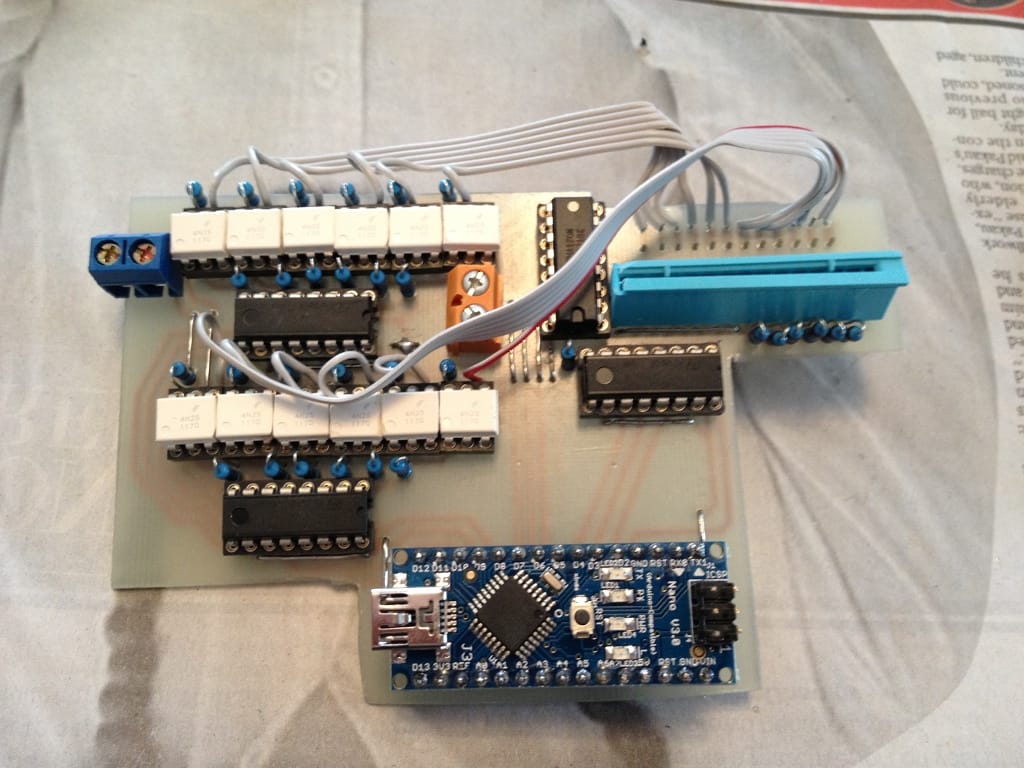
I used shift registers and optocouplers to control the touchpad pins. To listen for touchpad presses, an output shift register scans one line at a time on the first touchpad layer, and an input shift register listens for connections to the second layer.
I unsoldered the touchpad connector from the original circuit board, and replaced it with a row of pin headers. I then used the original touchpad connector on my PCB, so that my circuit acts as a kind of proxy for button presses.
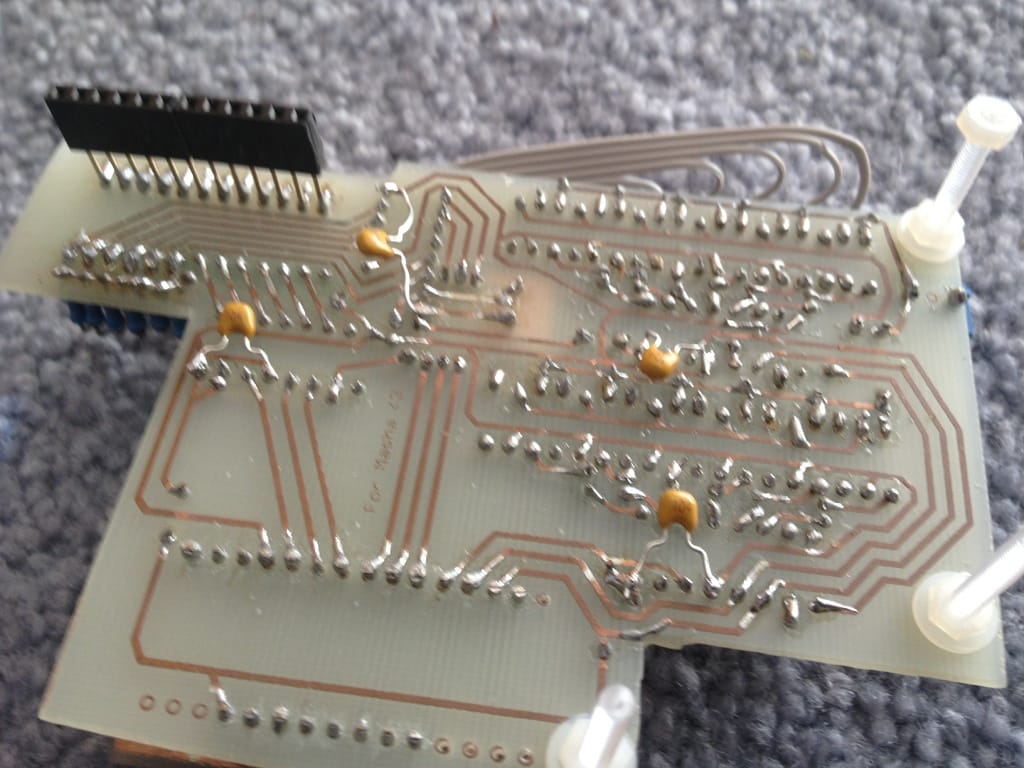
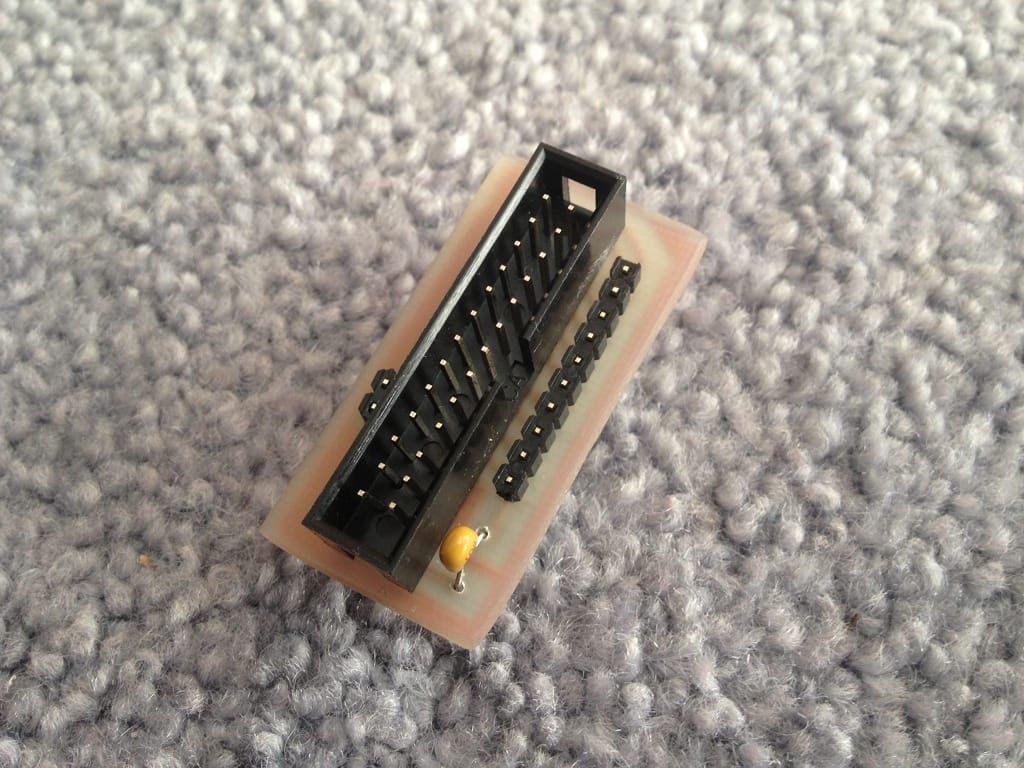
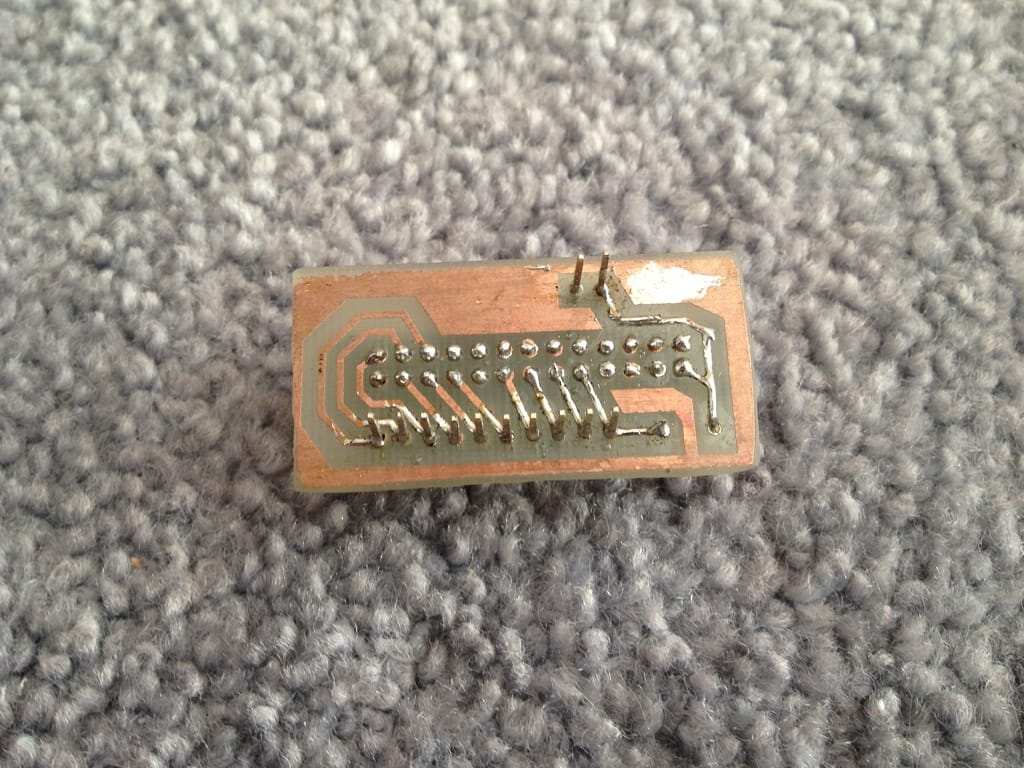
Here's the final product after transferring toner, etching, drilling, and soldering. (I had to use the ribbon cables to save space.)
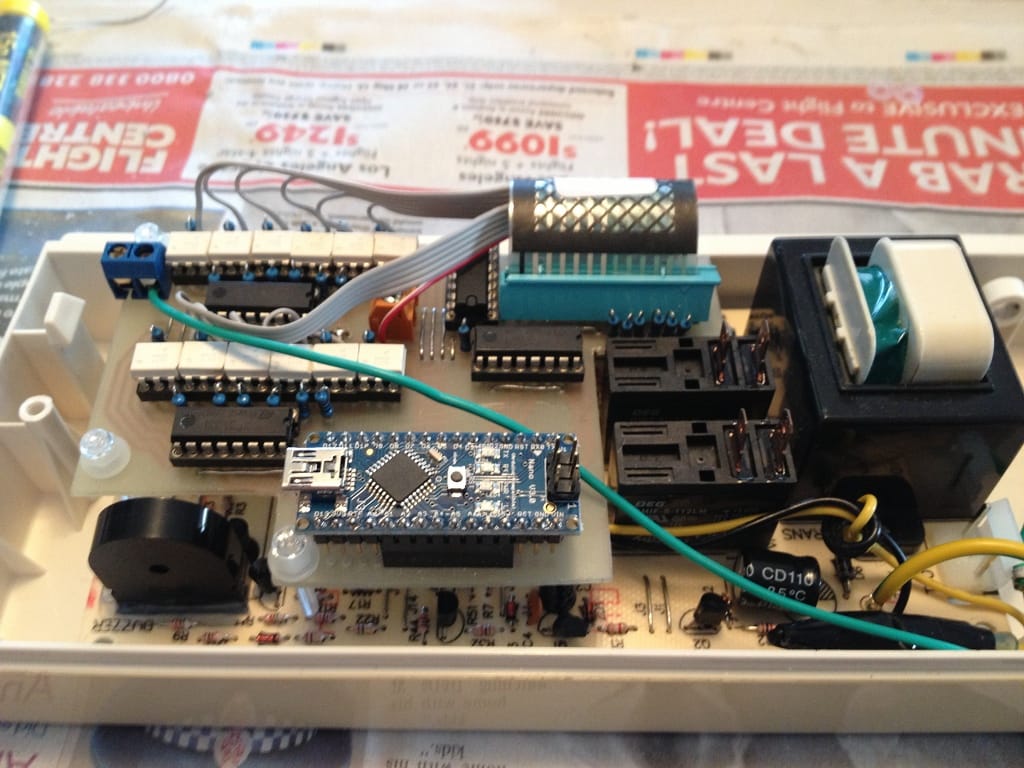
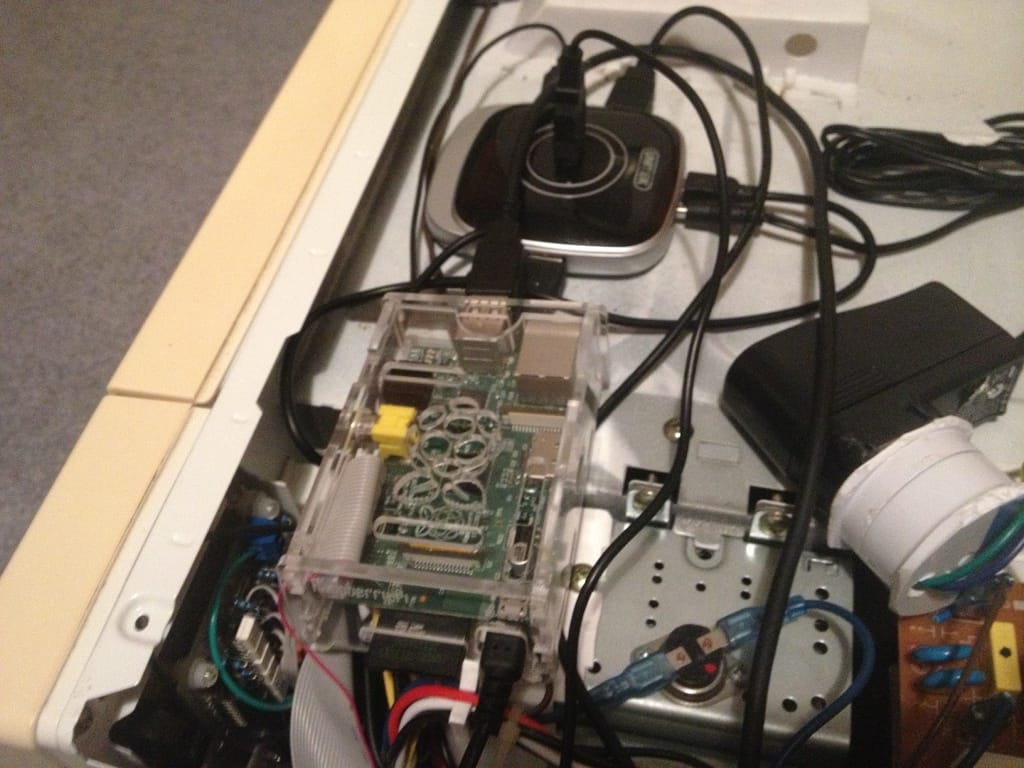
And here's how it fits on top of the microwave controller:

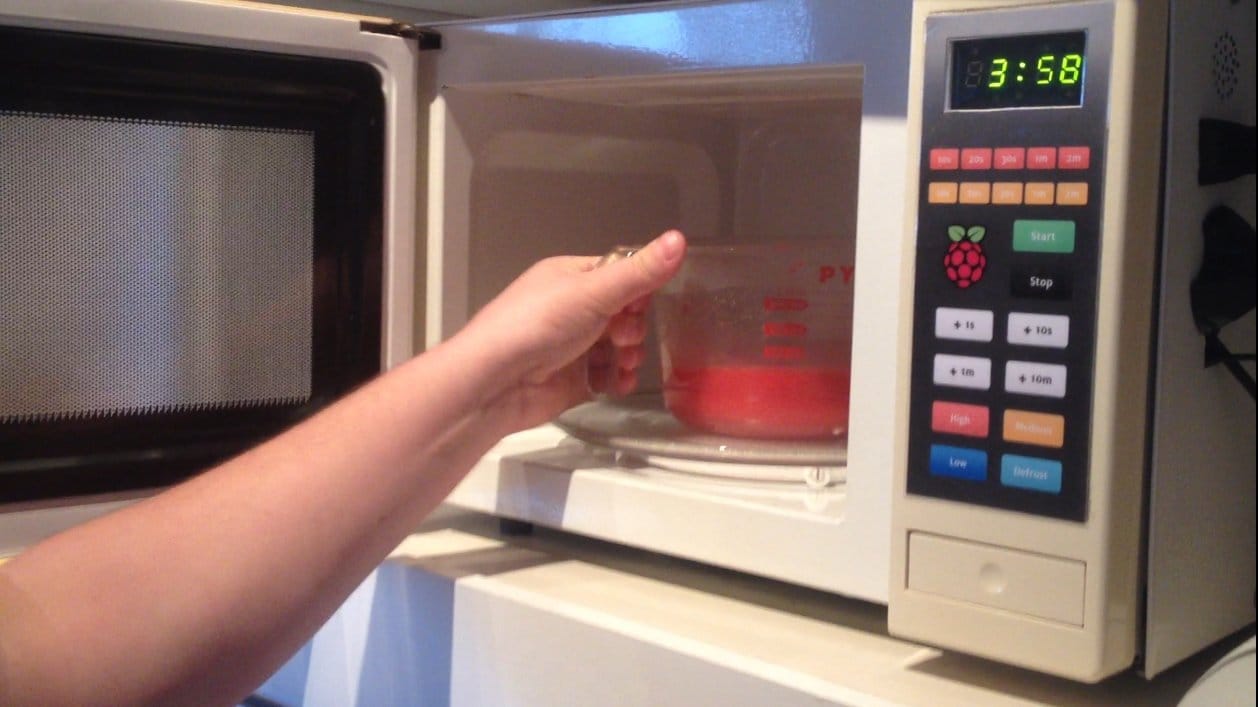
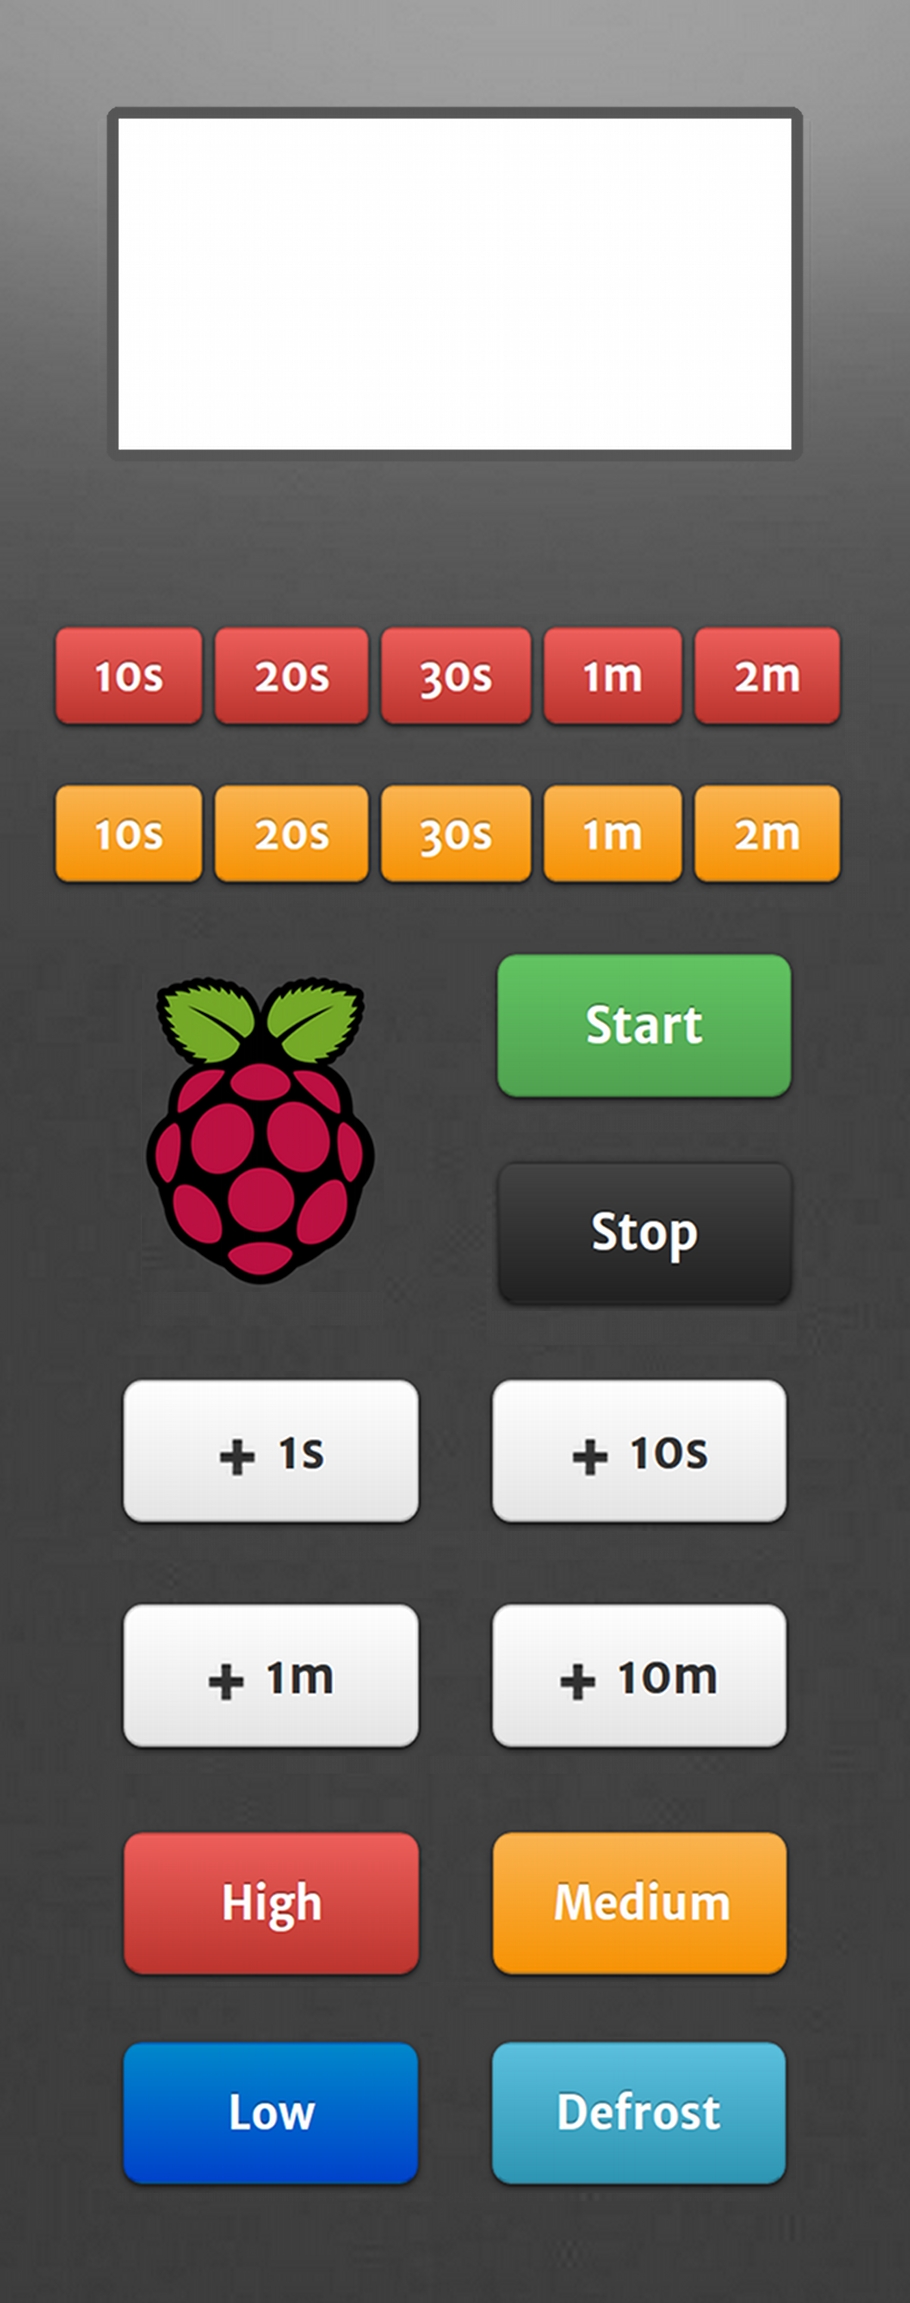
When I peeled off the old touchpad overlay, it became wrinkled and ugly, so I thought I may as well have a go at redesigning the interface. My goal was to get rid of the features I don't really use, and make the basic functions more convenient. The top two rows of buttons are now dedicated to "one touch" cooking times, for either "high" or "medium" power. You can also set the time and power manually.
You might have noticed that I started the project with the intention of using an Arduino Nano plugged into a Raspberry Pi USB port. This was because I was a) familiar with the Arduino, b) not familiar with the Raspberry Pi GPIO, and c) thought it would make testing and debugging a bit easier, since I could just plug the Arduino into my laptop.
However, it turns out that my Raspberry Pi had some issues with the arduino's FTDI chip if the Raspberry Pi was turned on while the Arduino was plugged in. It wouldn't recognize the Arduino until I unplugged it, and then plugged it back in again.
So I decided to make an Arduino Nano => Raspberry Pi GPIO adapter, and port my Arduino code to the Raspberry Pi GPIO using the WiringPi library.
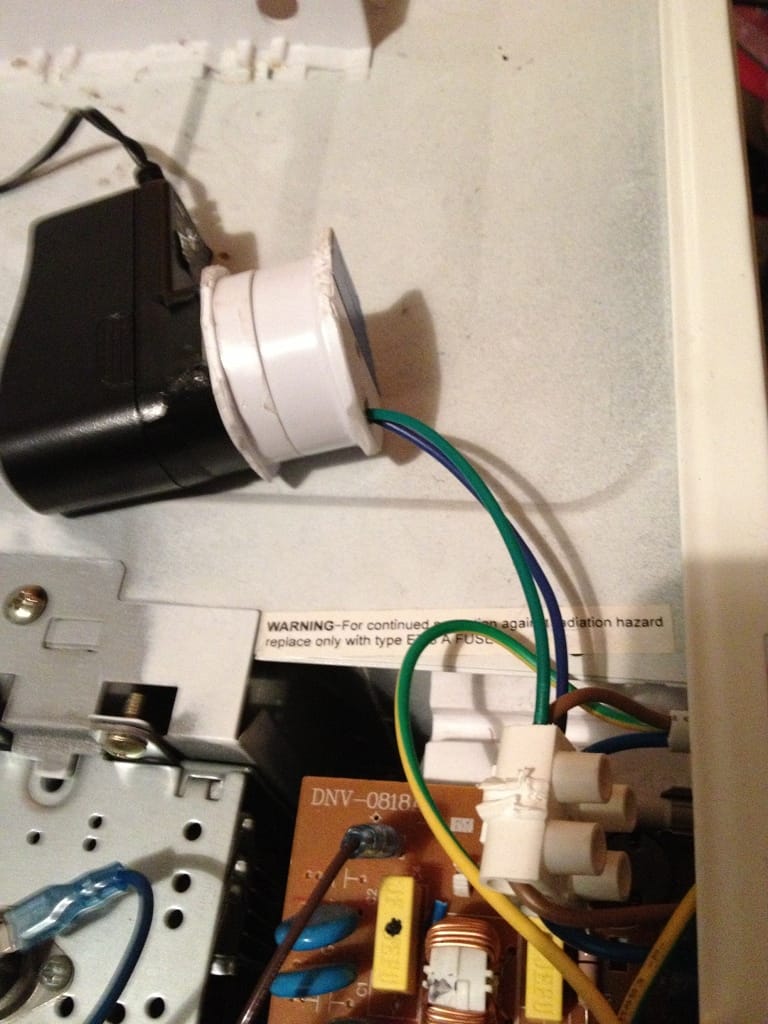
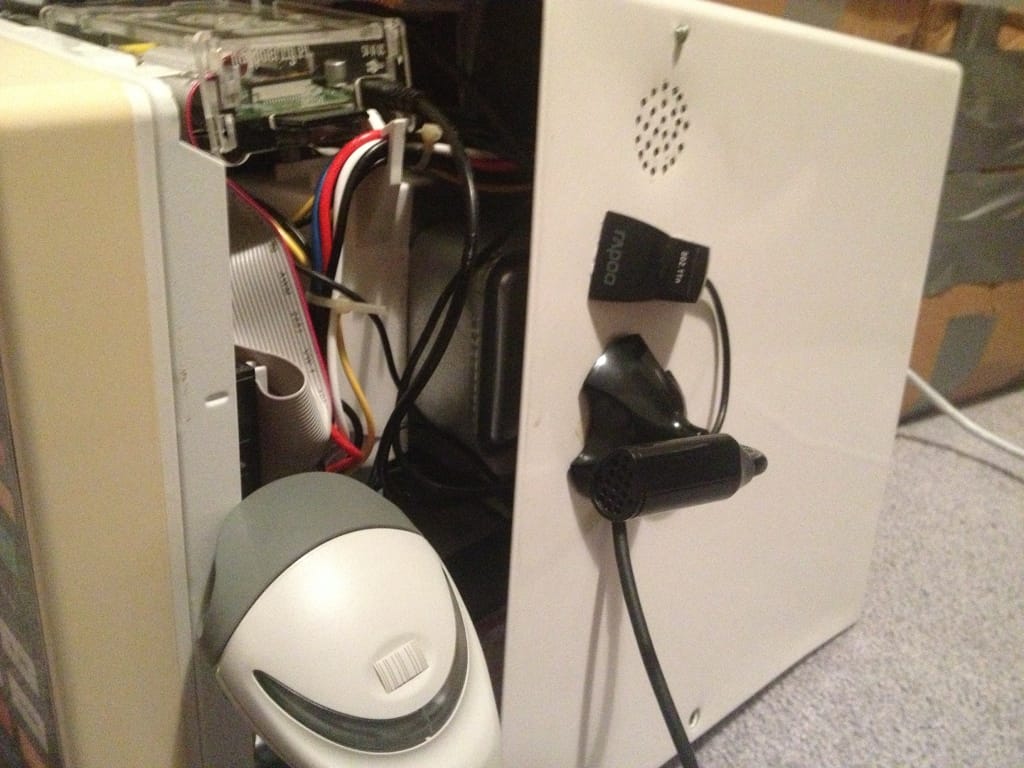
The Raspberry Pi is powered by a USB hub, which is also plugged into the Raspberry Pi's USB port. To power the hub, I wired up a power adapter to the microwave's power source. There's also a USB powered speaker, USB microphone, wifi adapter, and barcode scanner.
Microwave Software
All the software running on the Raspberry Pi is hosted at: https://github.com/ndbroadbent/raspberry_picrowave.
There are 4 main components:
Microwave Daemon
This runs the code that listens for touchpad button presses, and controls the microwave. It also accepts TCP connections so that other programs can send commands or request information about the microwave's status.
Barcode Instructions
This program listens to the barcode scanner, and requests product information from the Microwave Cooking Database. It also runs the cooking programs.
Voice Control
I used PocketSphinx for voice recognition, which worked very well with my small corpus. I embedded Ruby in the pocketsphinx_contiunous C program, so that it would be easier to script voice commands and send commands to the microwave daemon. It turns out that the acoustics of my kitchen seem to mess up the recognition, so it won't be used very often.
Sinatra App
There's a simple sinatra web application that lets you control the microwave from your phone or computer. This may not be a big selling point. It uses a JavaScript EventSource to push updates to the browser, so you could have hundreds of users connected to your microwave at once.
If any barcodes are scanned that can't be found on the Microwave Cooking Database, this webpage will display the unknown barcodes and provide a link to add the new product.
Microwave Cooking Database
I couldn't find any existing websites with a database of microwave cooking instructions, so I made one.
UPDATE: It used to be live at https://www.microwavecookingdb.com/, but the domain has now expired. Sorry!
If cooking instructions are posted for a 1000W microwave, you can request the instructions for a 700W microwave, and the cooking times will be automatically adjusted.
So if you're also planning on making an internet connected microwave with a barcode scanner, please feel free to sign up and add some products.
Thanks for reading!
I'd be interested to hear if you build something similar!