3D Printing Log

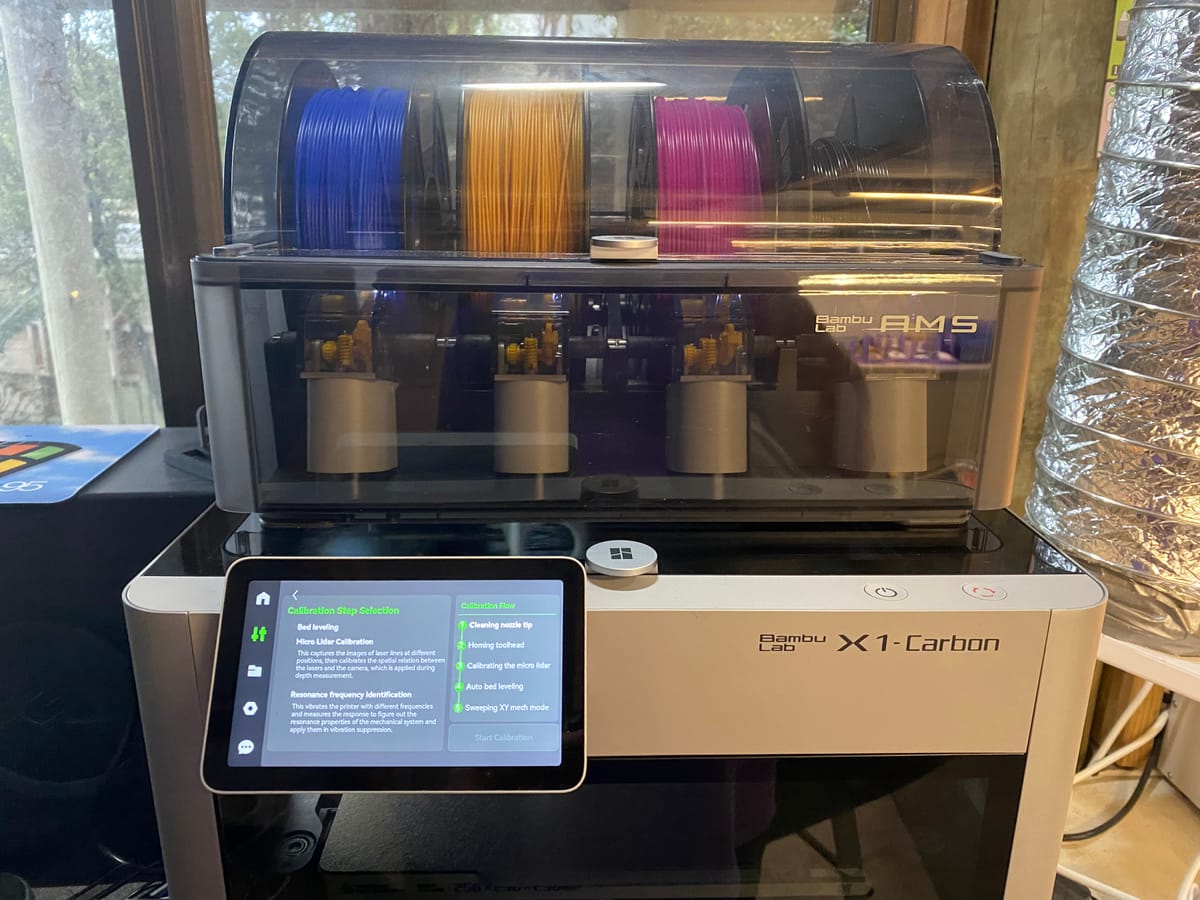
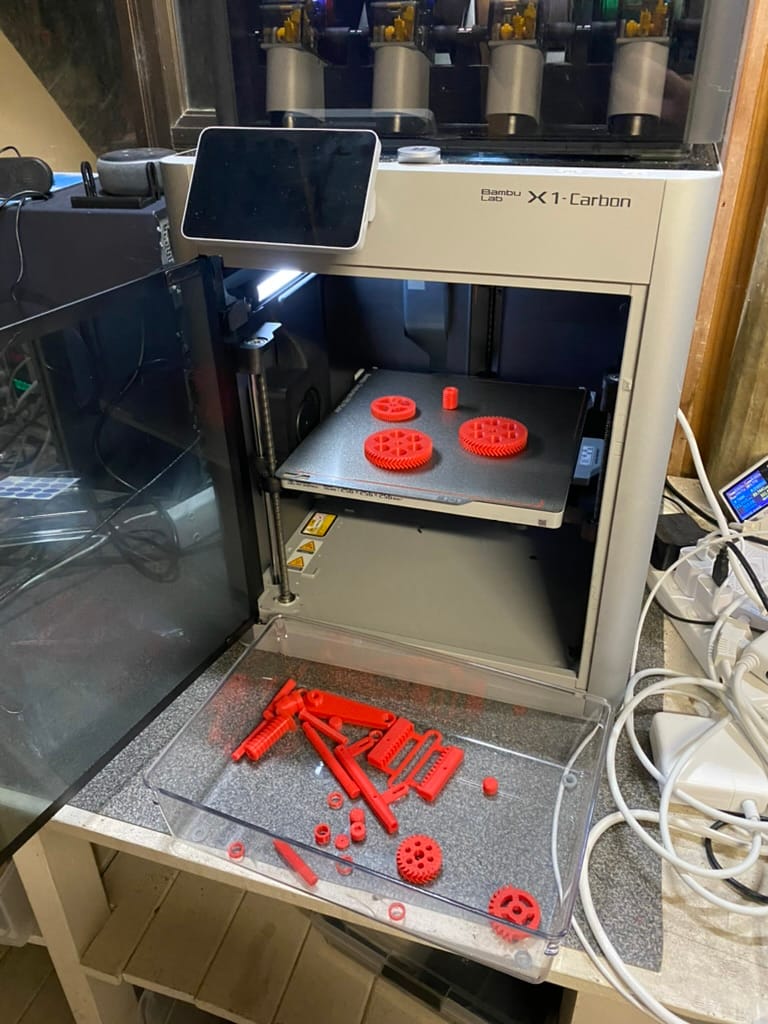
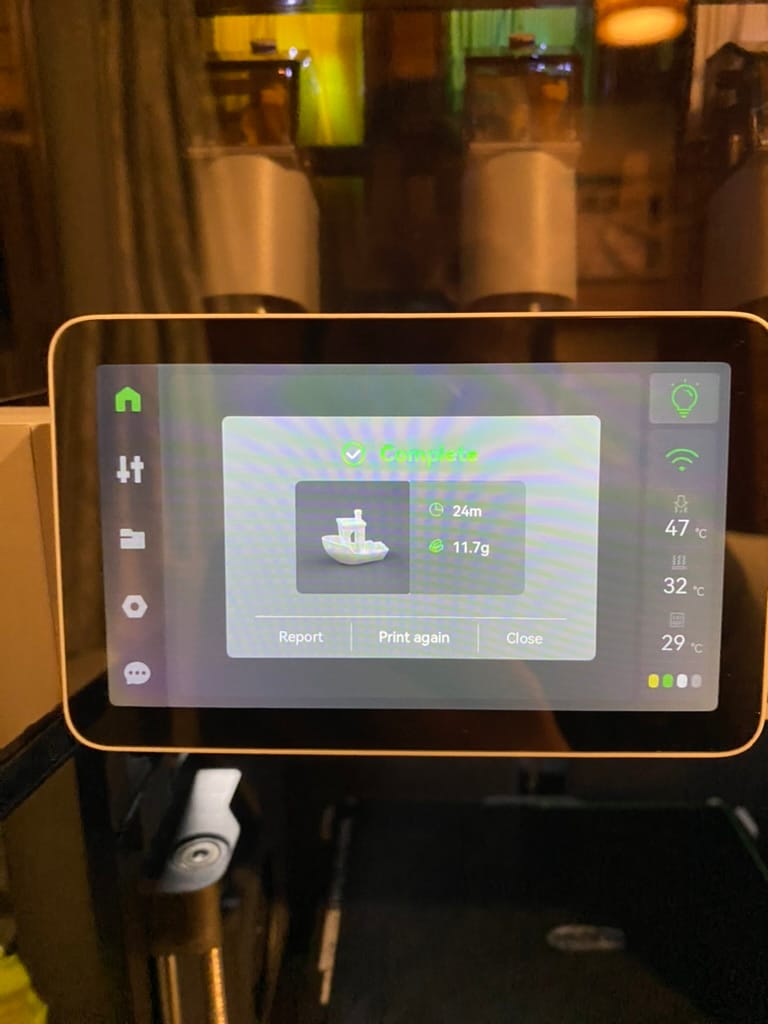
I bought a Bambu Lab X1-Carbon 3D printer in March 2023.
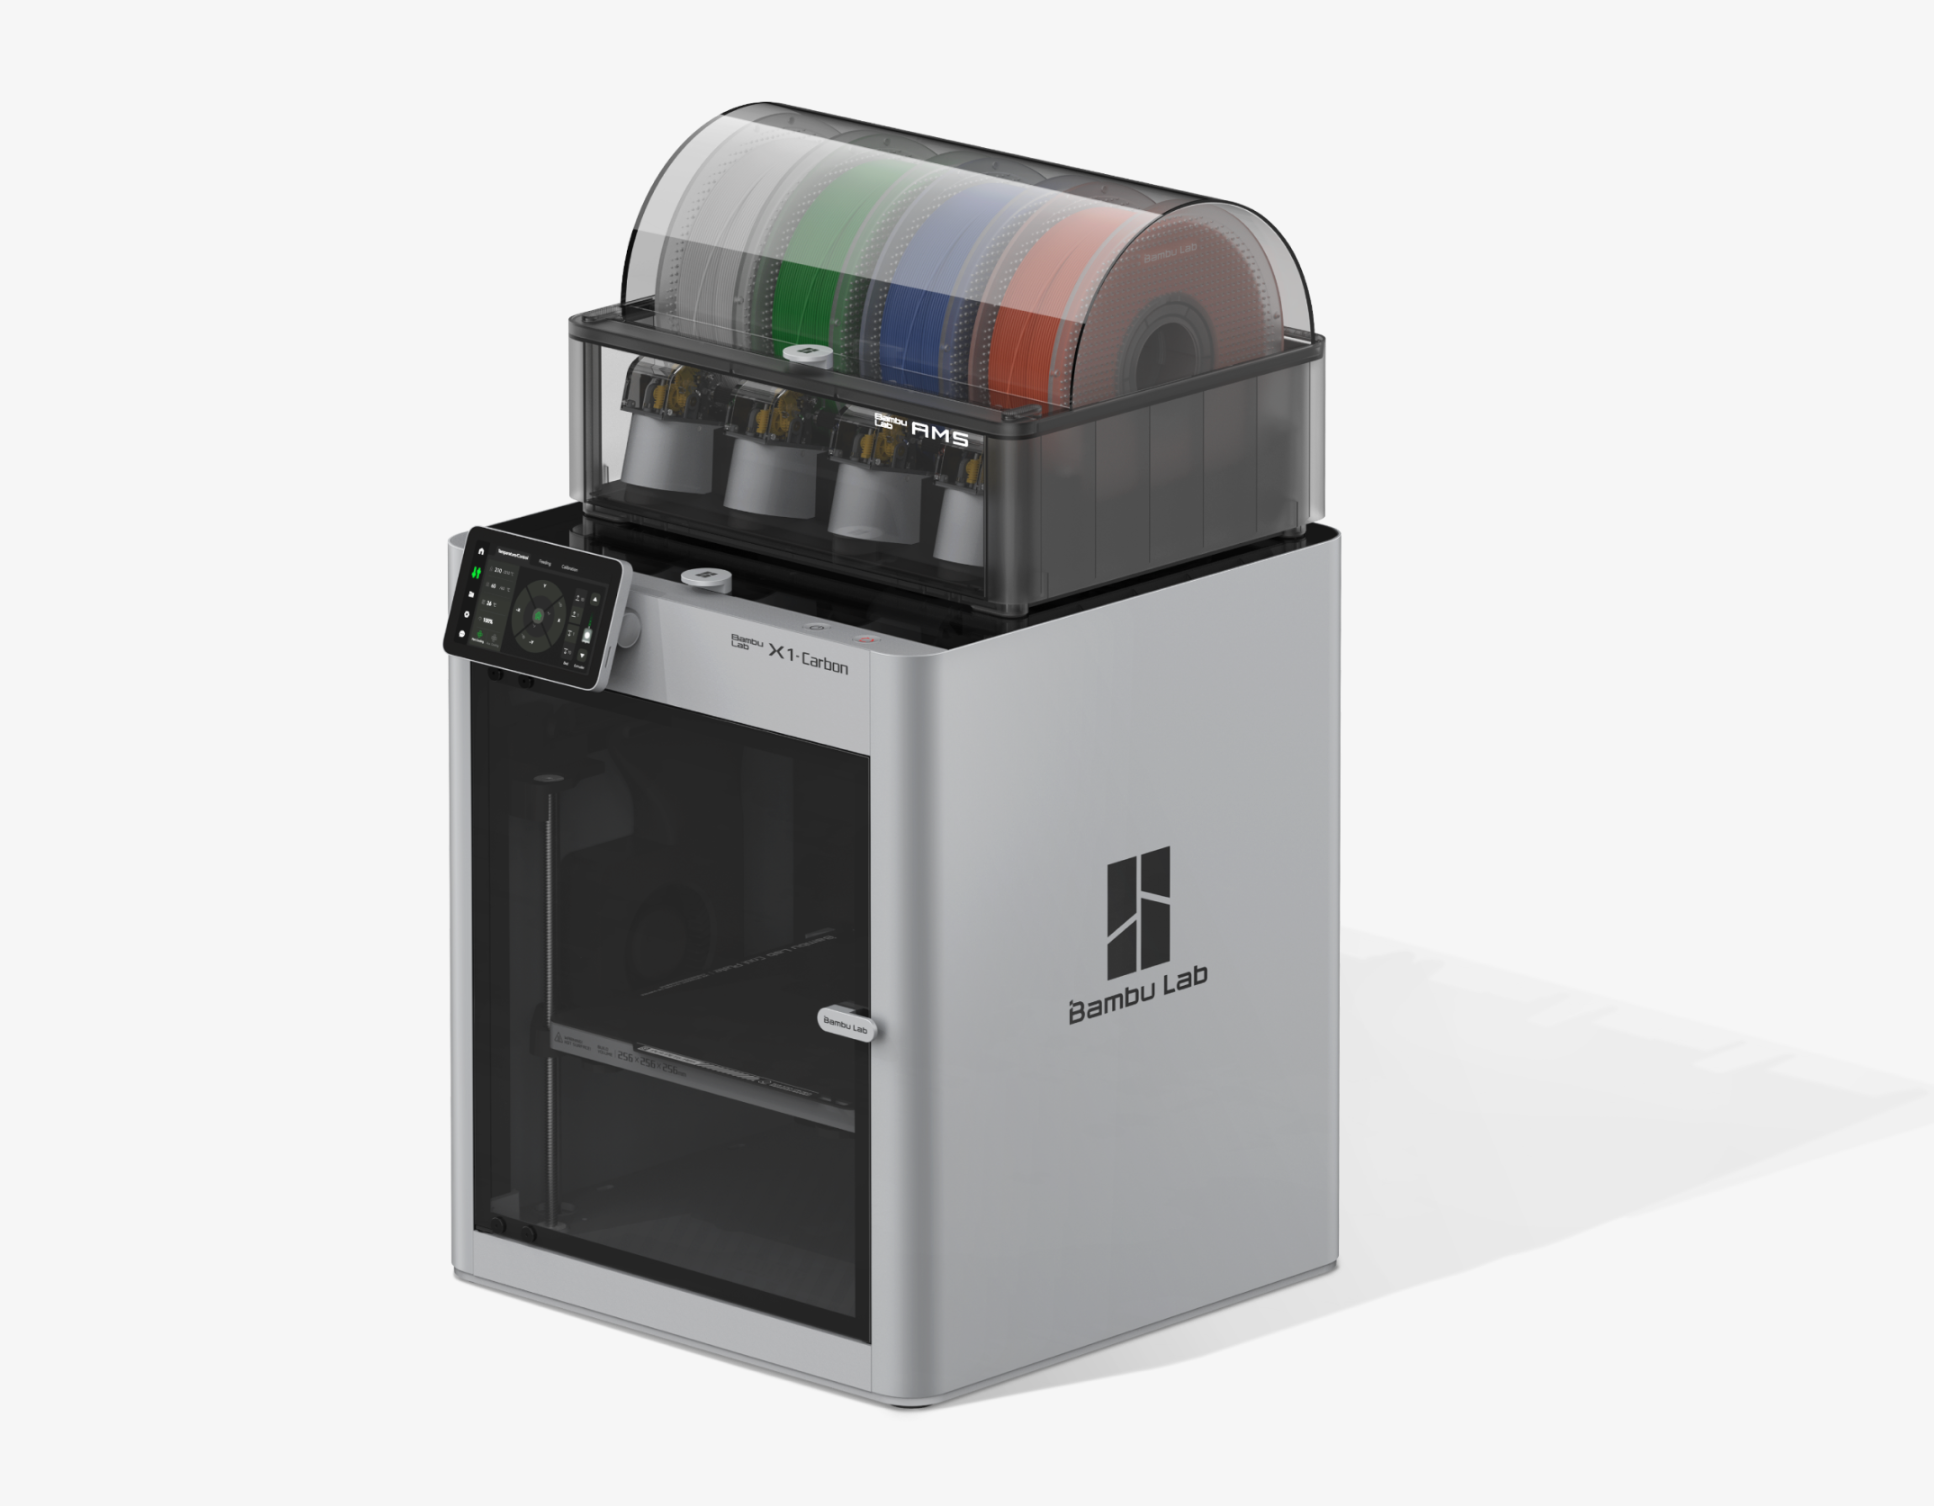
I'm extremely happy with this 3D printer and highly recommend it! It's more expensive than entry-level printers, but it's a very high quality machine and is very reliable. I can focus on designing and making things instead of spending lots of time tinkering with my 3D printer.
I find a lot of models on Thingiverse, Printables, and MakerWorld. I also design my own parts in OpenSCAD and Fusion360.
This page is where I log some of the things that I've printed.
2024
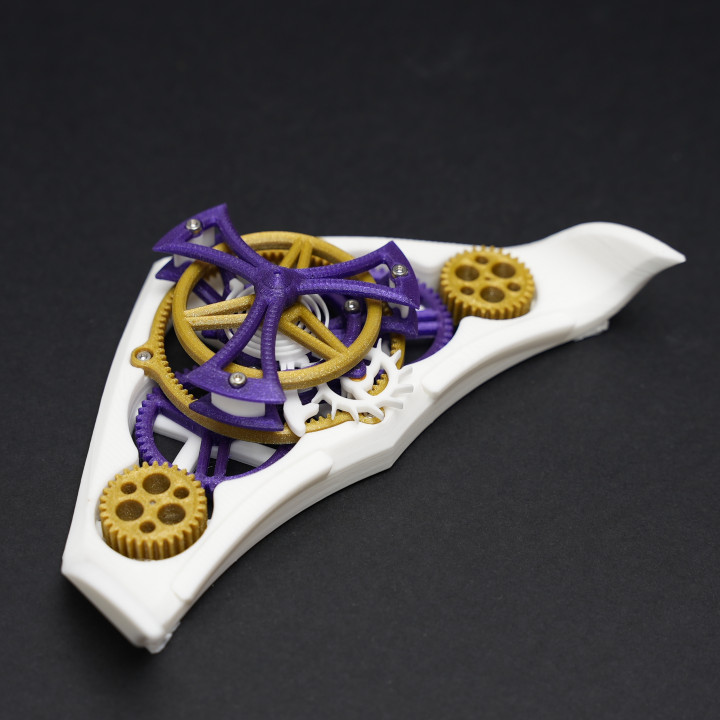
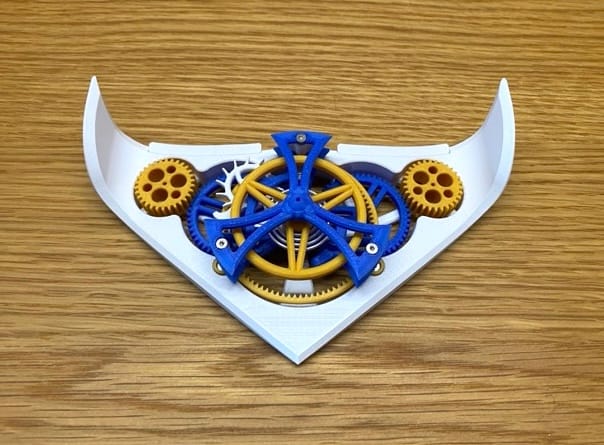
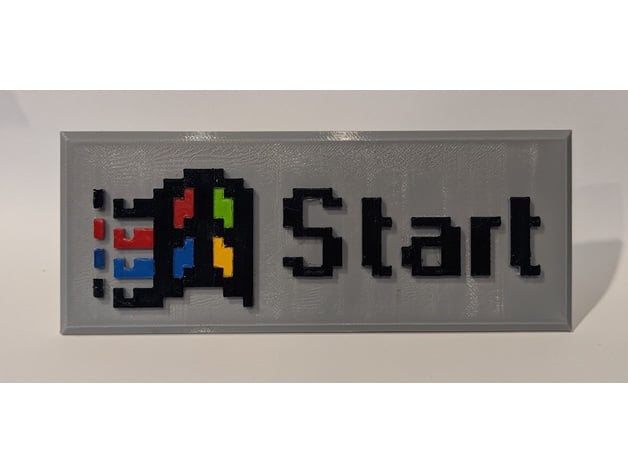
Aeria Mechanica Mini
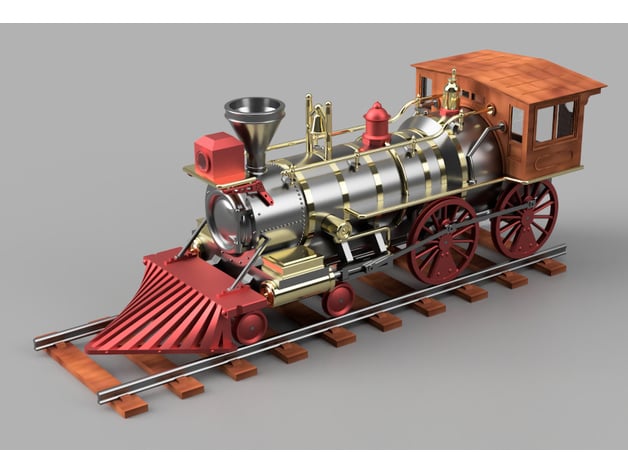
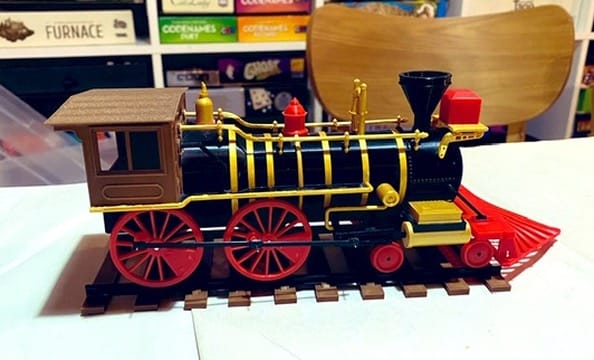
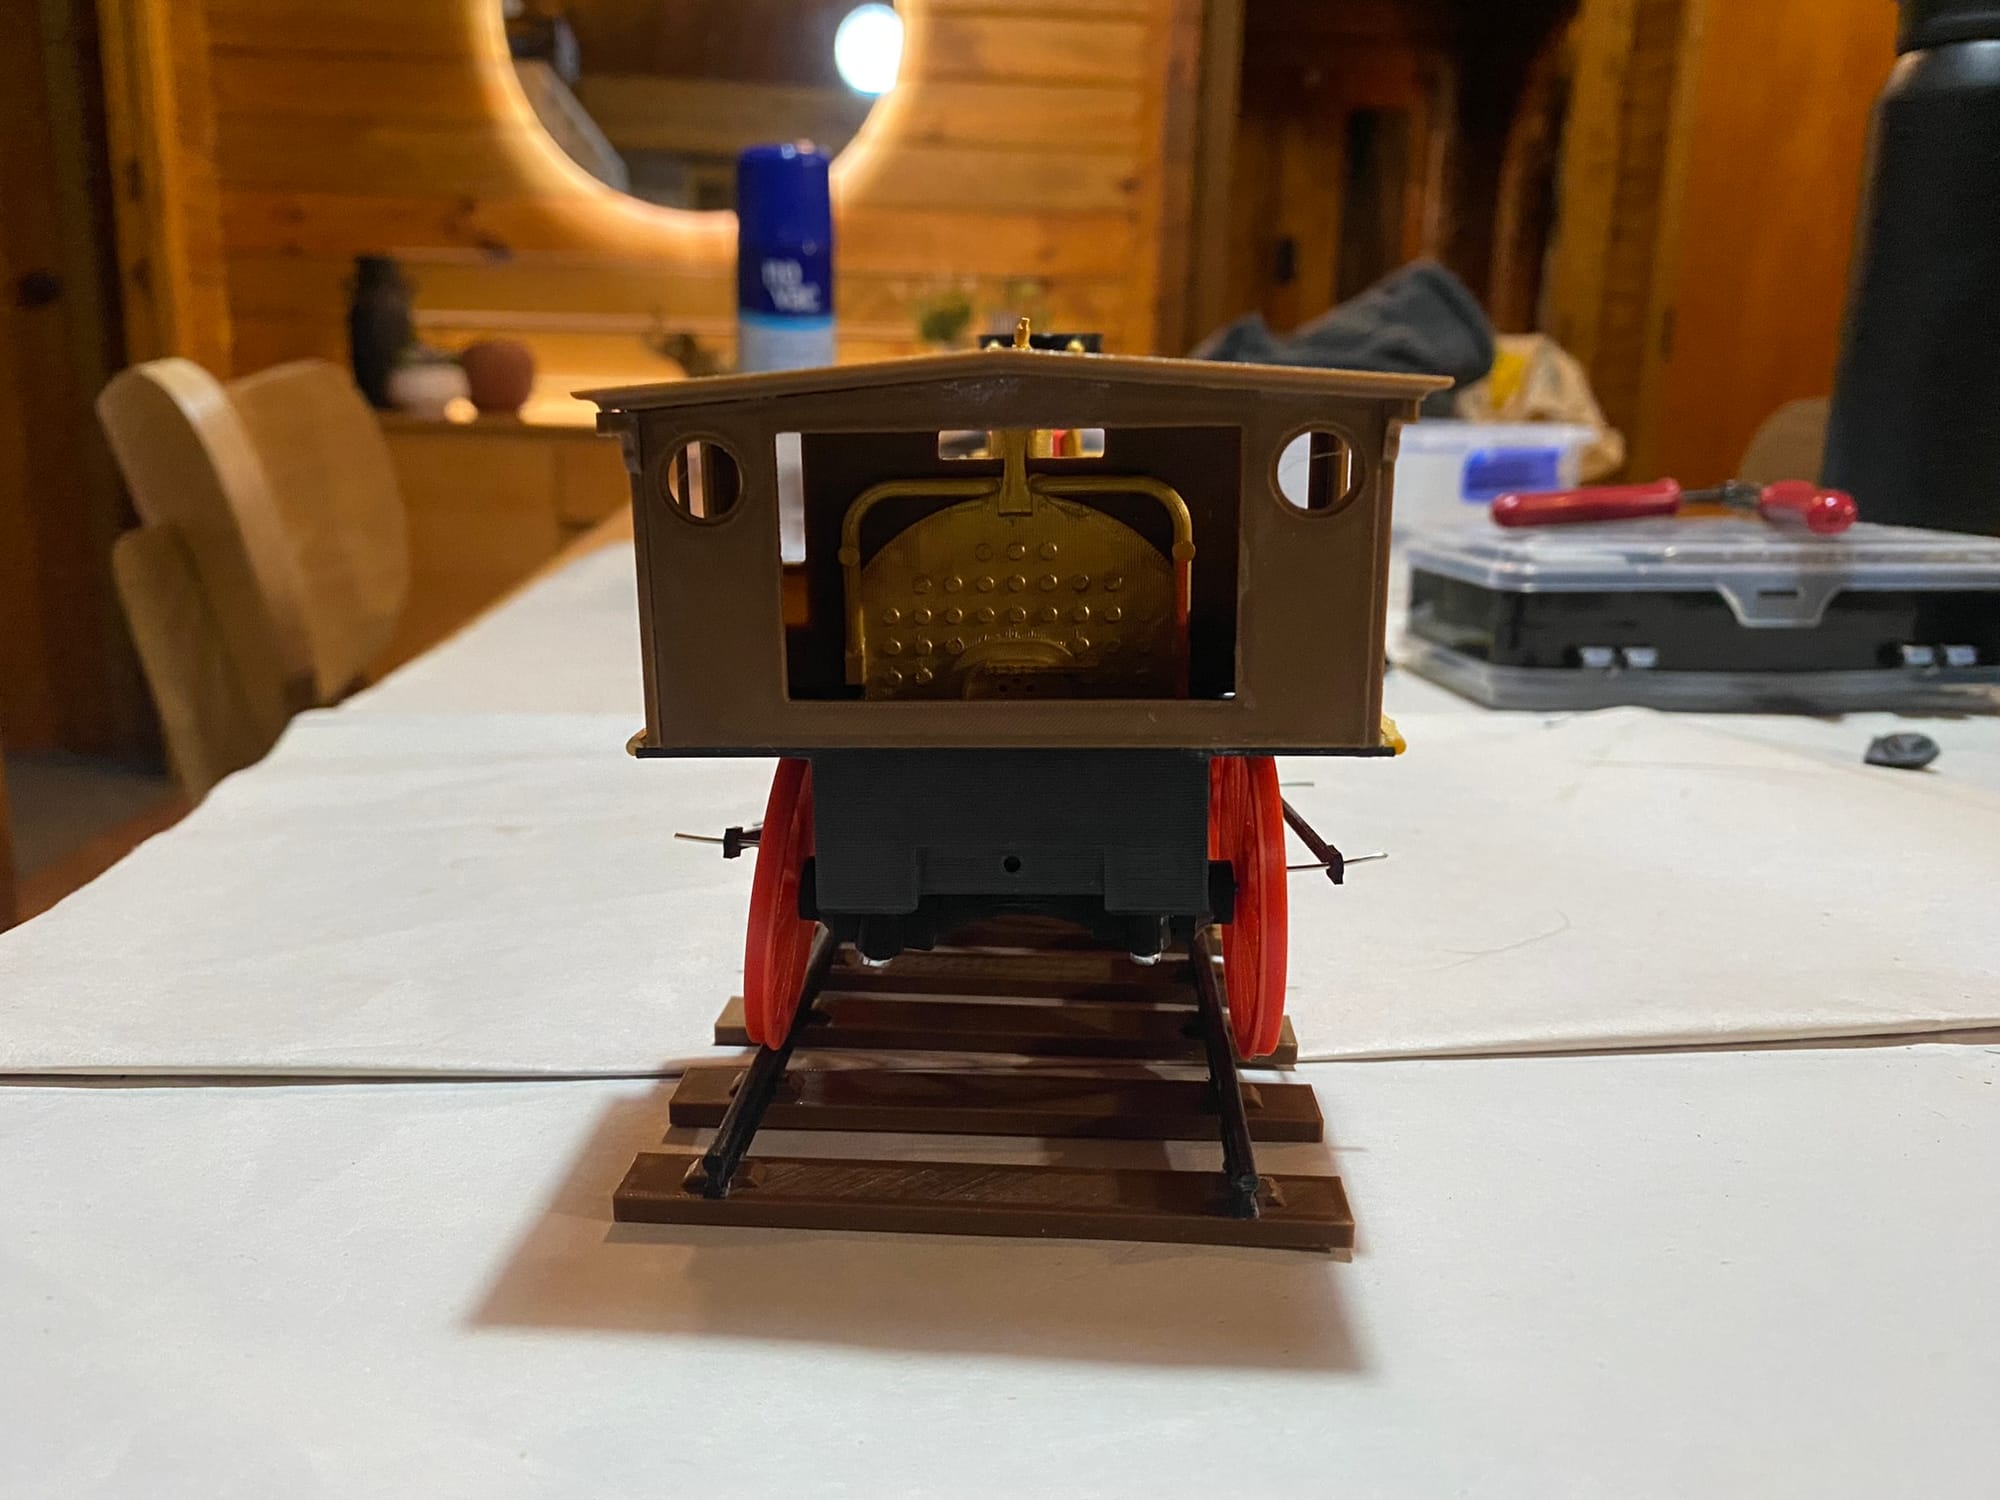
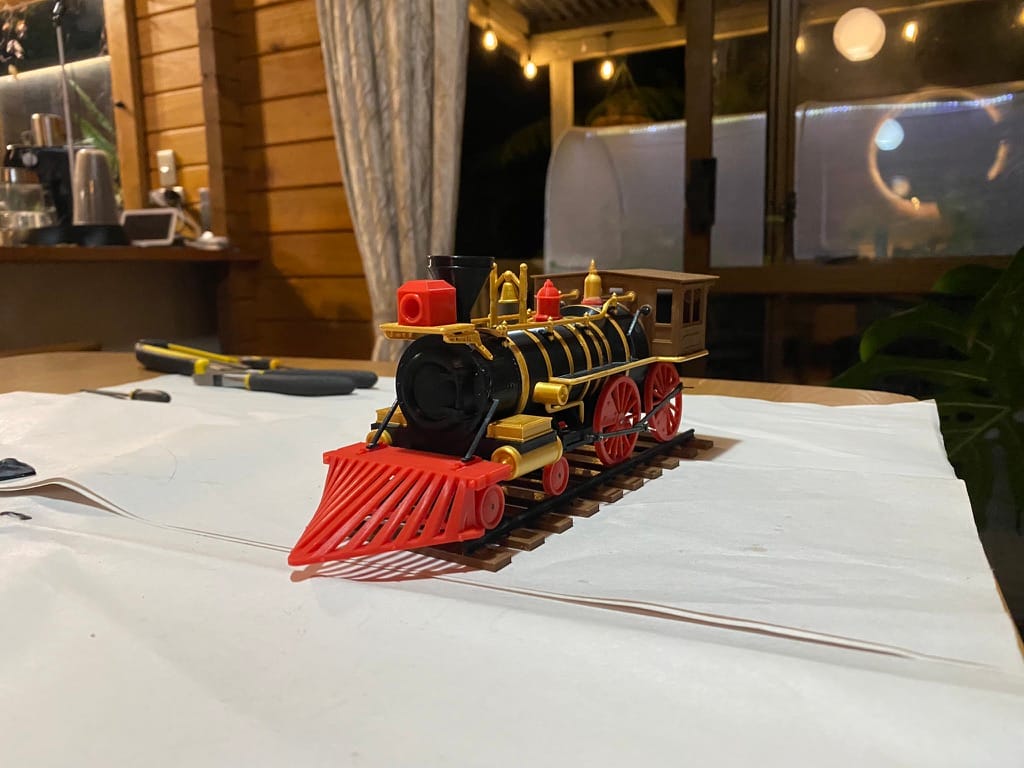
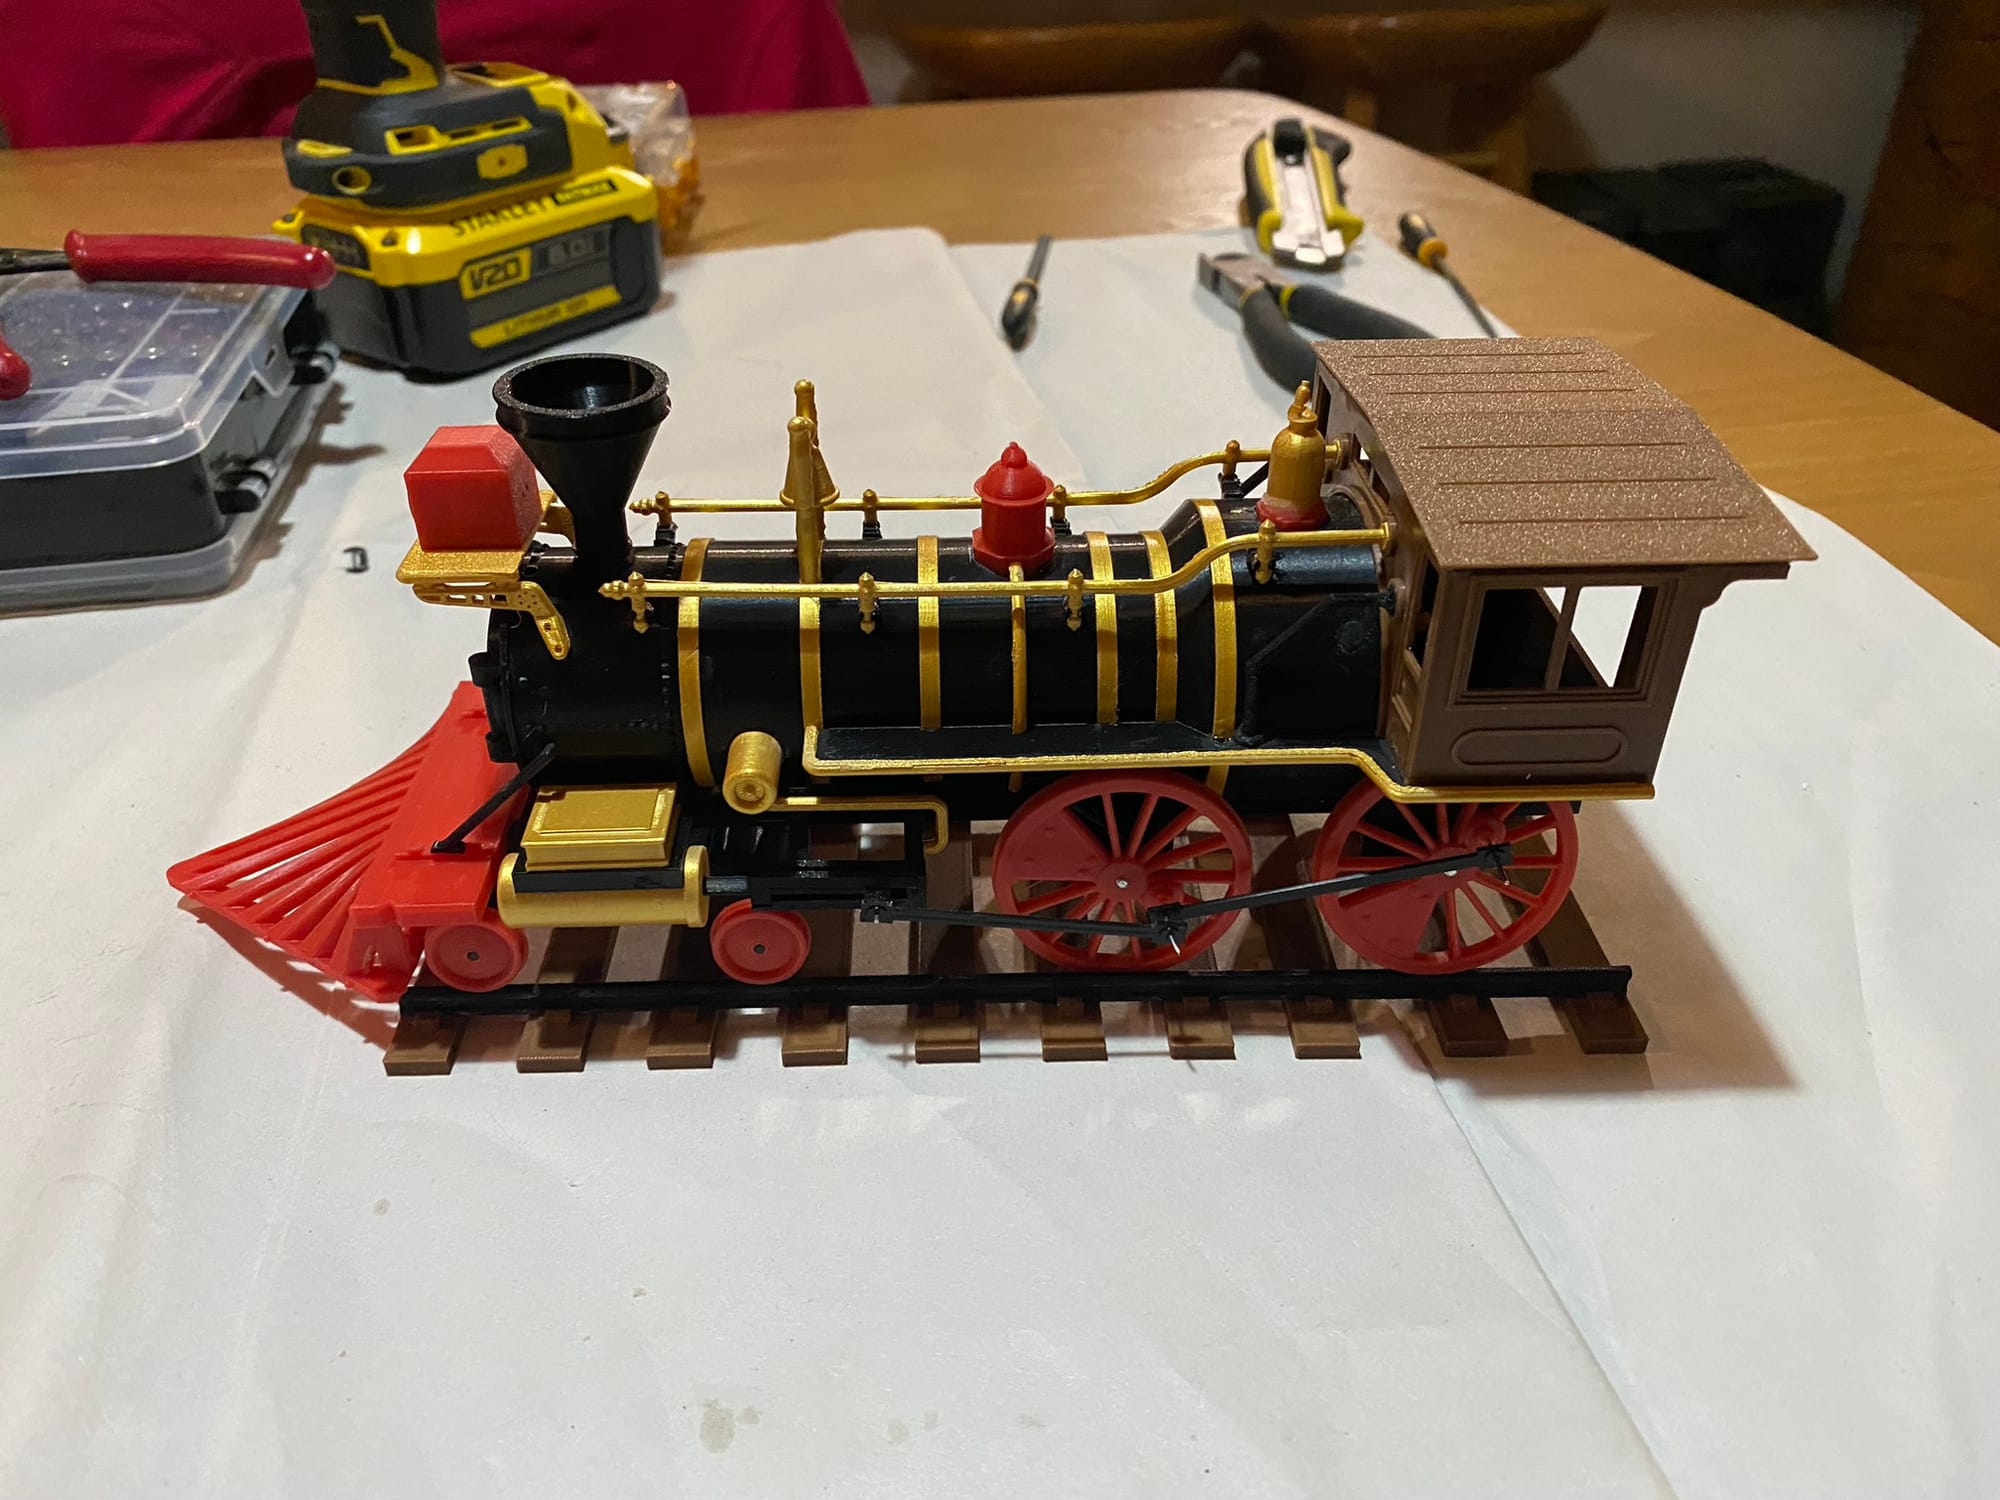
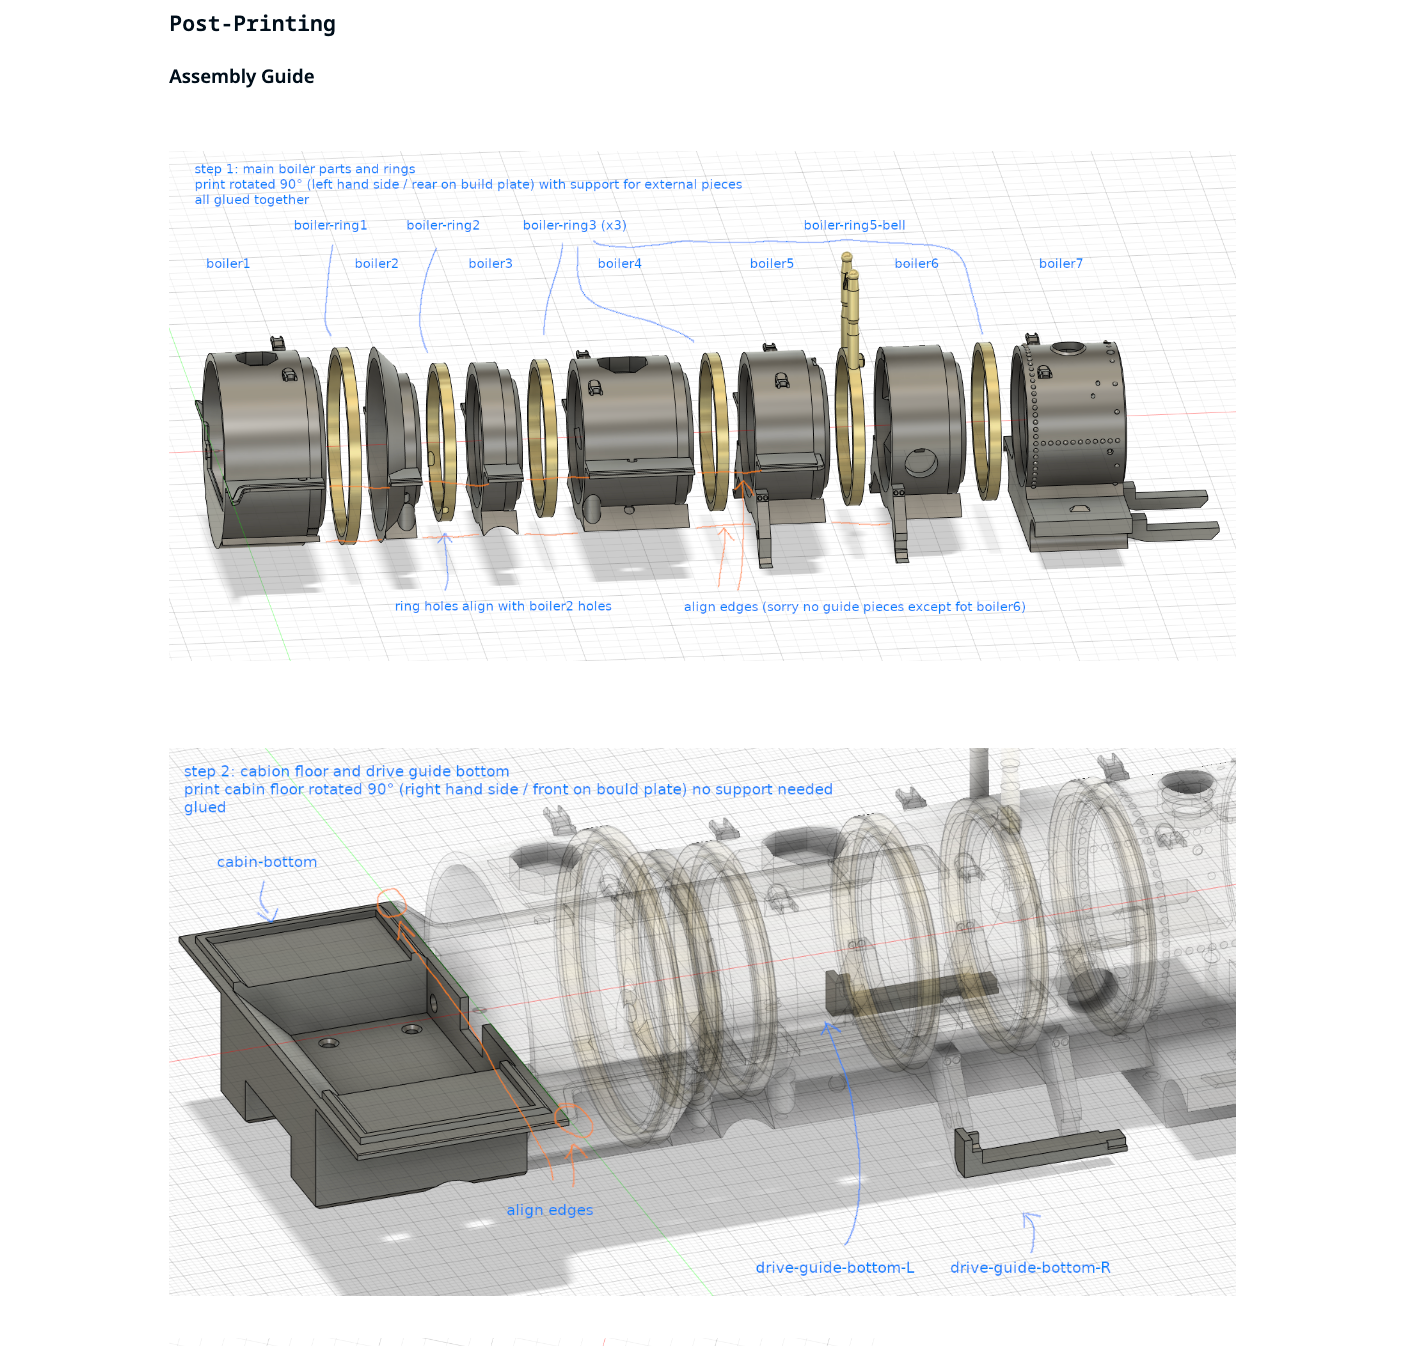
Leviathan Steam Train

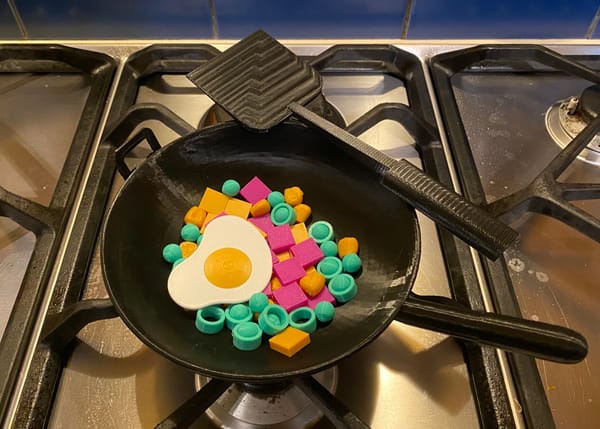
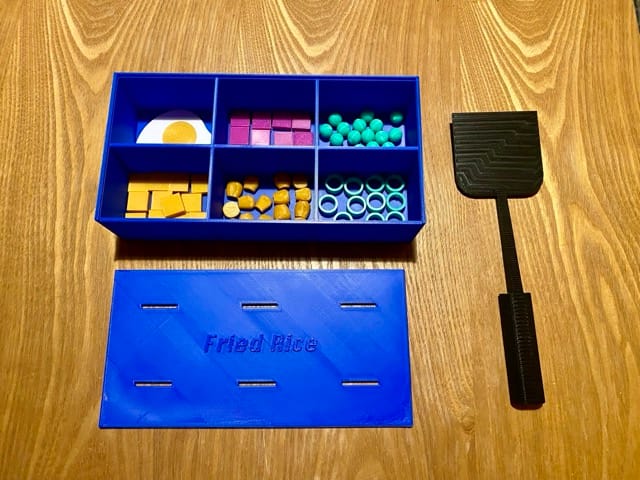
Fried Rice Sandbox Toy
 Nathan Broadbent
See the project blog post for more details
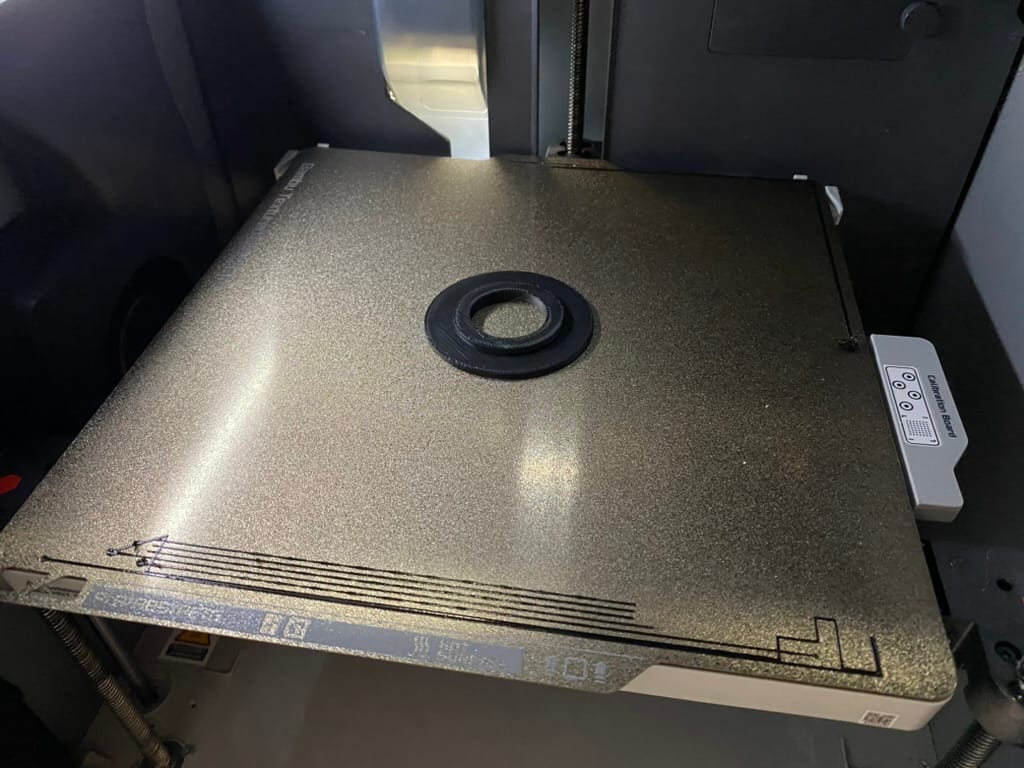
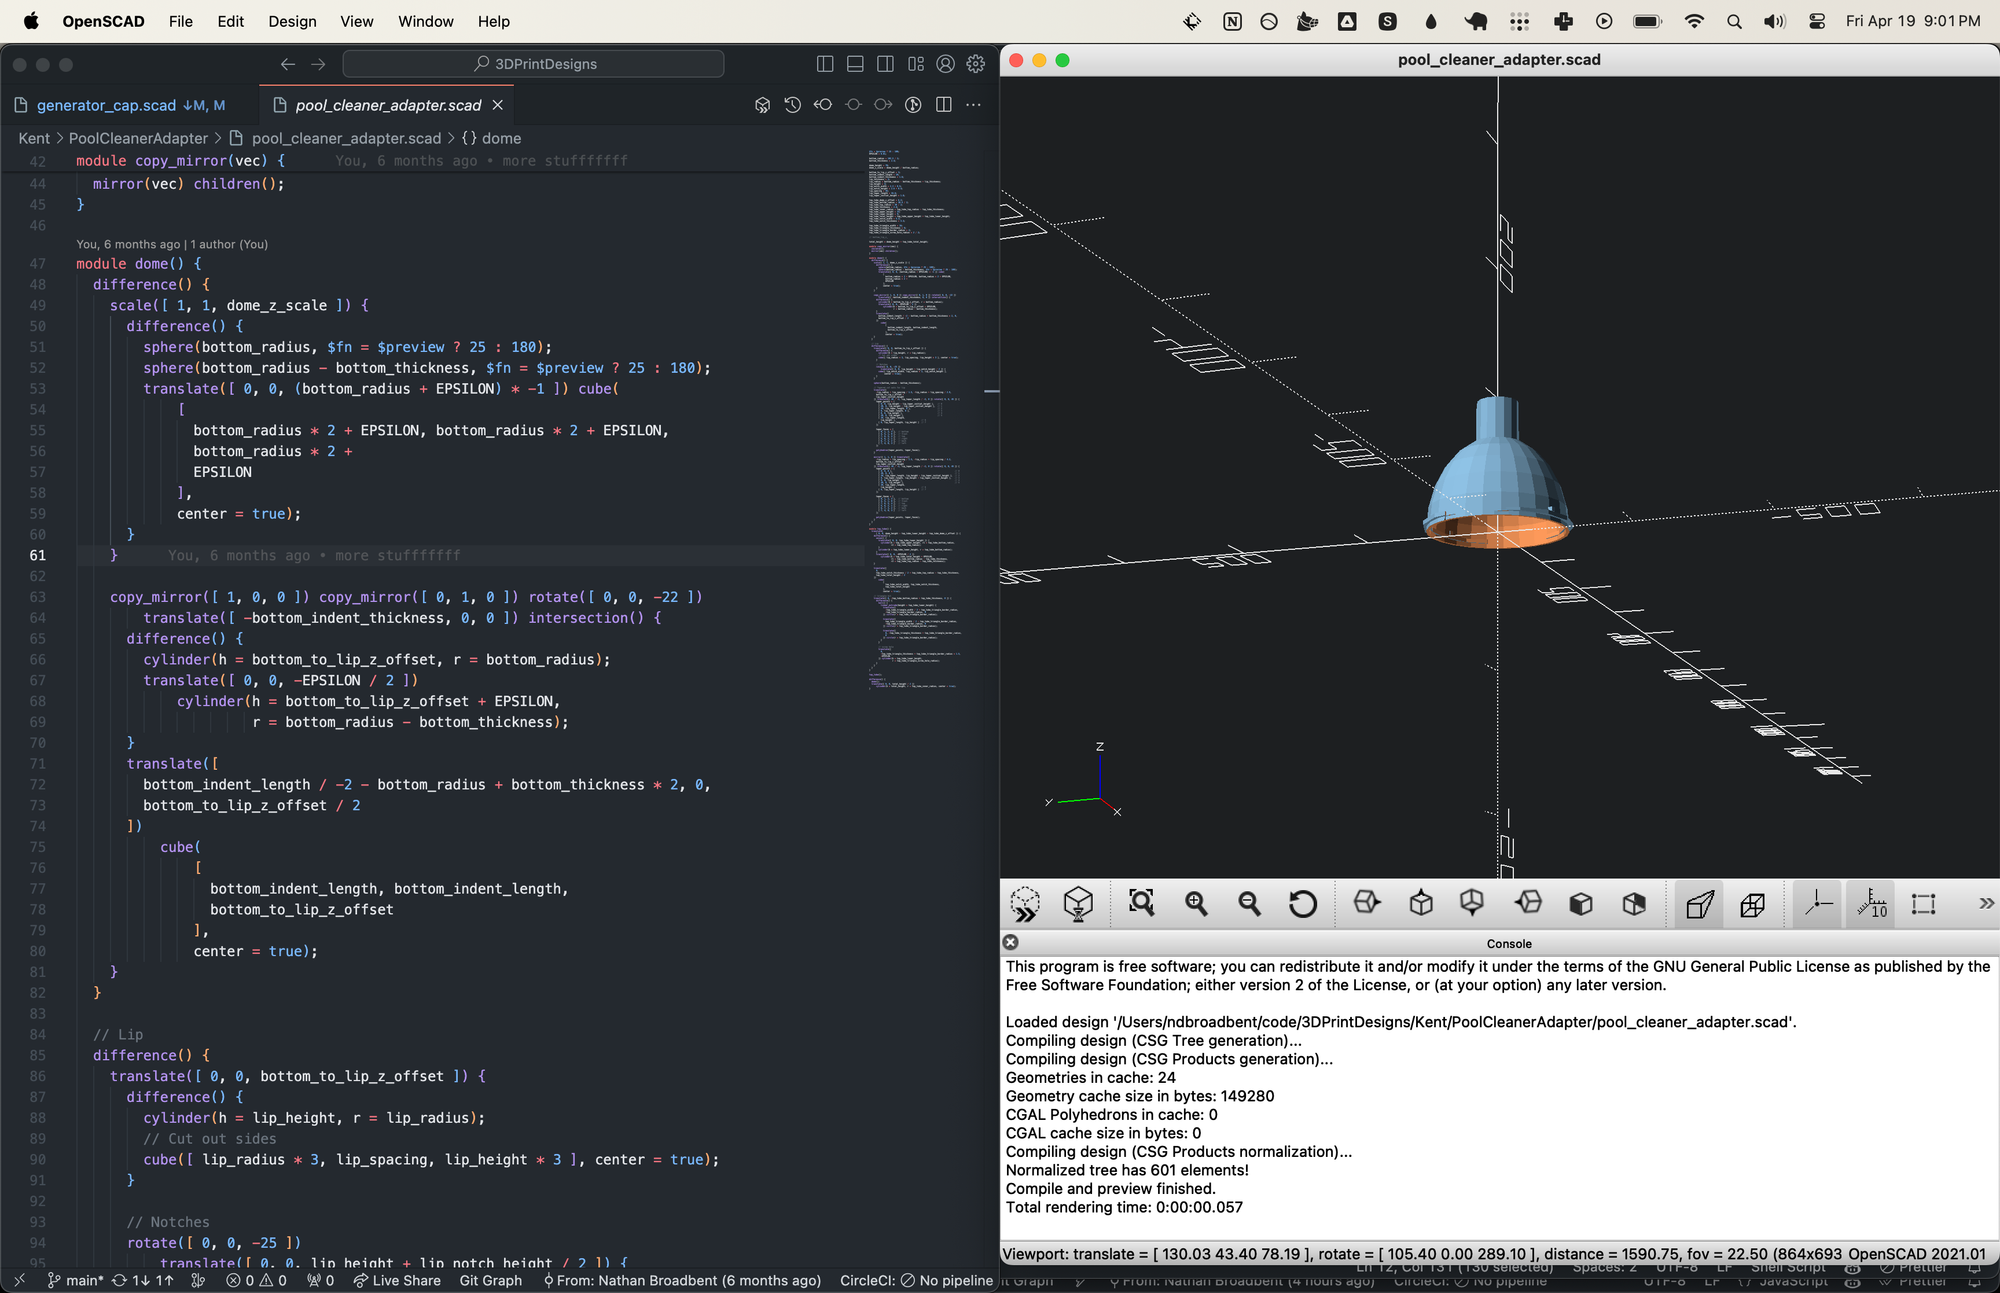
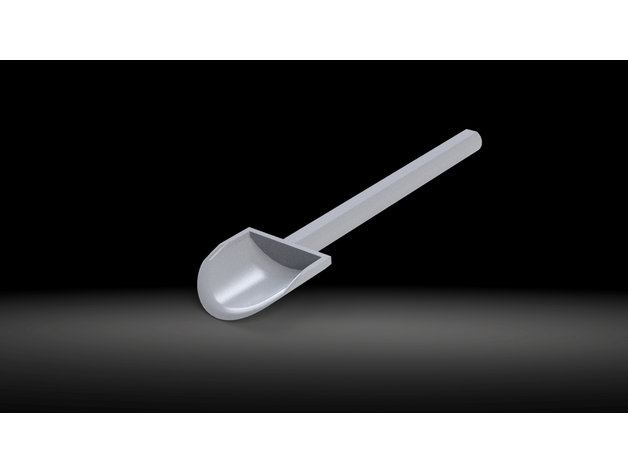
Replacement Generator Cap
My cousin works for a company that supplies generators for events. They lost one of these generator caps and asked me if I could print a new one, since it's quite expensive to buy a replacement. I copied the design in OpenSCAD and printed it using ASA filament for strength and UV resistance.
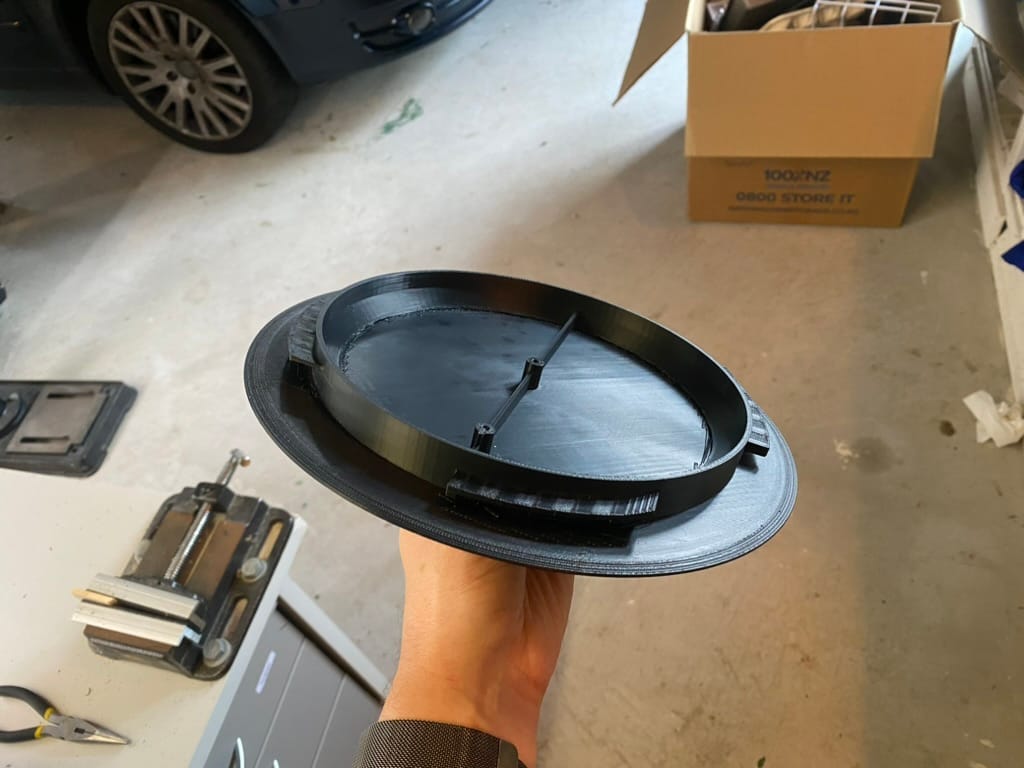
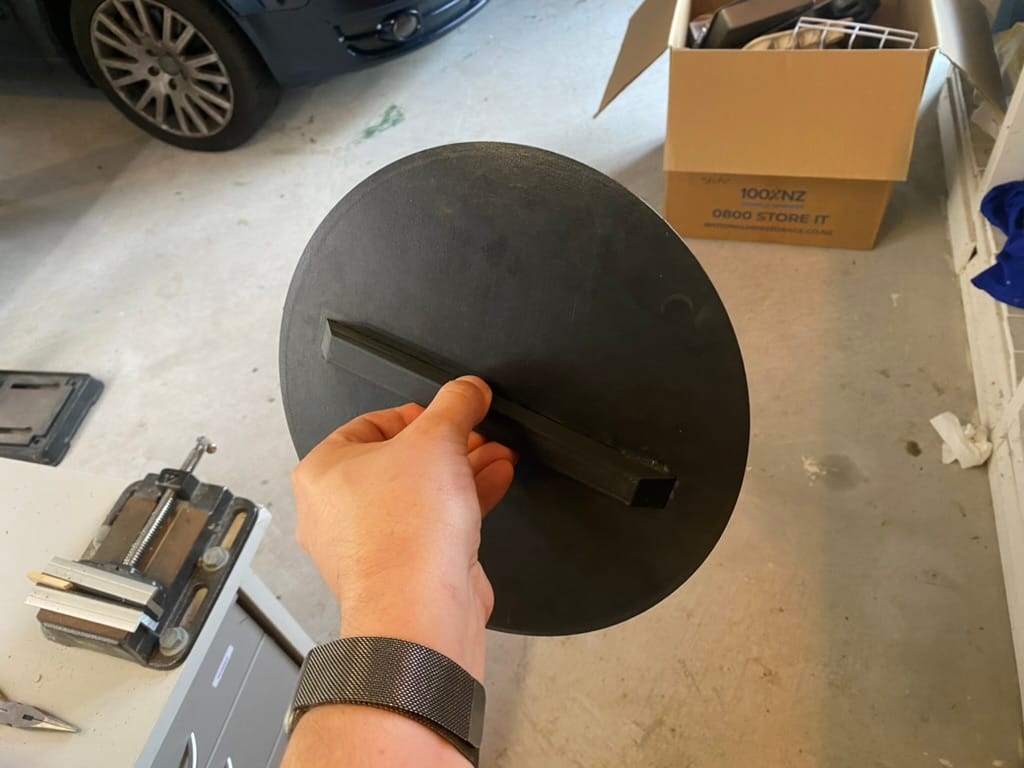
This took a few attempts because there was significant warping with ASA. You can see the build plate jump up a little bit as the plastic cools and shrinks, but it was able to finish printing without any issues.
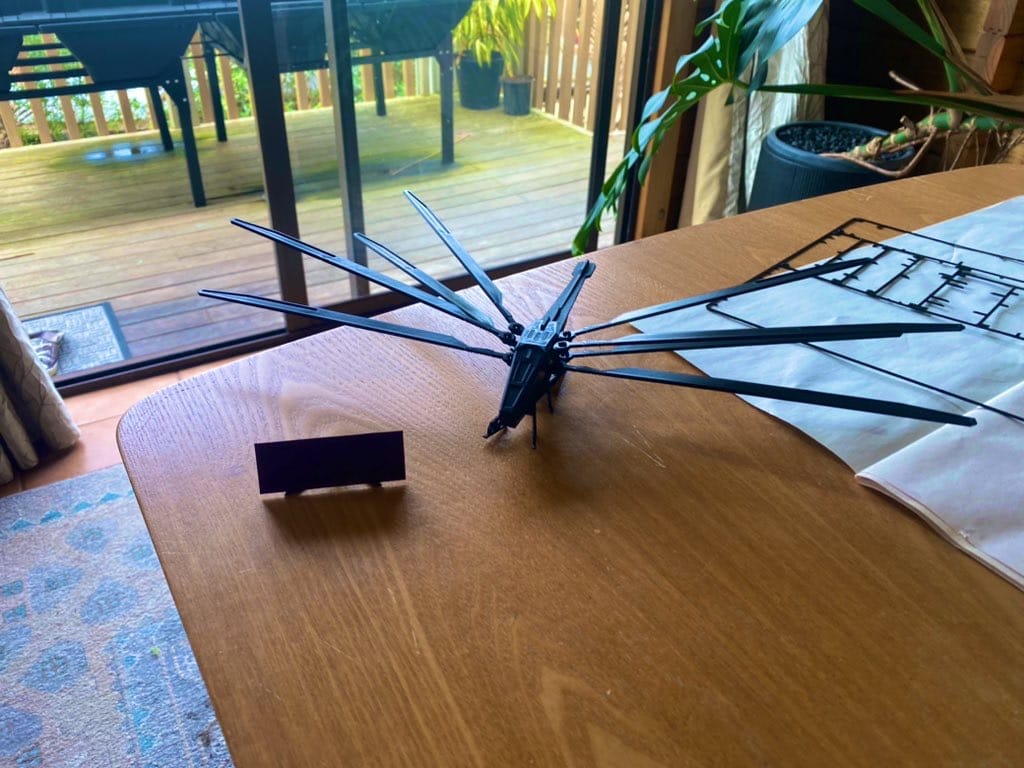
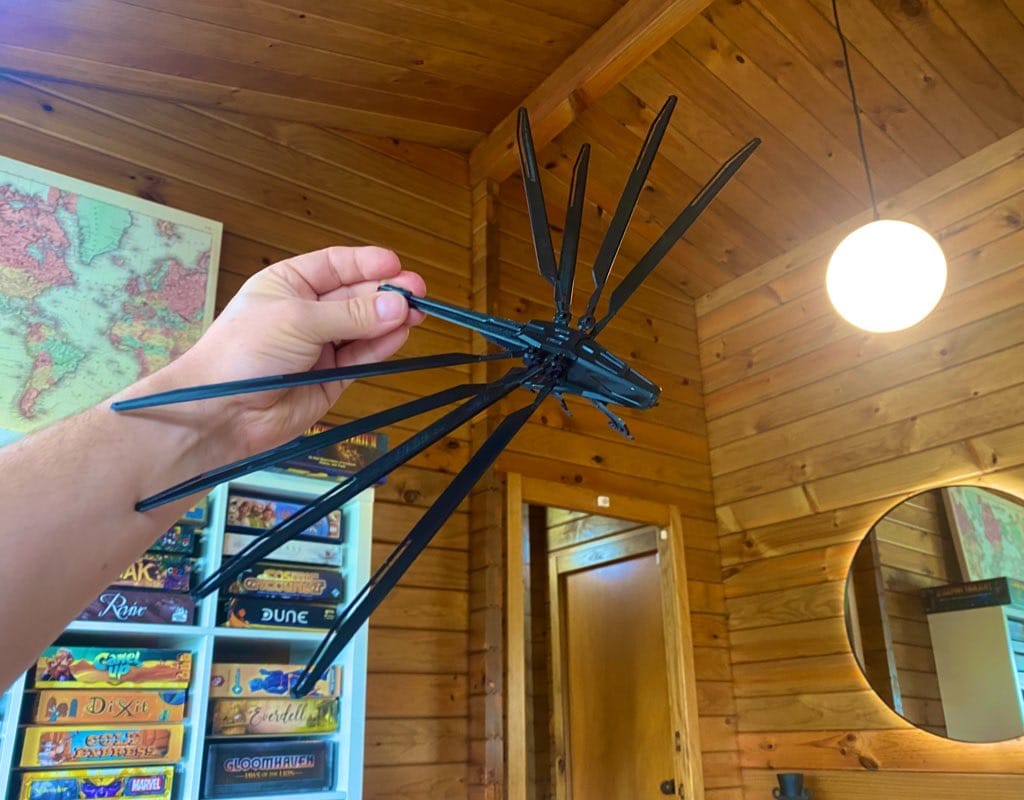
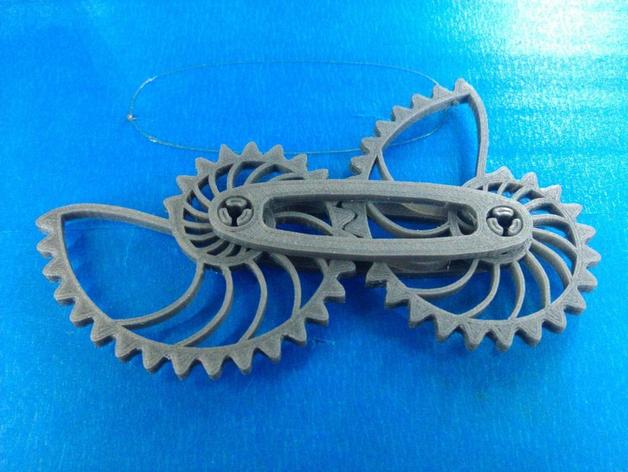
Dune Ornithopter Model
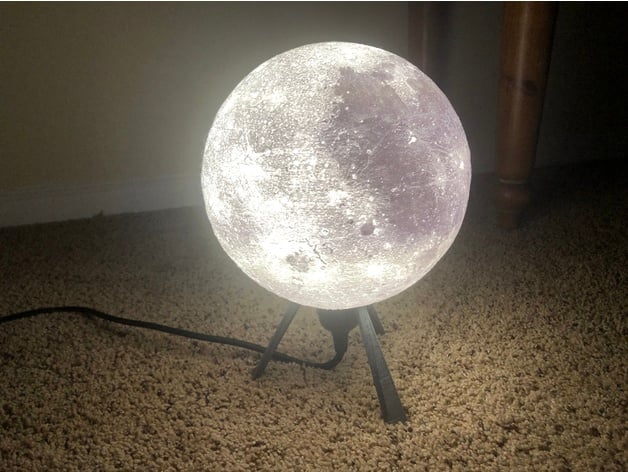
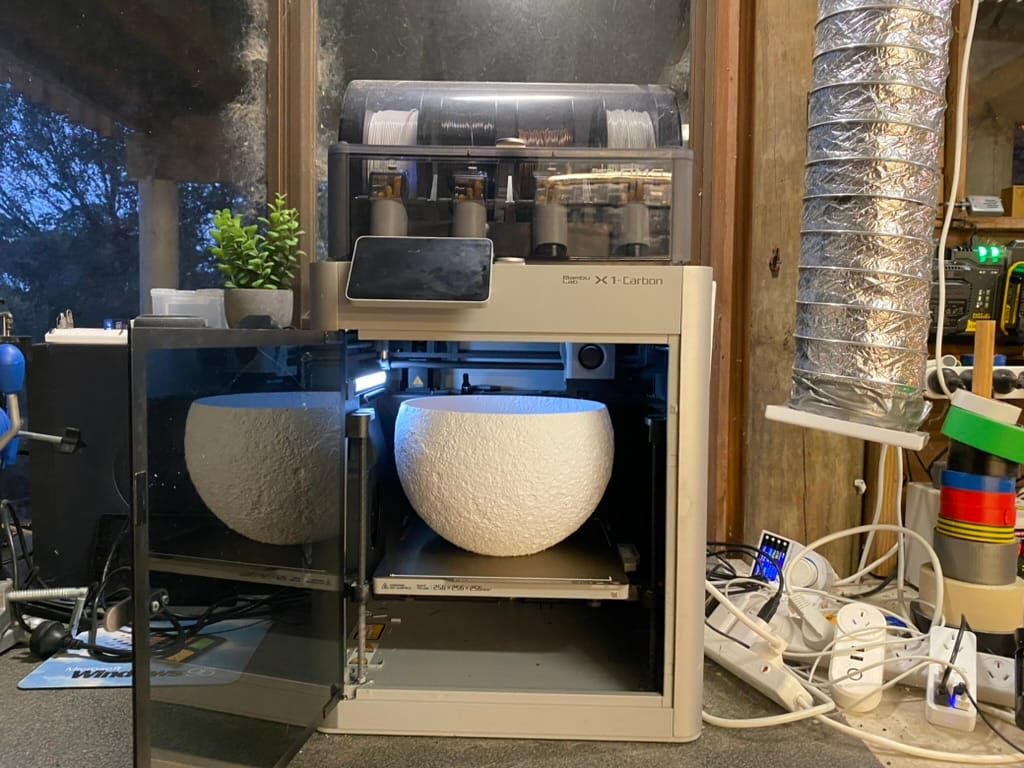
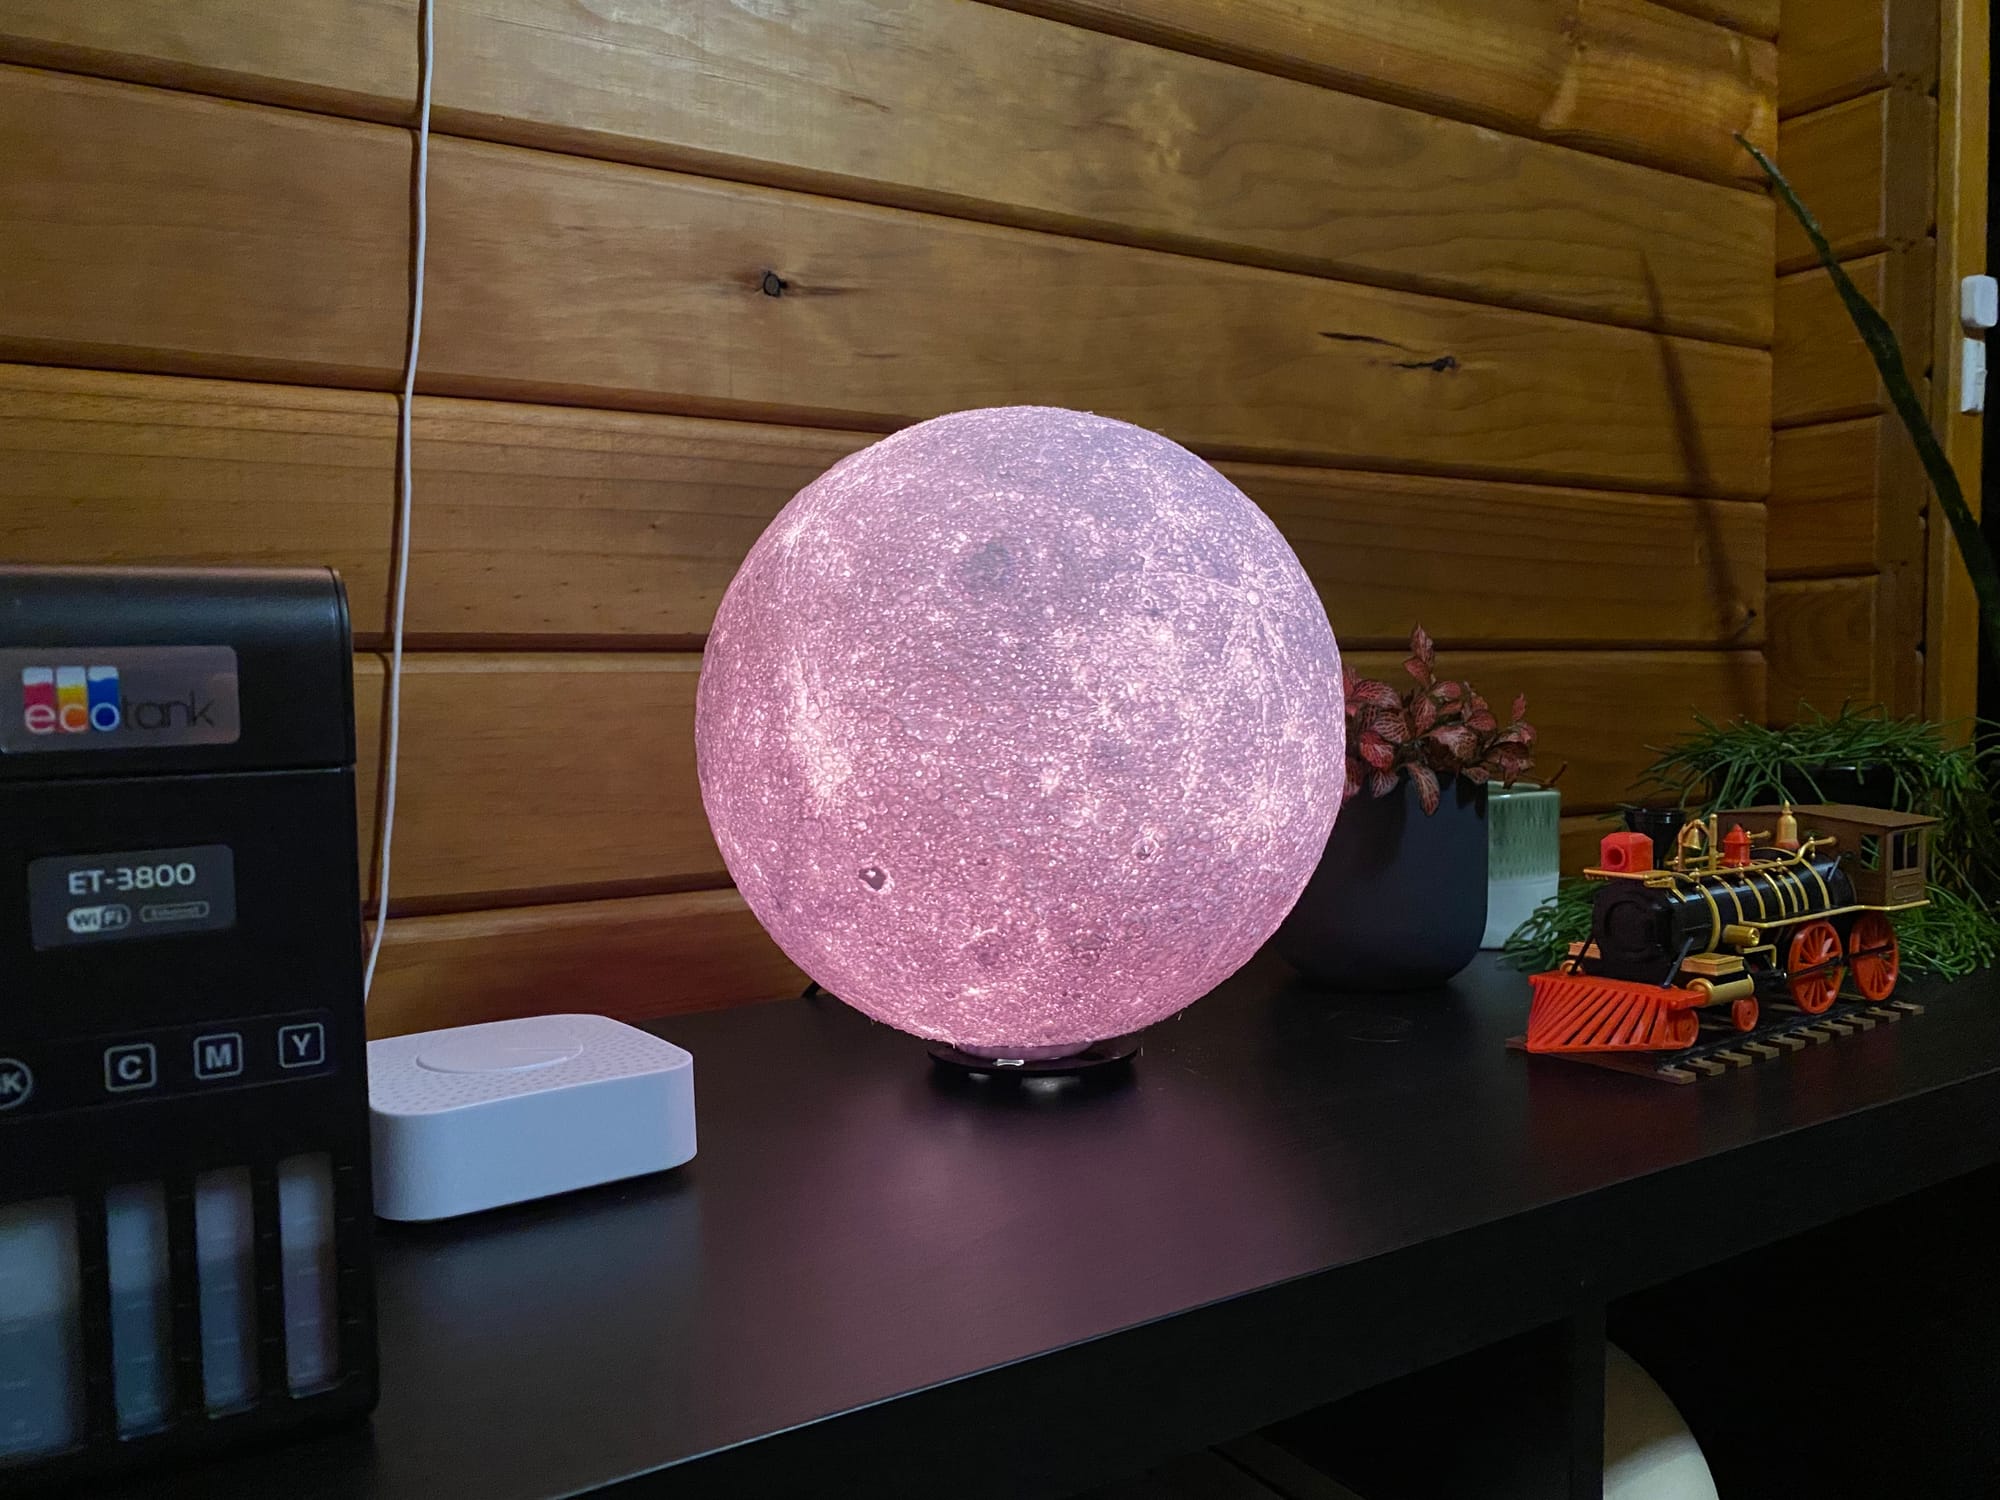
The Moon
This print took 33 hours.
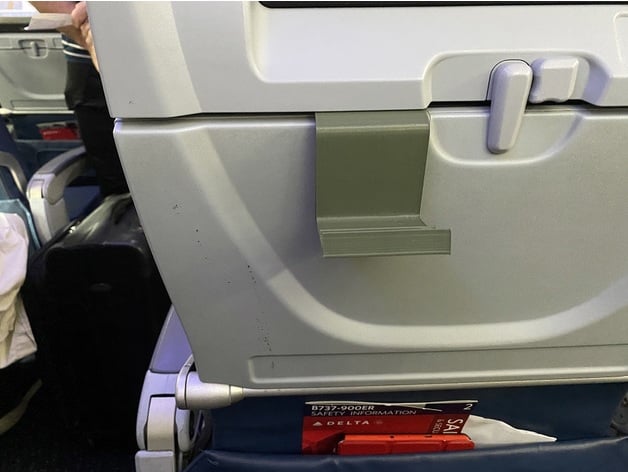
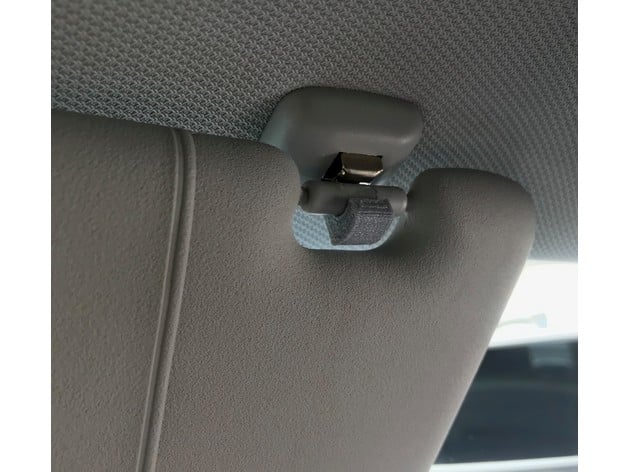
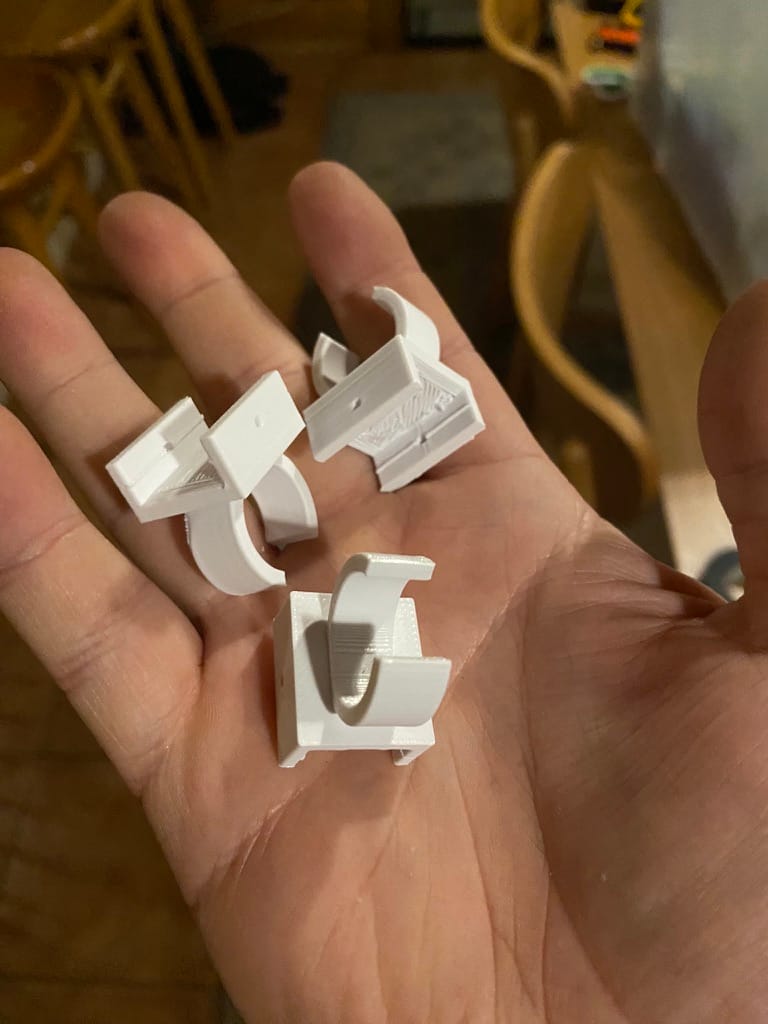
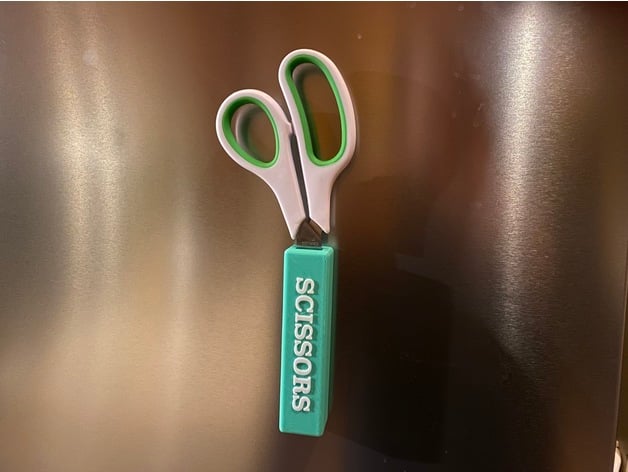
Replacement Sunvisor Clip for Audi
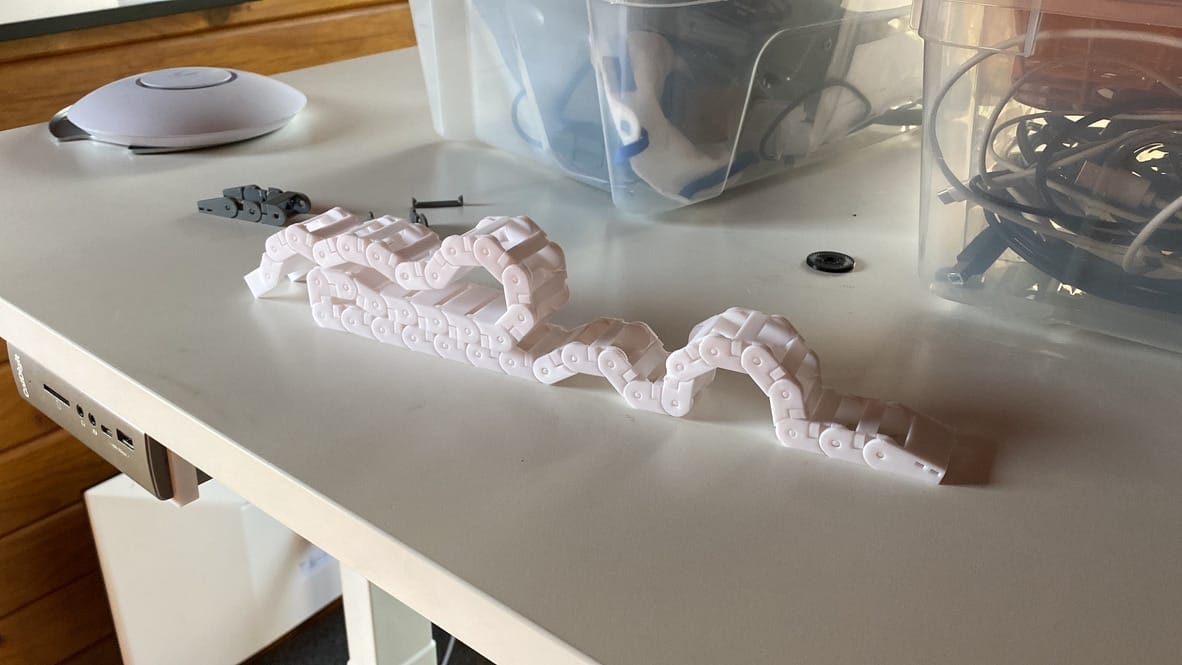
Lighter Fluid Tracks
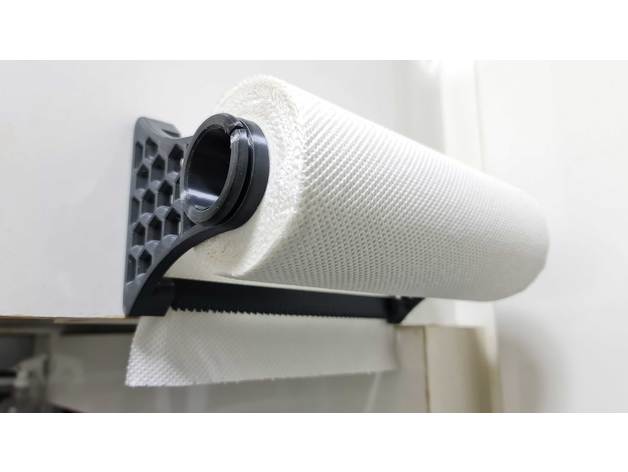
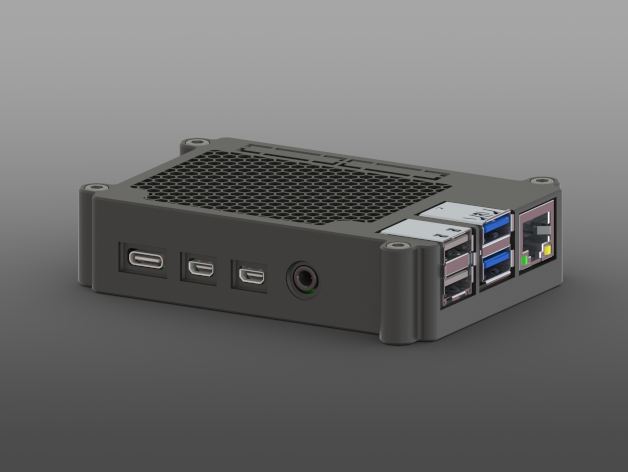
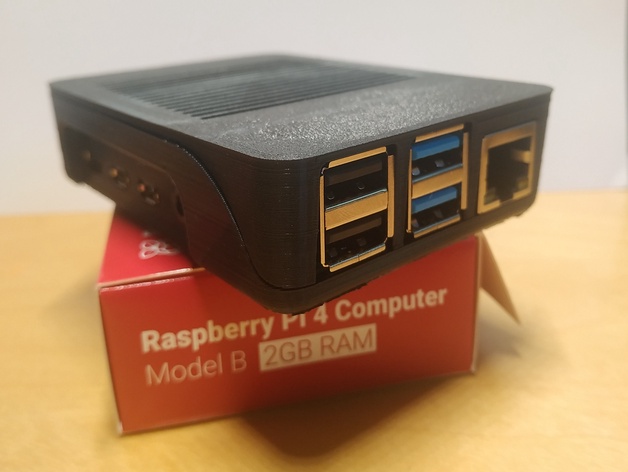
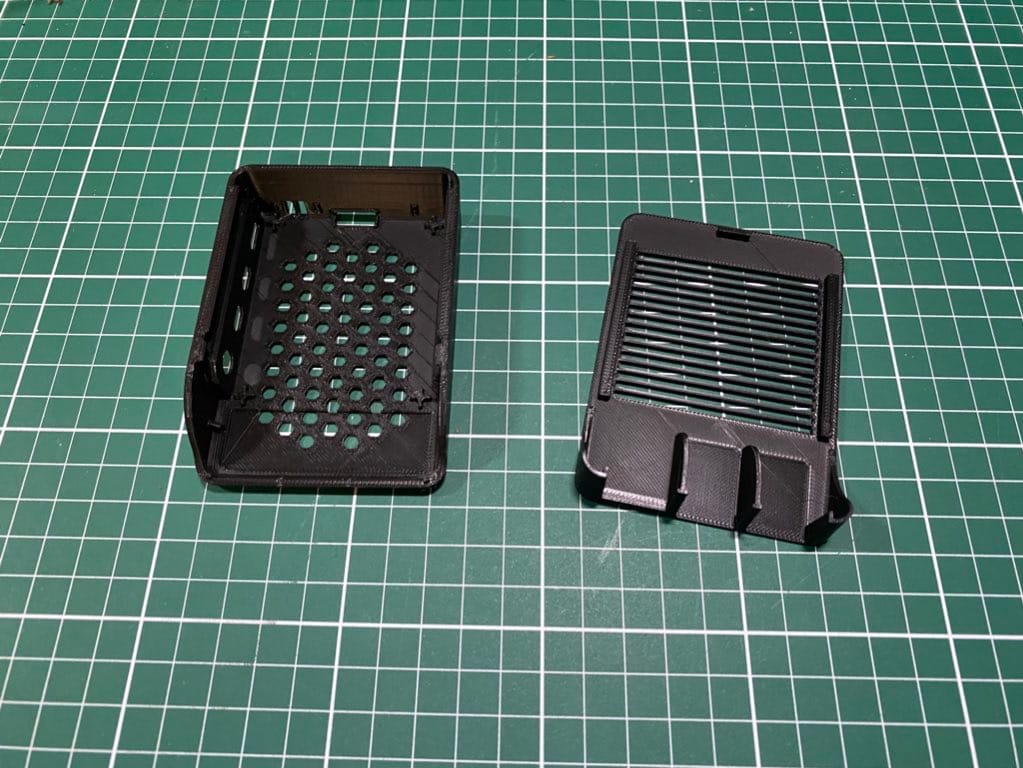
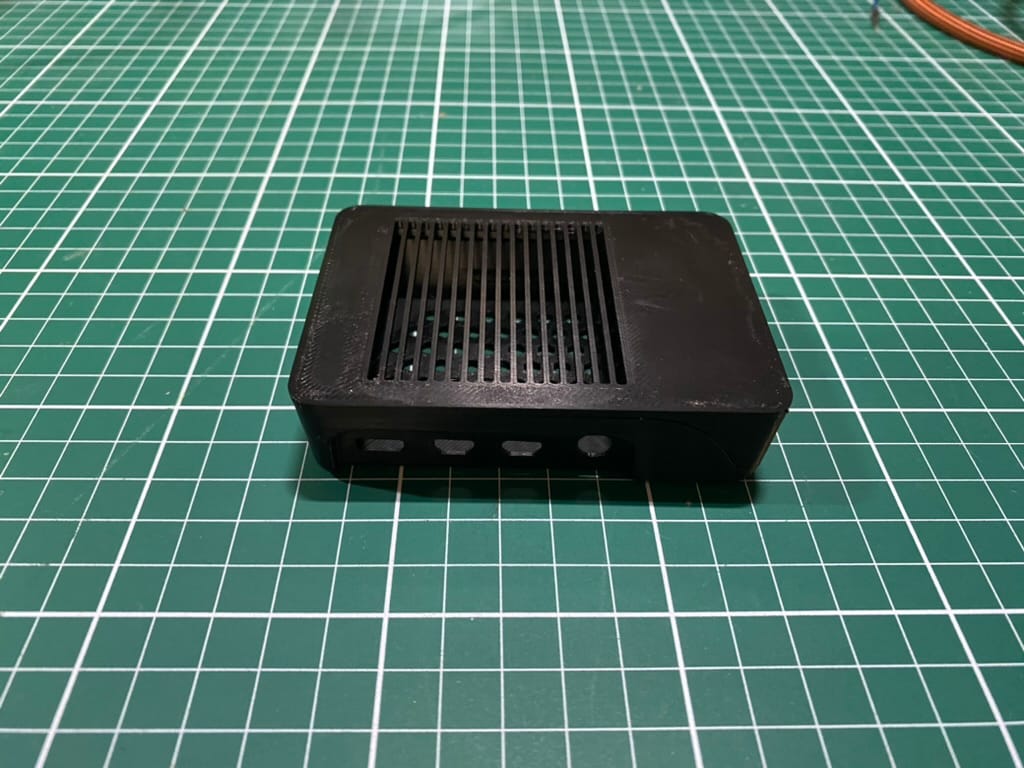
Raspberry Pi 4B Cases
This my new favorite case design. It looks really cool and snaps together nicely.
Other Stuff
 josteb
2023
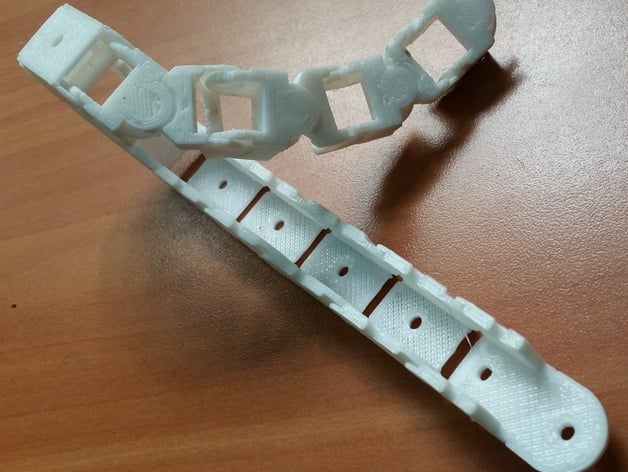
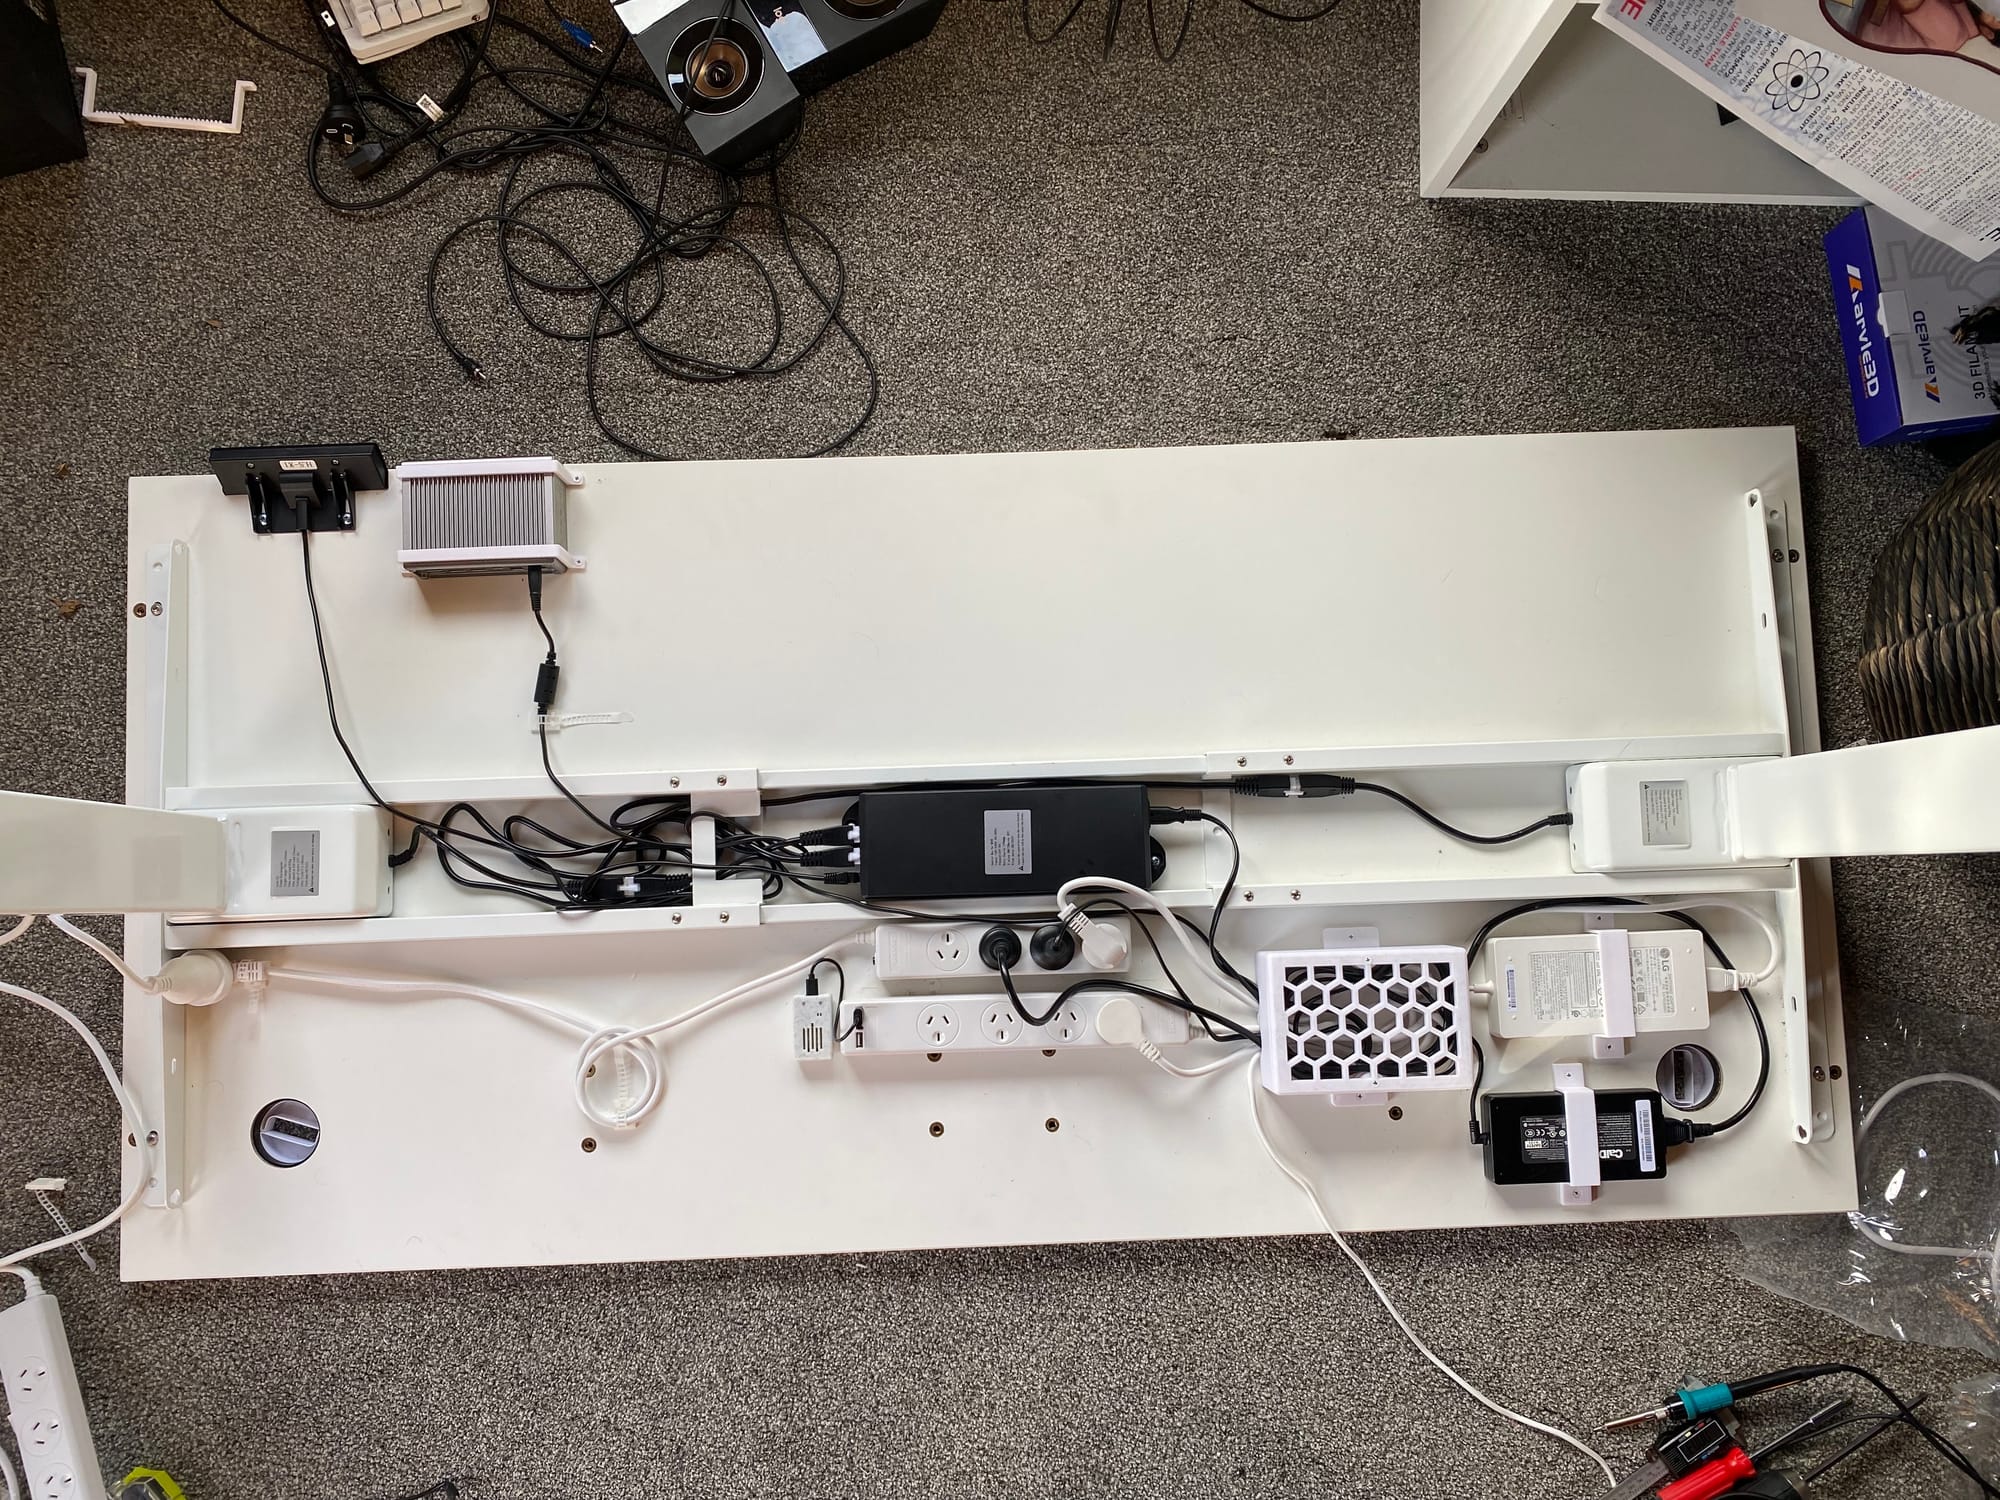
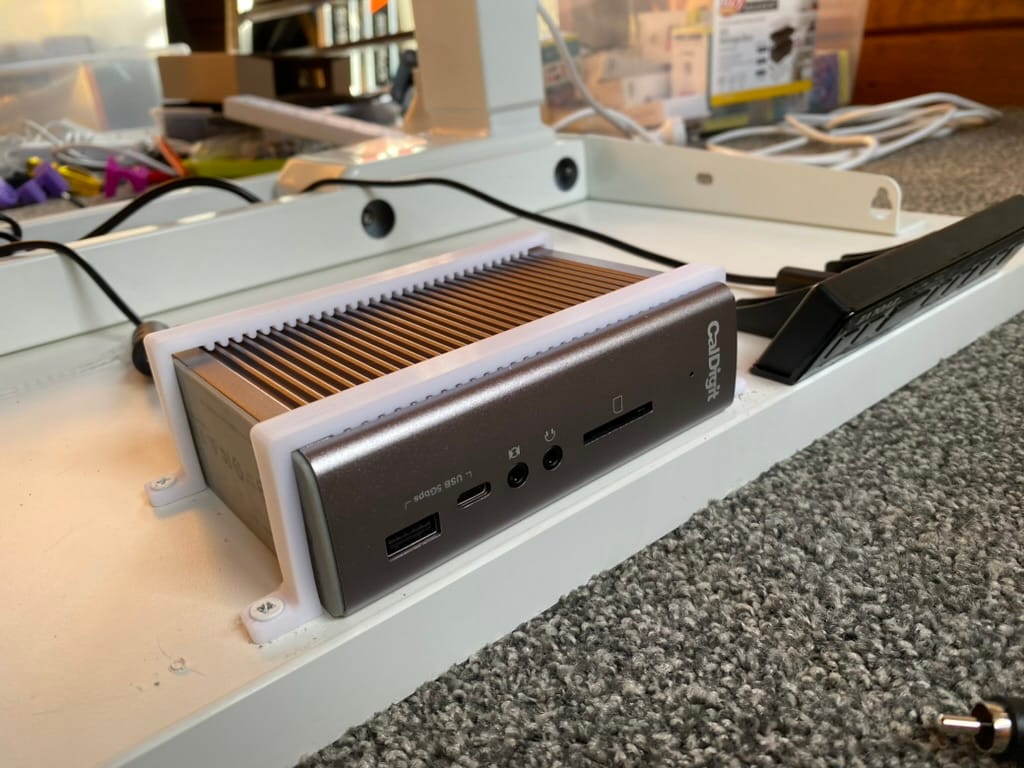
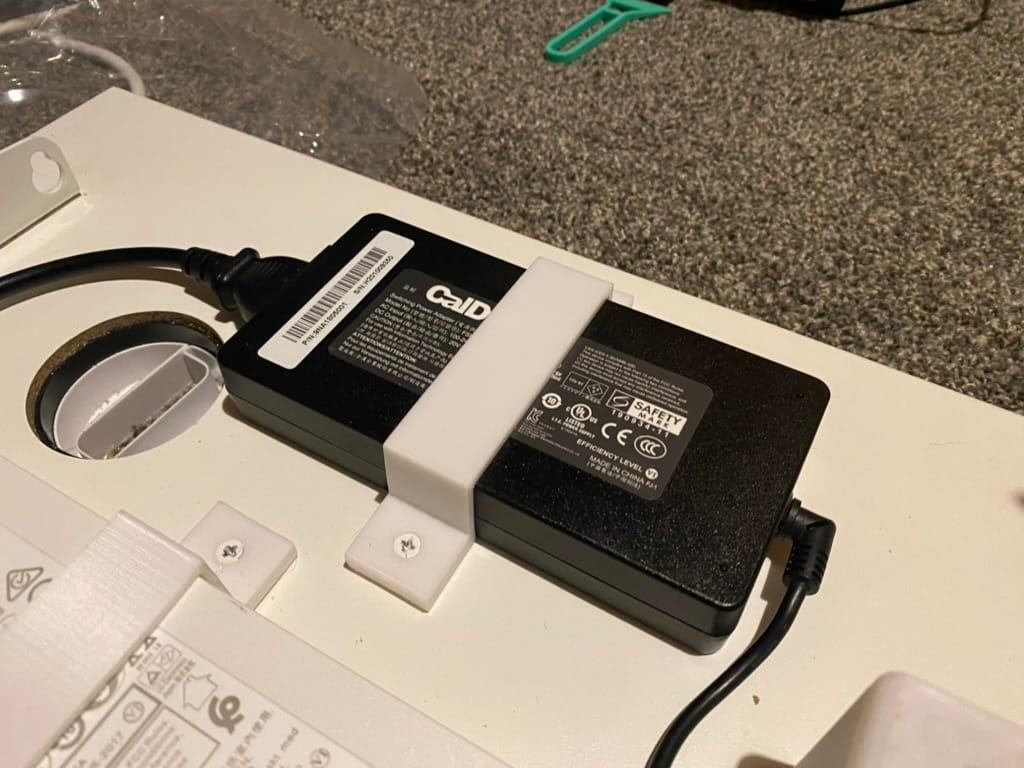
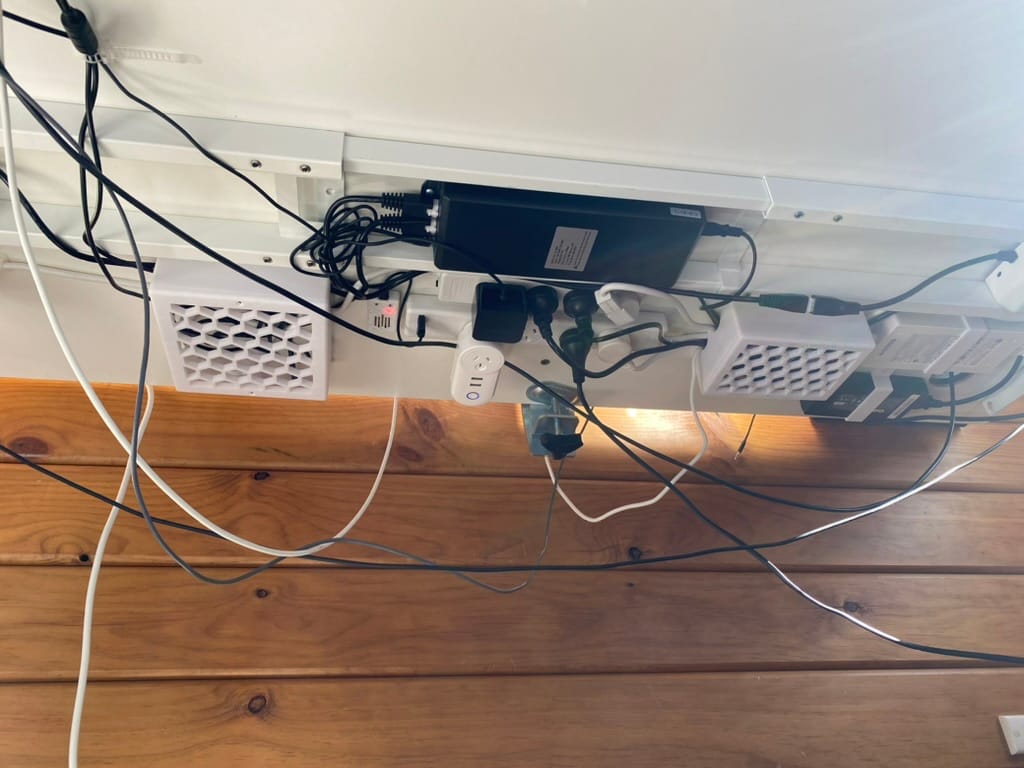
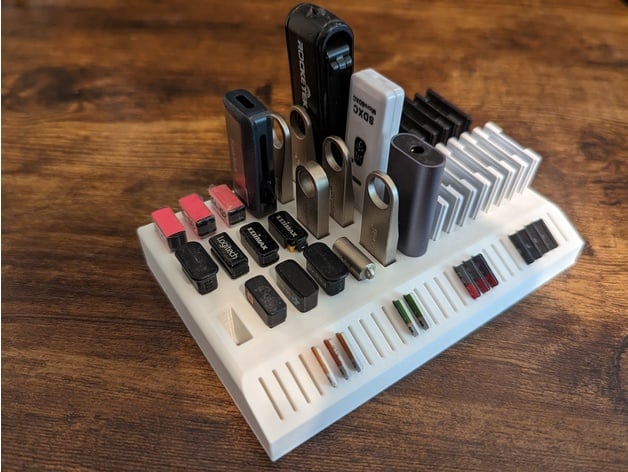
Desk Cable Organization
My first big 3D printing project was to organize all the cables under my desk. I found some of these models on Thingiverse, and I also designed a few of my own things in OpenSCAD.

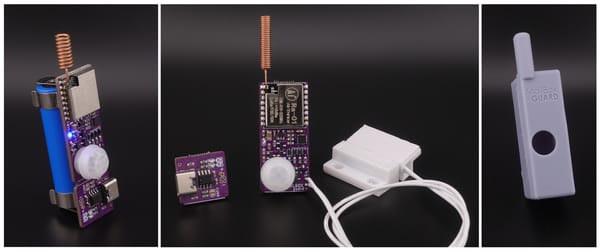
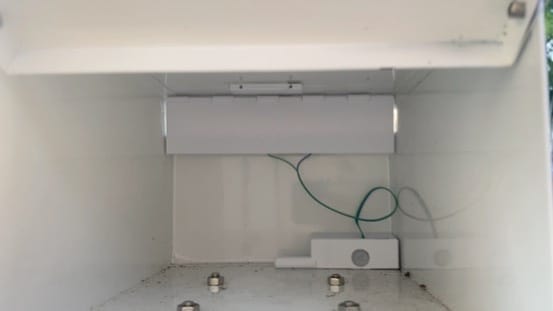
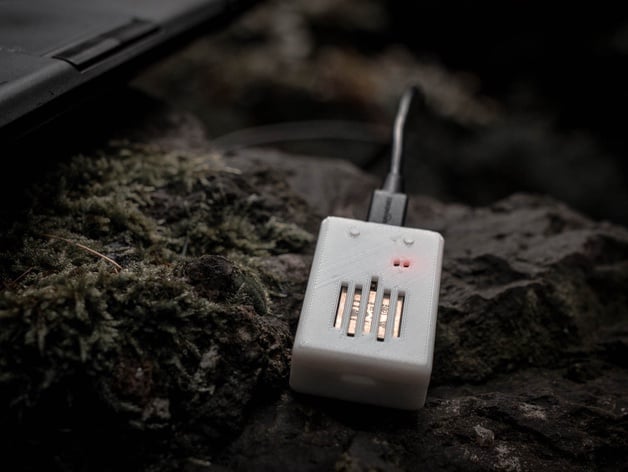
Mailbox Guard and Lora Receiver Case
Nathan Broadbent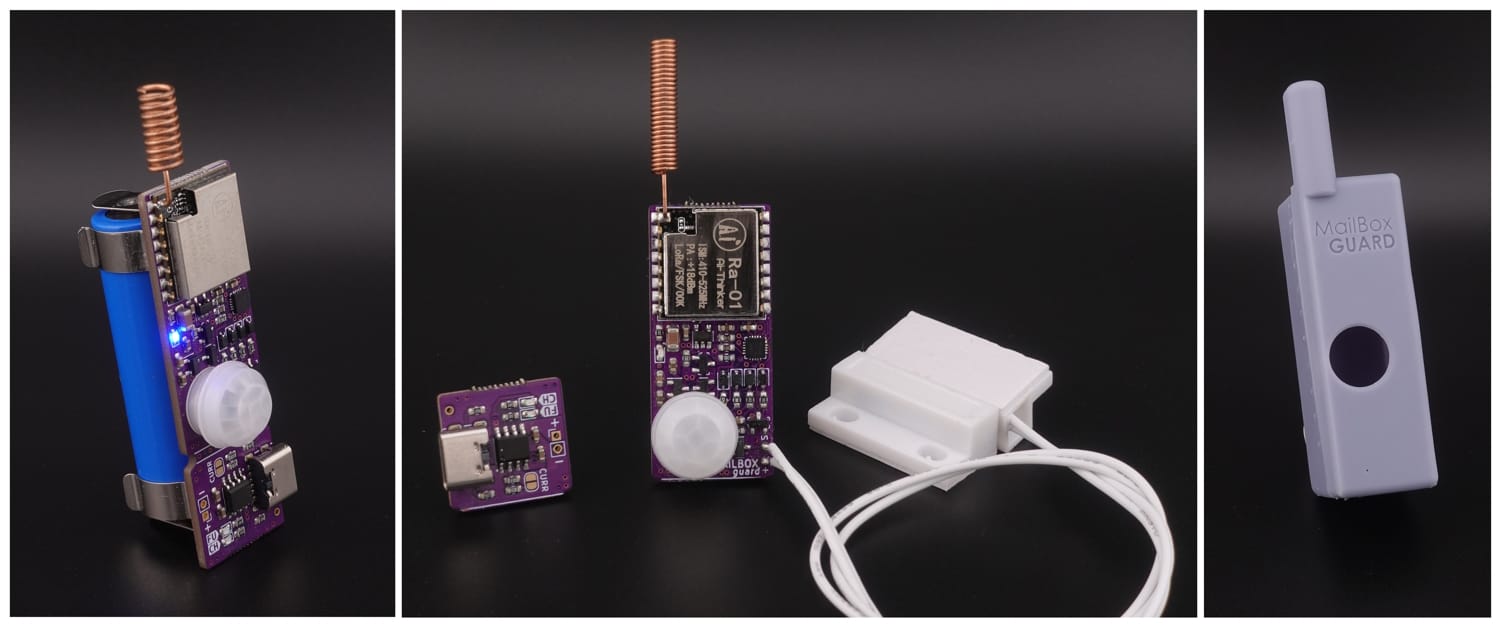
See the blog post for more details
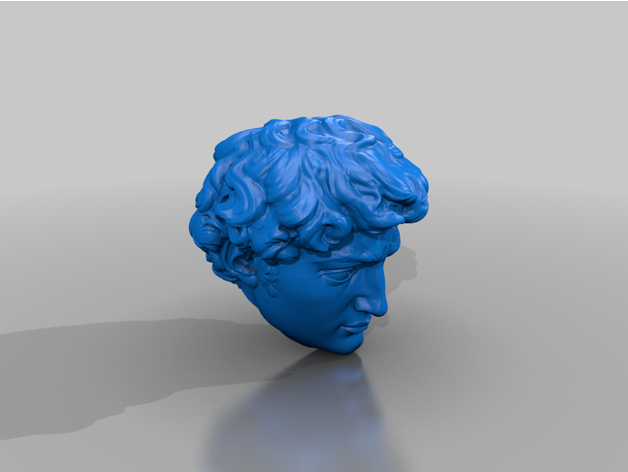
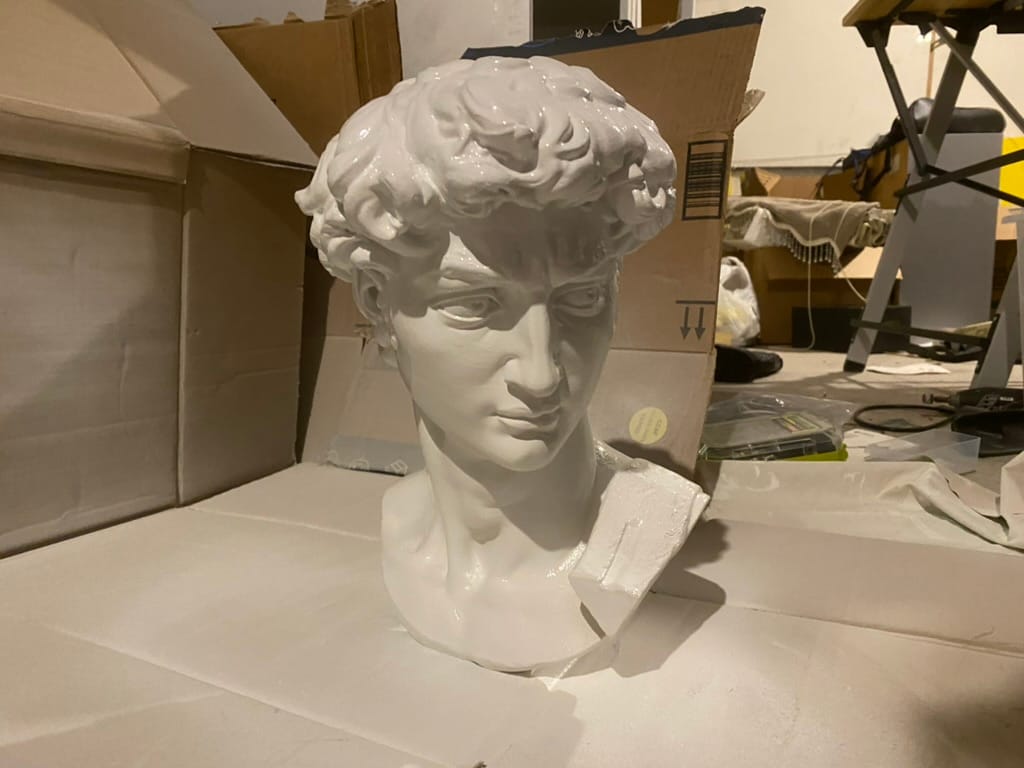
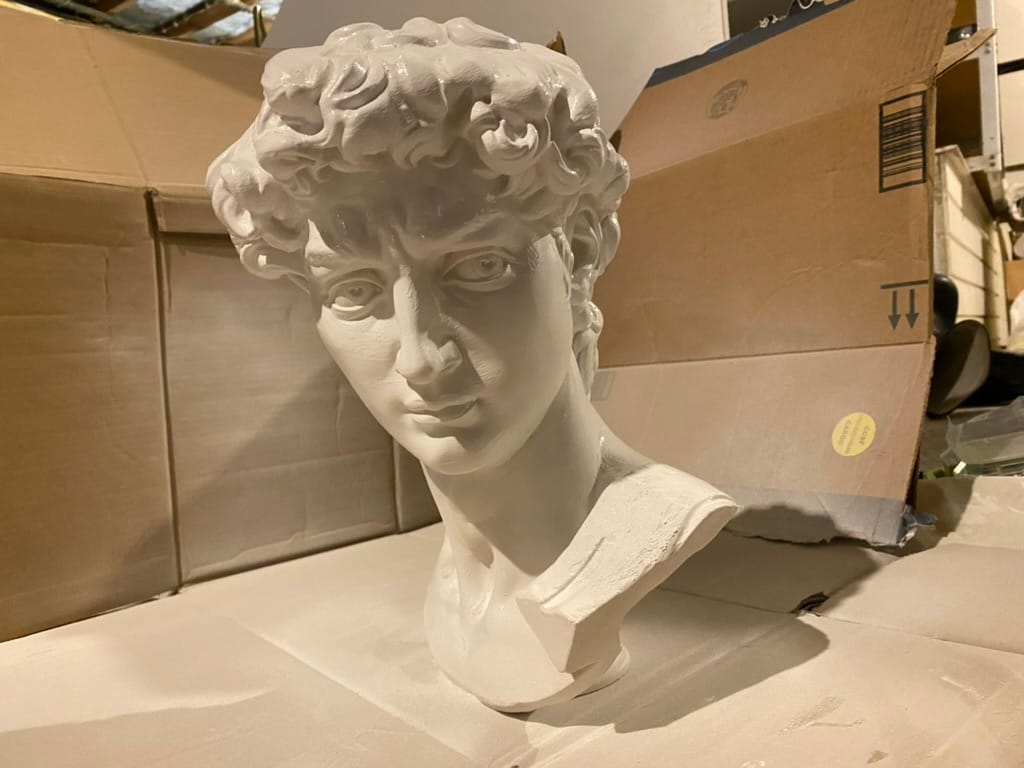
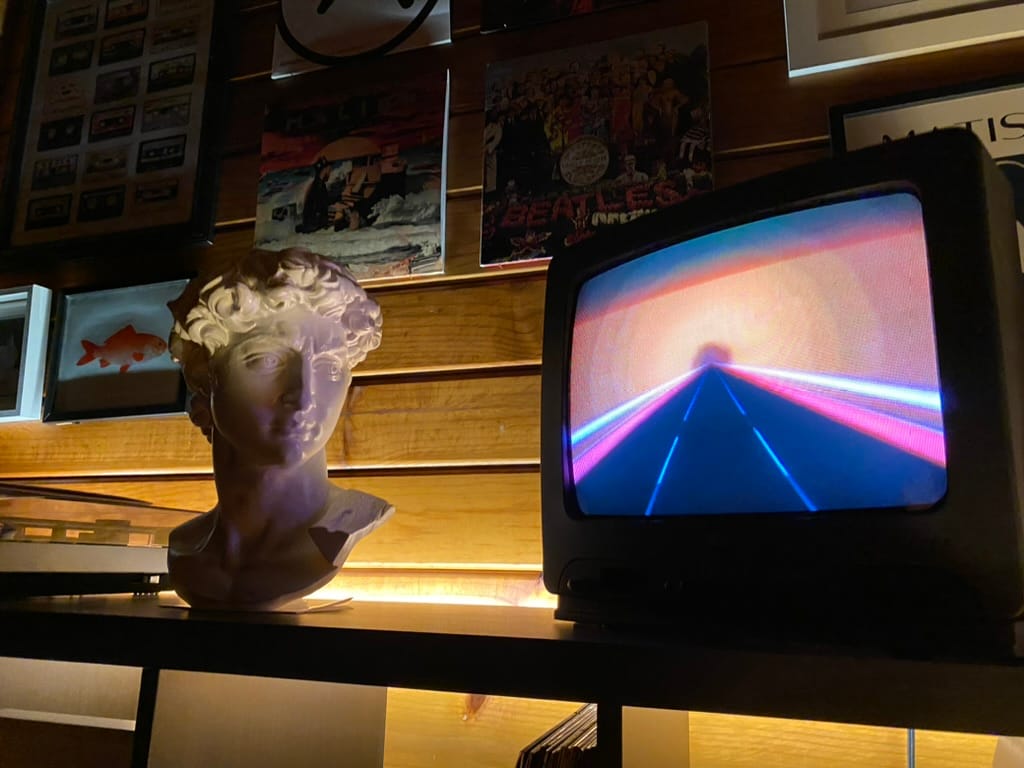
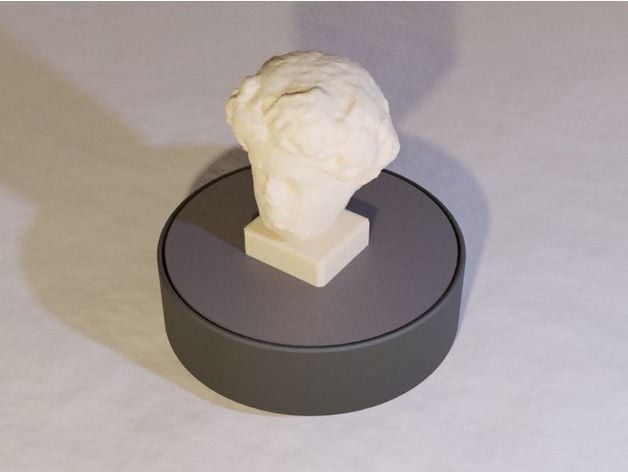
Michaelangelo's David Bust
I printed and spray-painted this David bust to display on a shelf. I paused the print half way and filled it with pebbles to give it some weight.
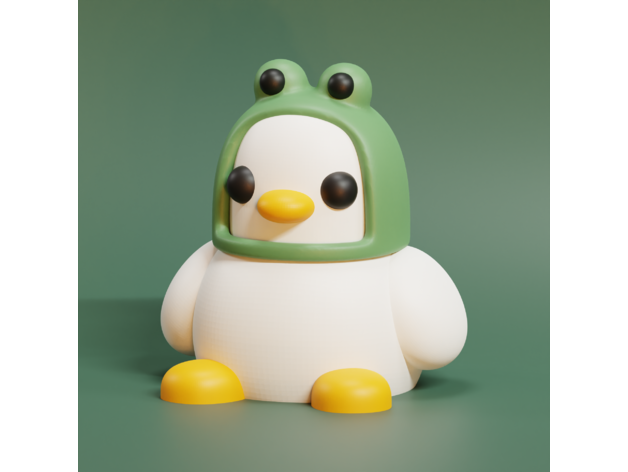
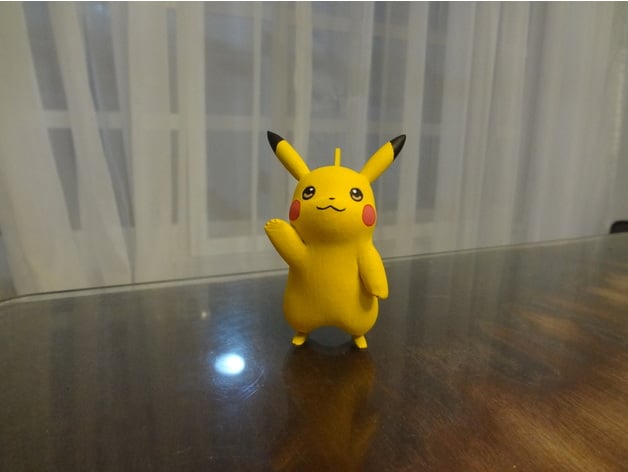
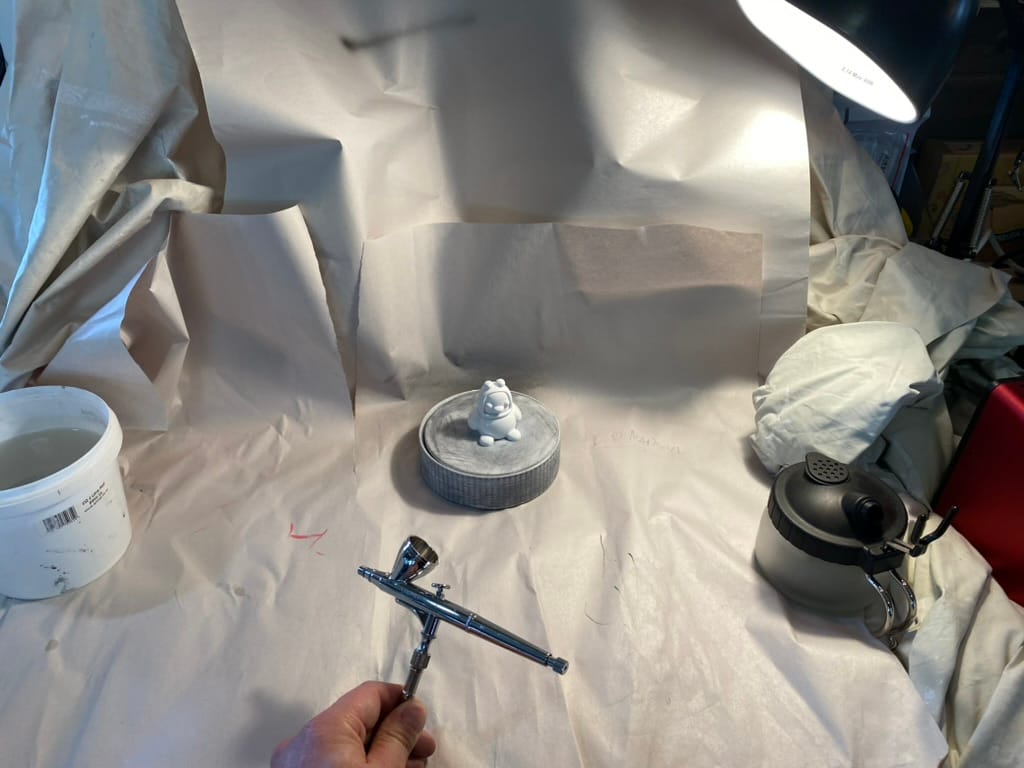
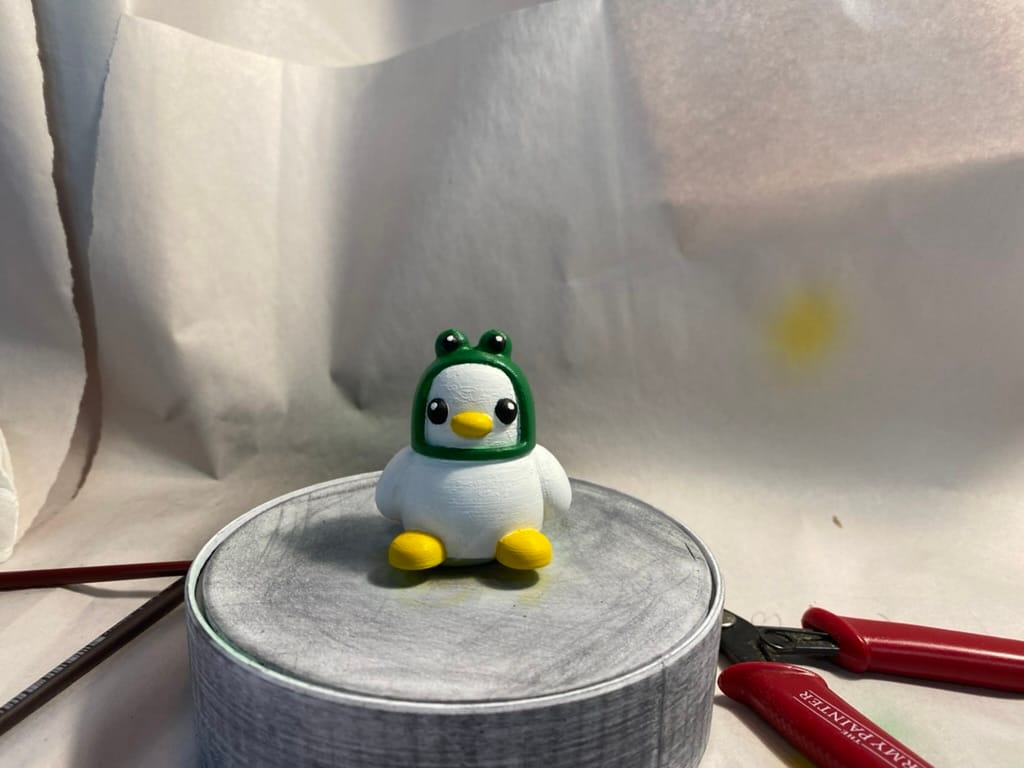
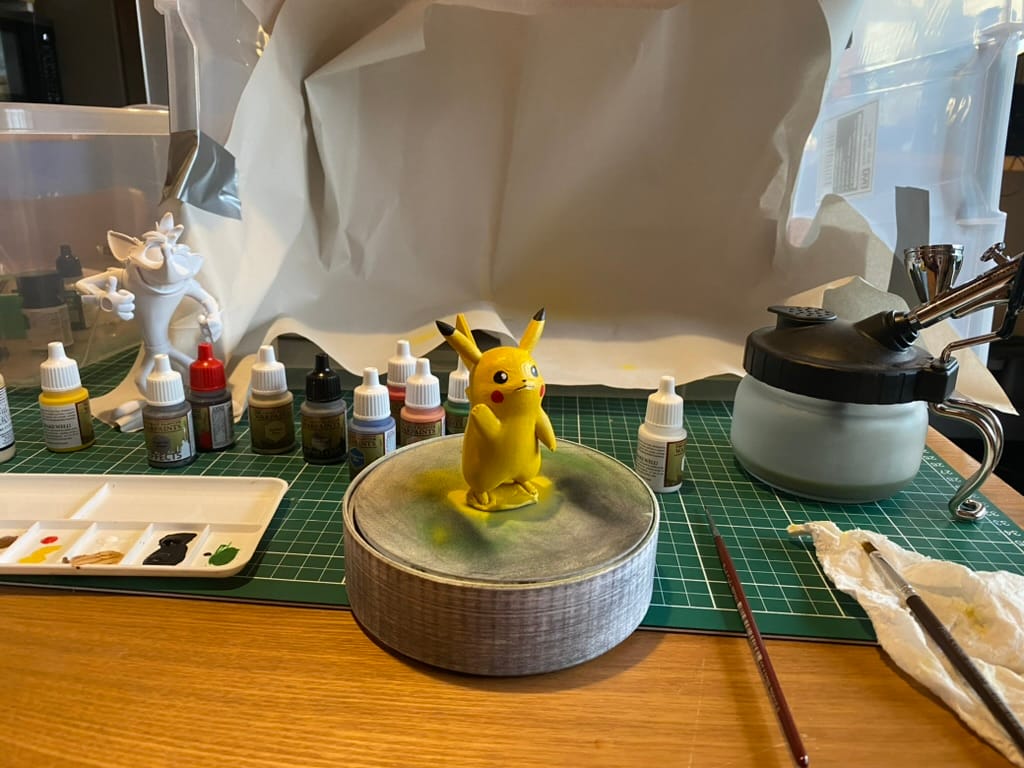
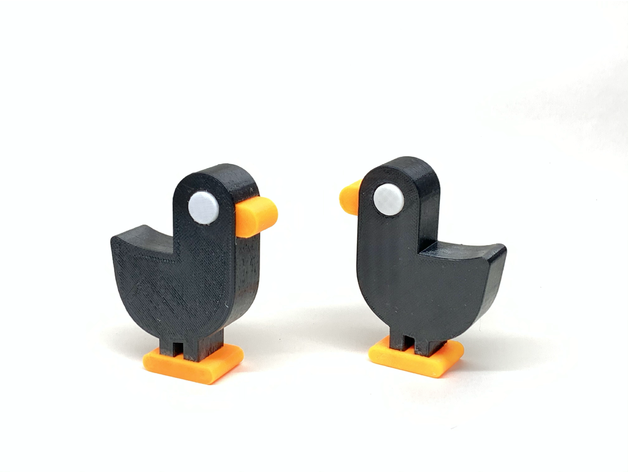
Figurines for Airbrushing and Painting Practice
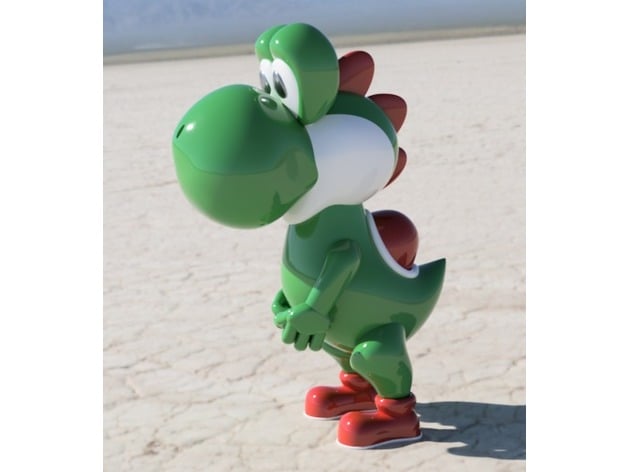
I printed this duck, Crash Bandicoot, and Pikachu to get some practice with my airbrush. My printer can do multi-color prints using the AMS, but it takes a long time, wastes a lot of plastic, and doesn't always look very good. Another good option is to print all the parts separately and glue them together.
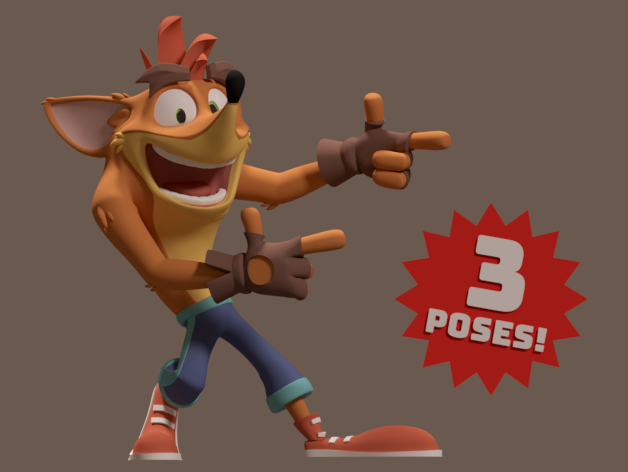

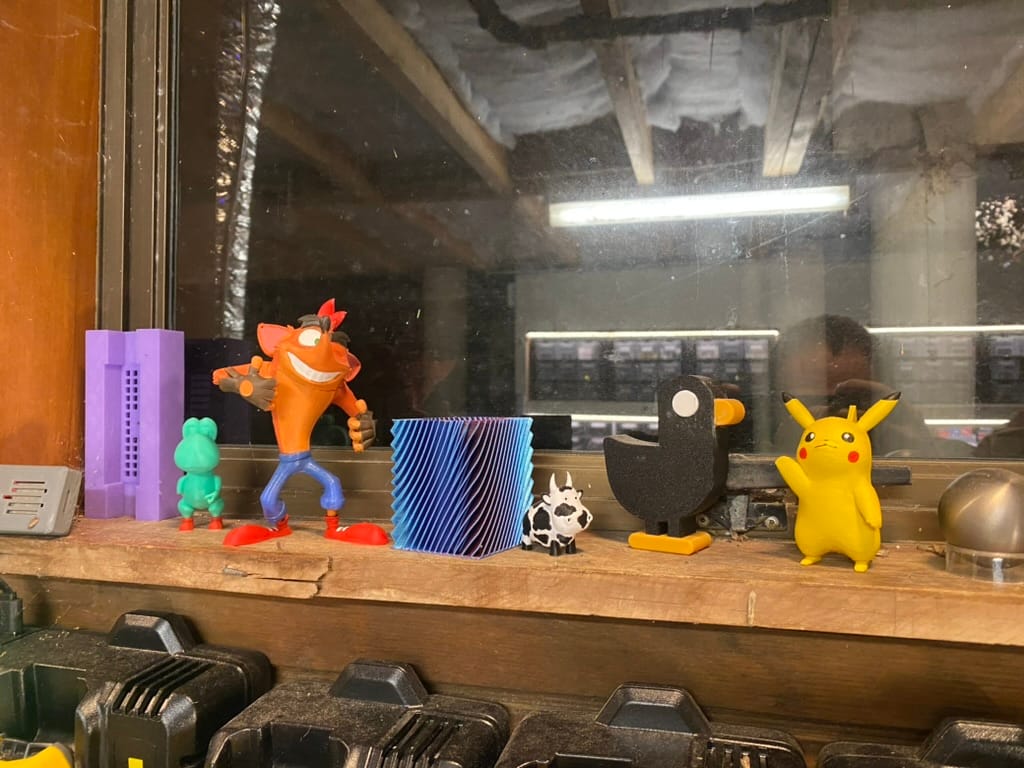
Crash Bandicoot
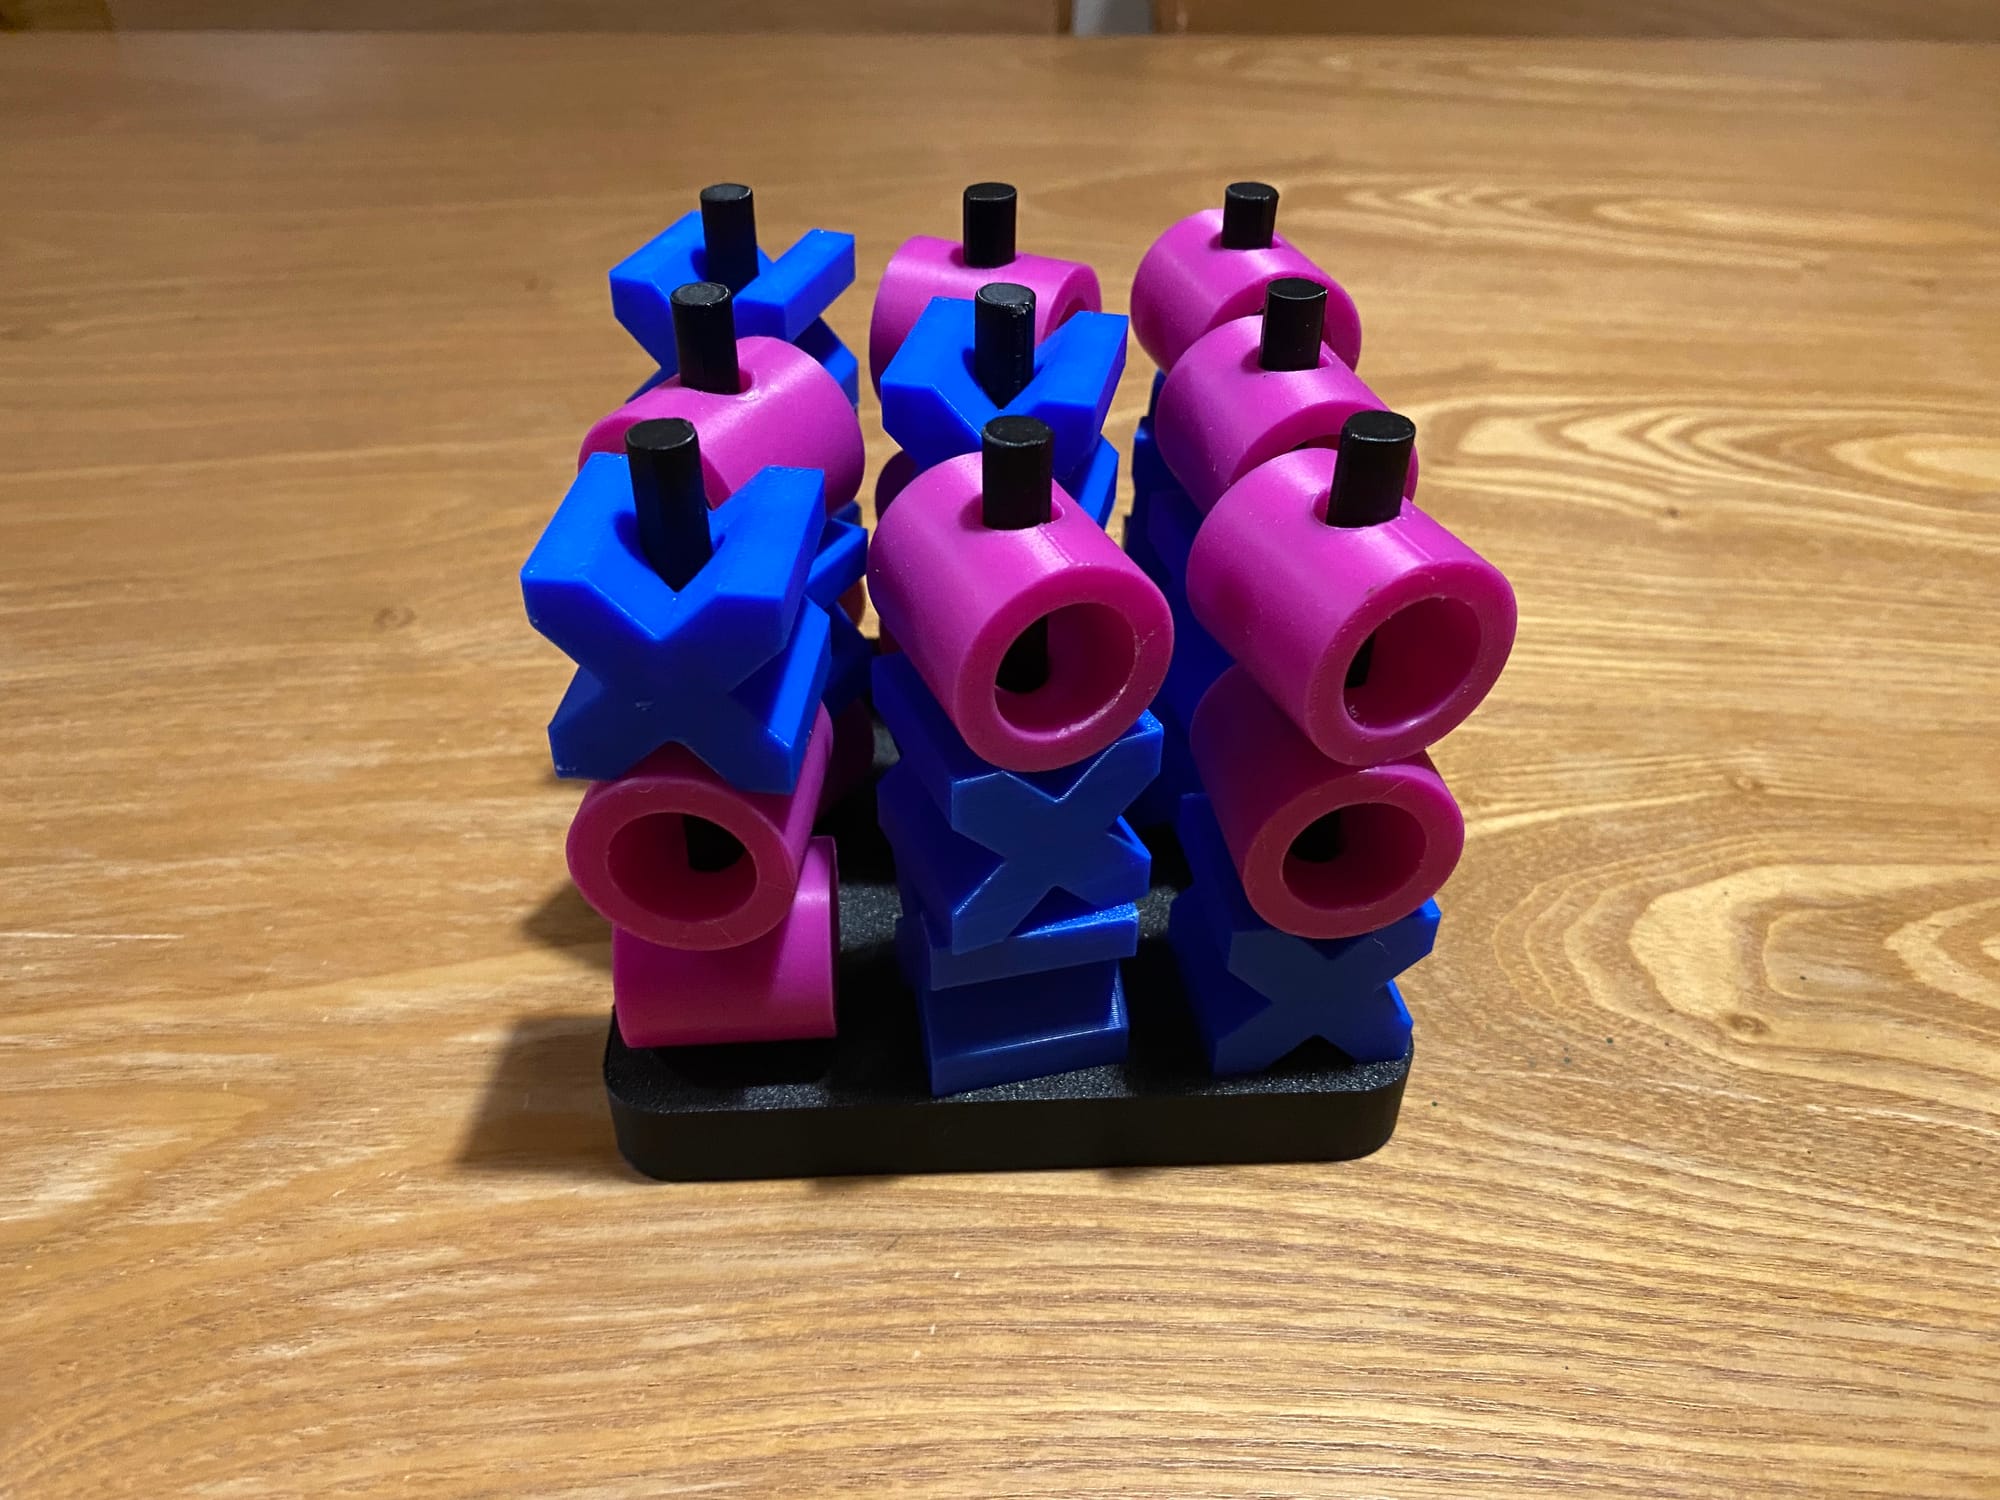
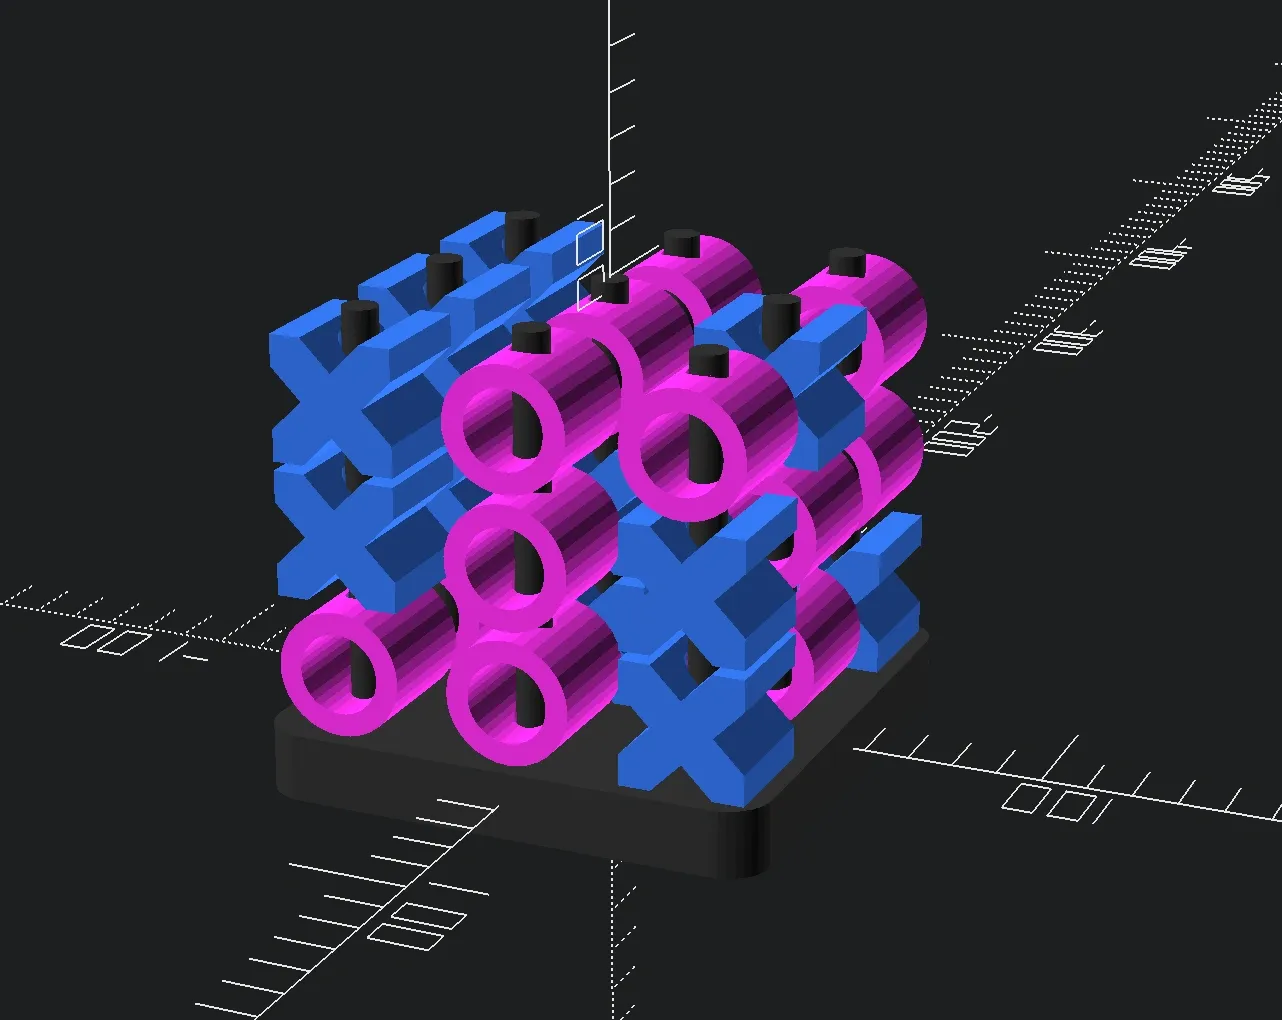
3D Tic-Tac-Toe
JetSpool
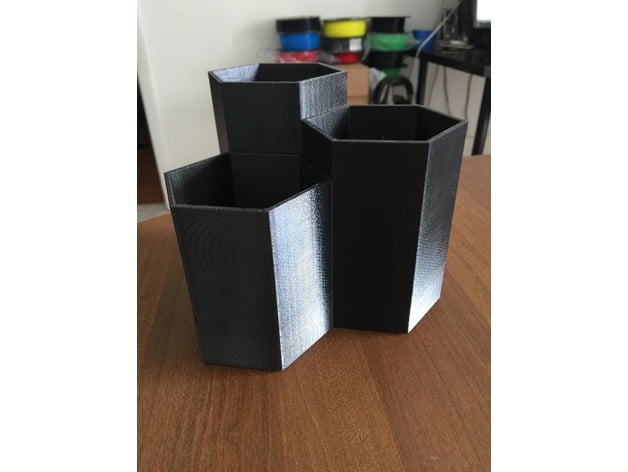
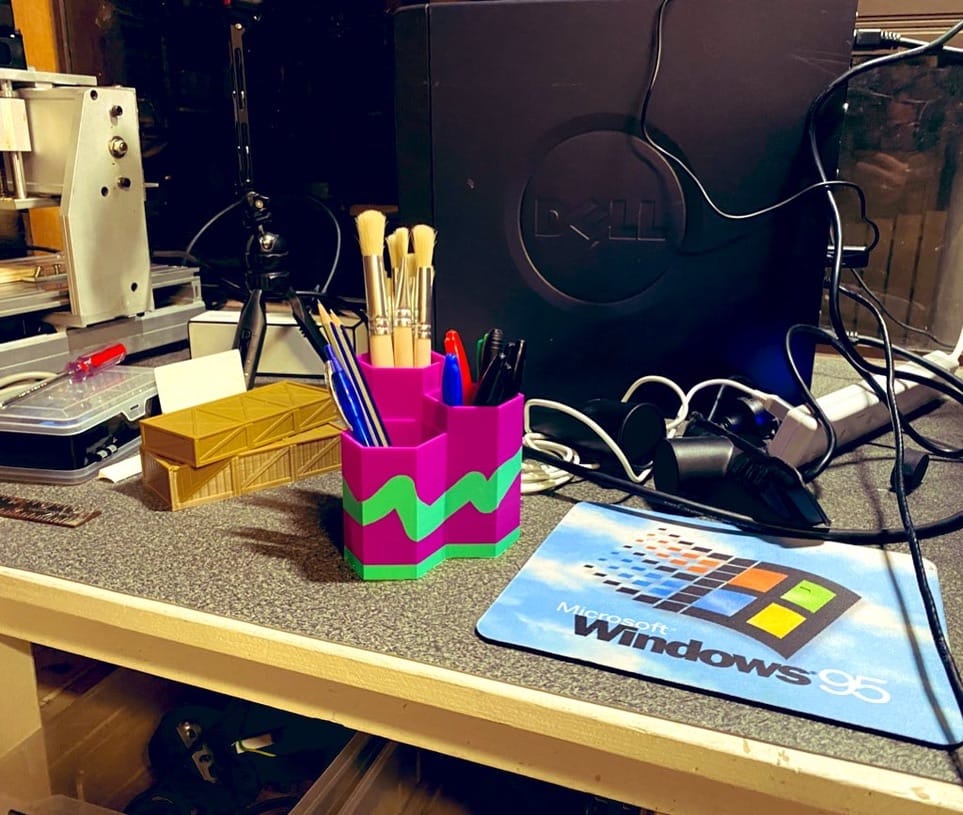
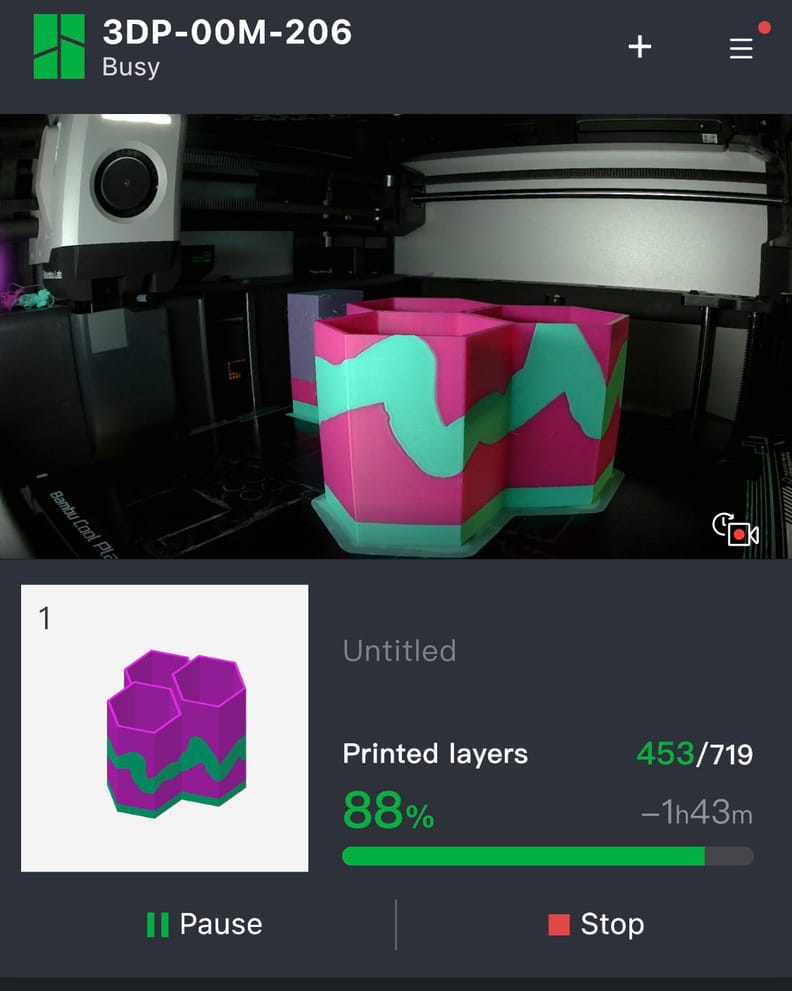
Tri-Hex Holder For Pens, Paintbrushes, etc.

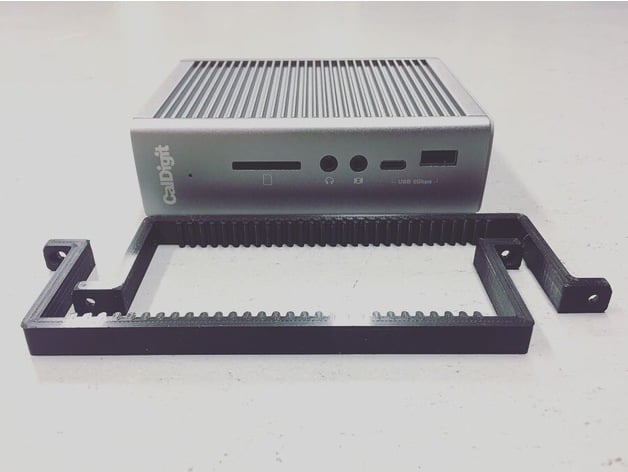
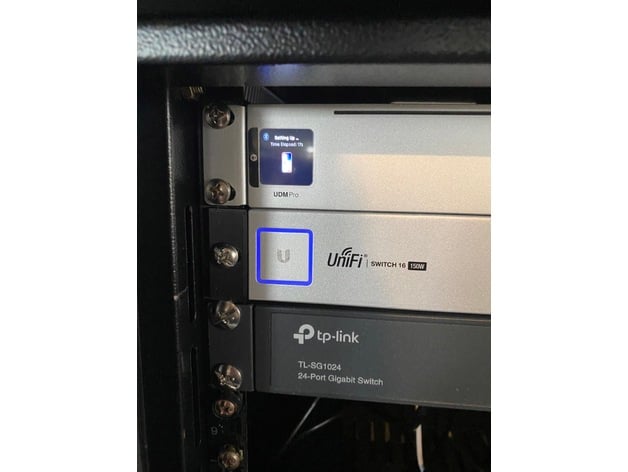
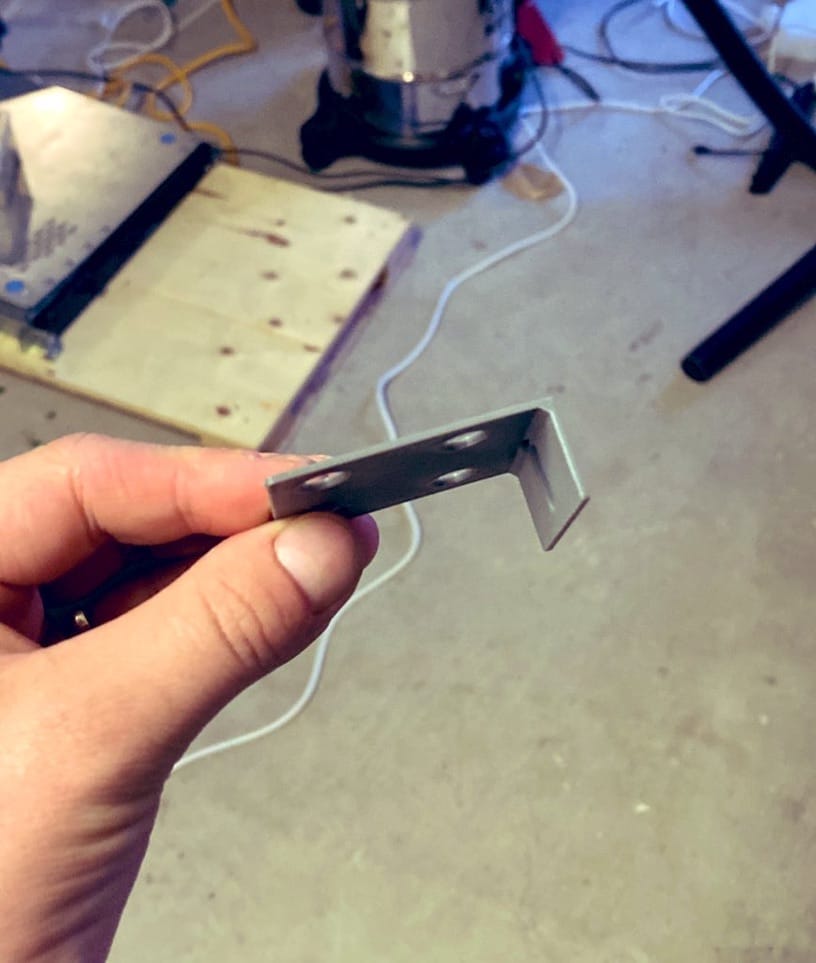
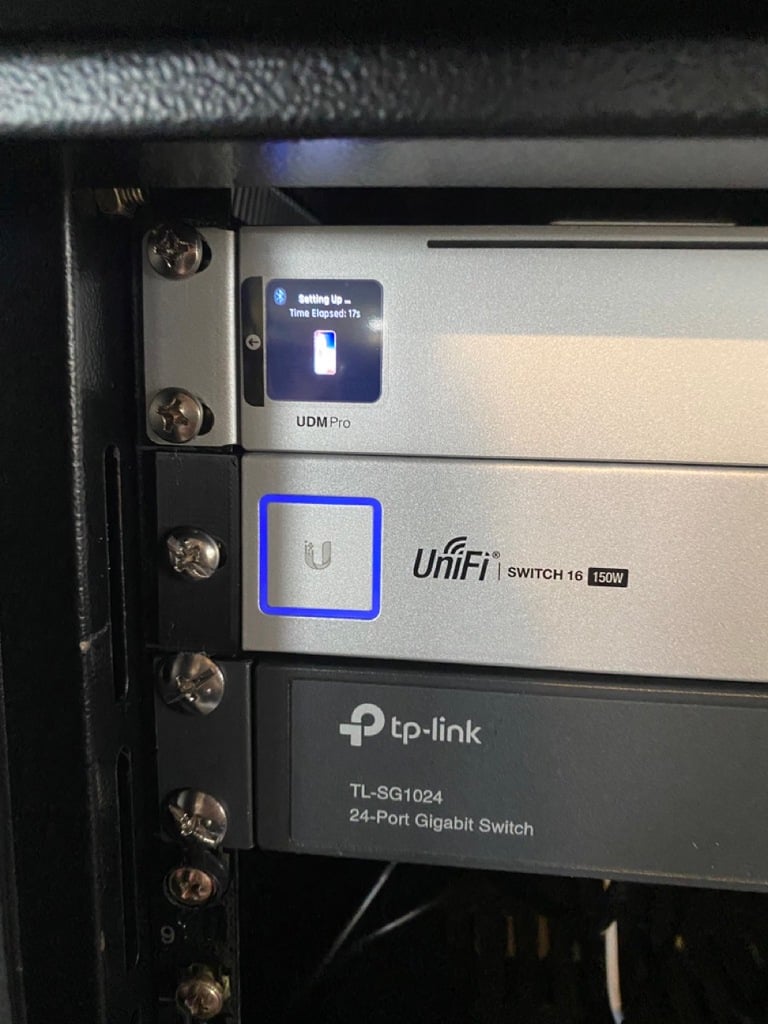
Replacement Rack Ears for Ubiquiti Switch
I bought a used Ubiquiti Switch that didn't come with any rack ears. I designed and printed these little brackets so that I could mount it in my server rack. The brackets prevent it from slipping out of the rack, but they are not strong enough to support the switch. It needs to be placed on top of another rack-mounted device for support.
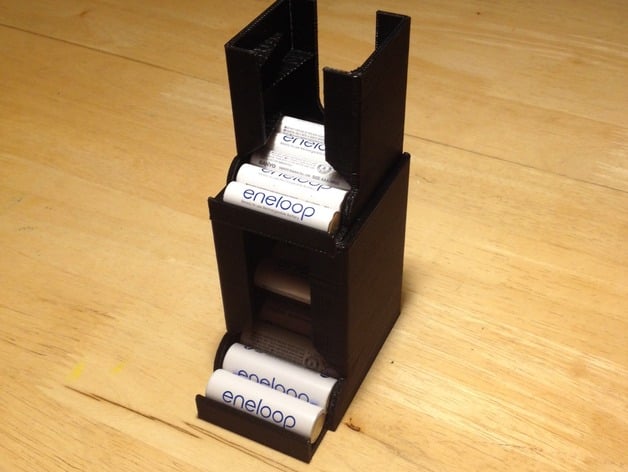
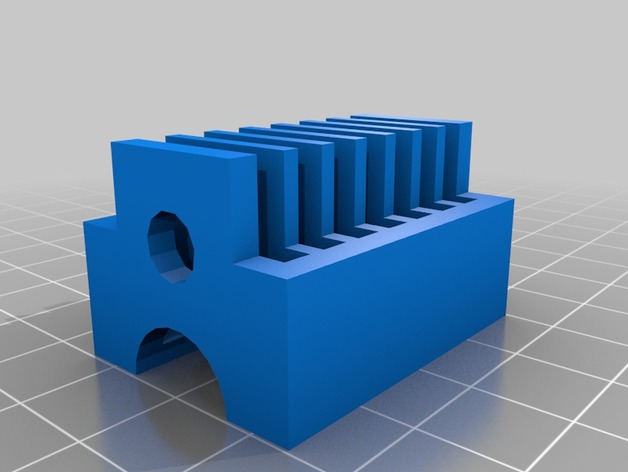
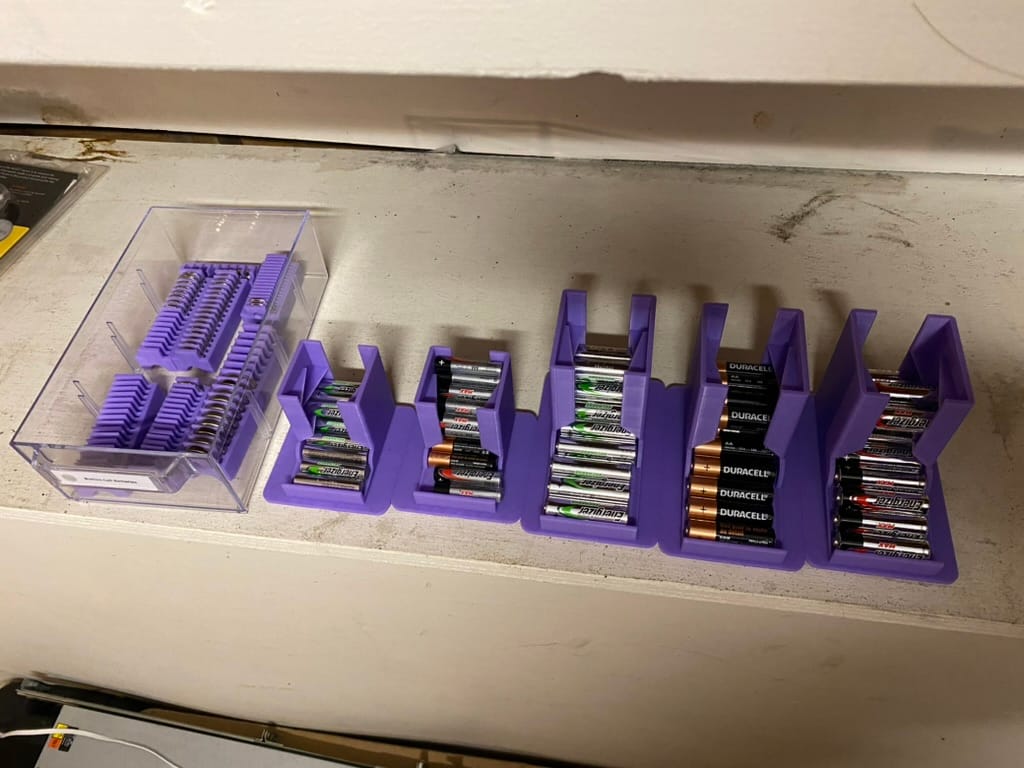
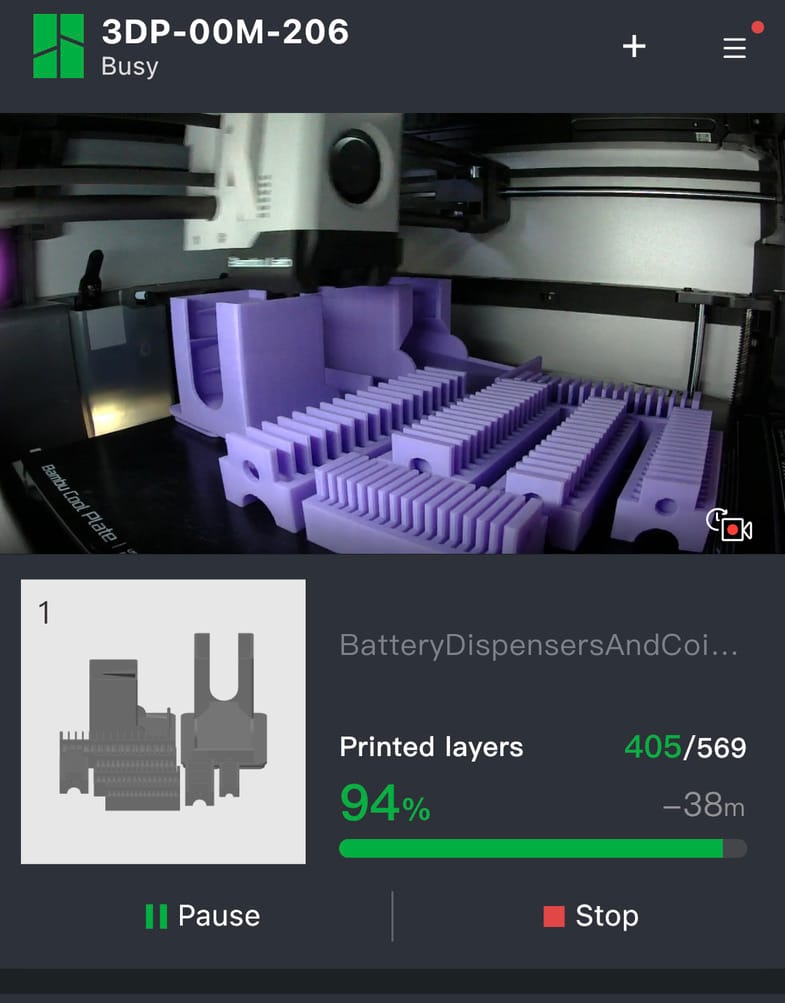
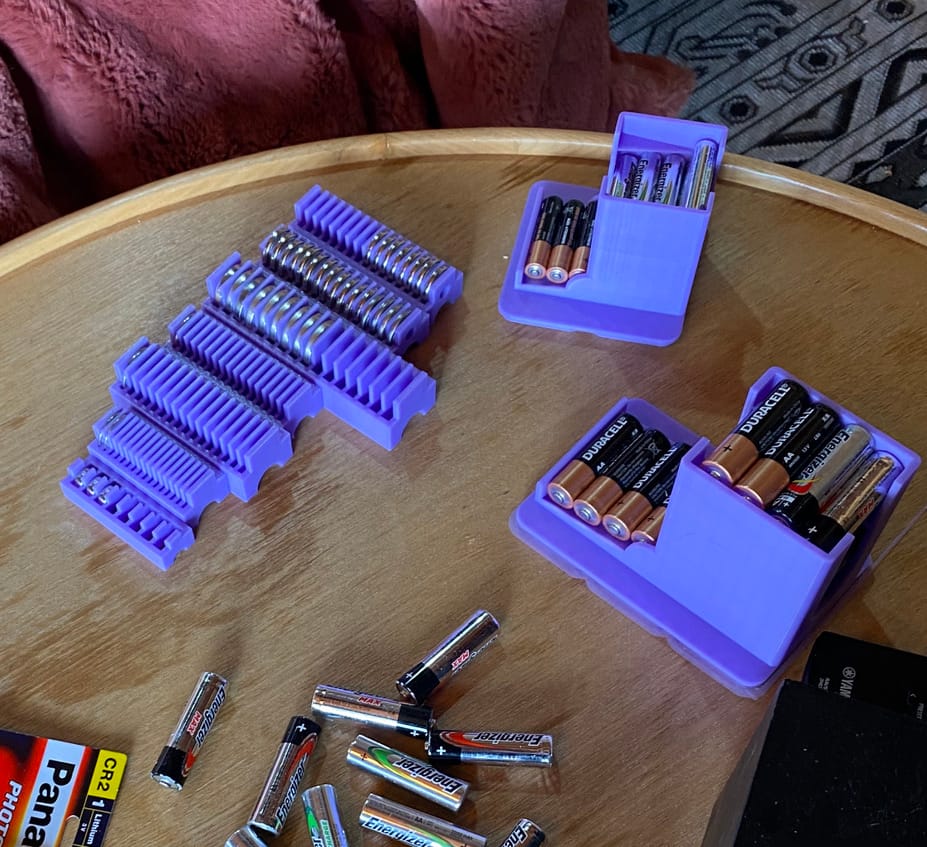
Battery Organizers
I printed lots of organizers for coin cell batteries, AA, AAA, 9V, etc.
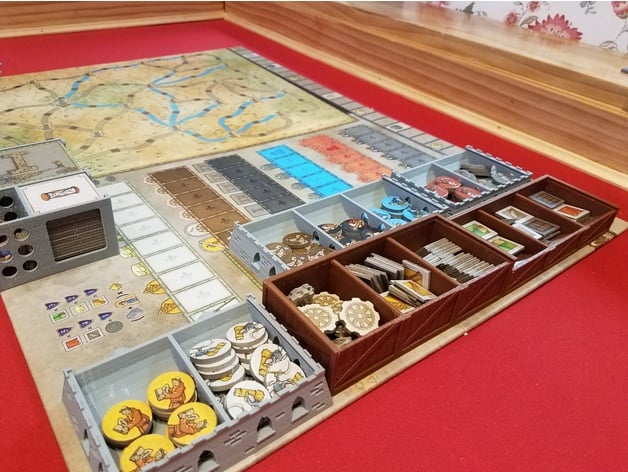
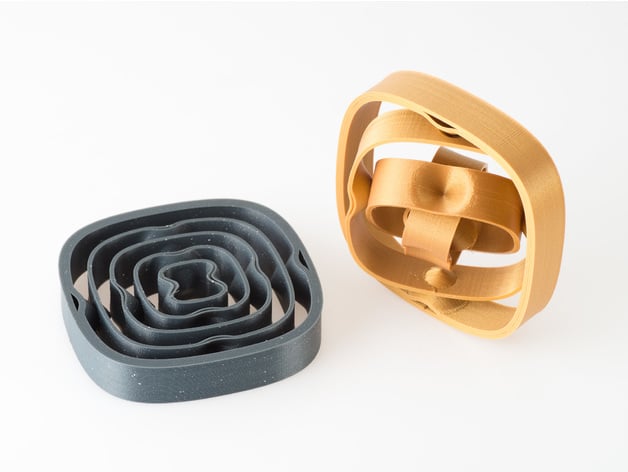
Orleans Board Game Organizer
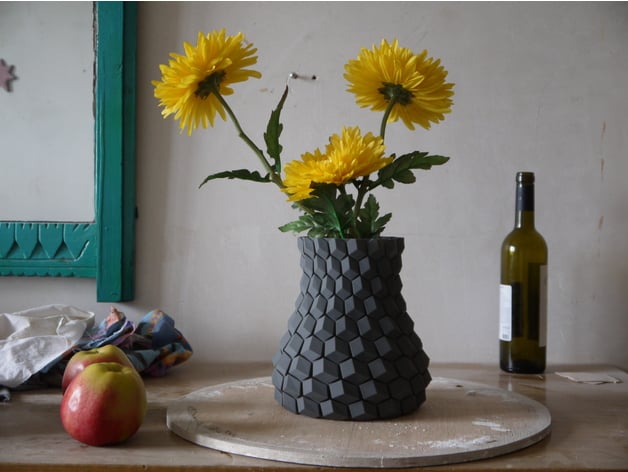
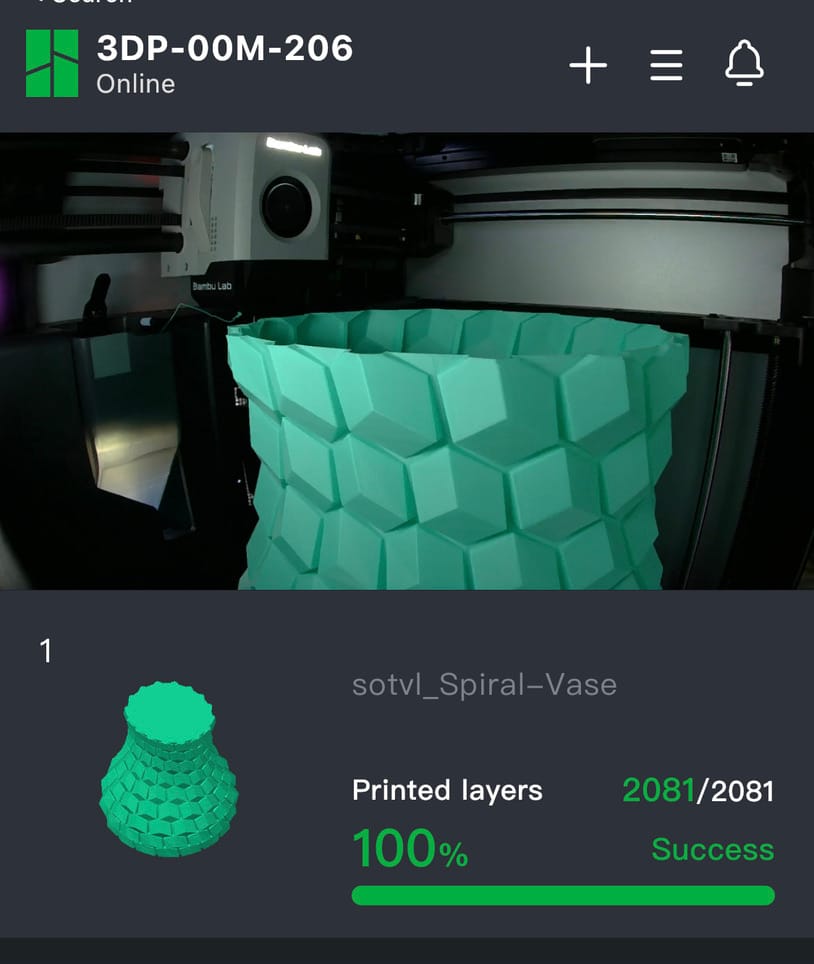
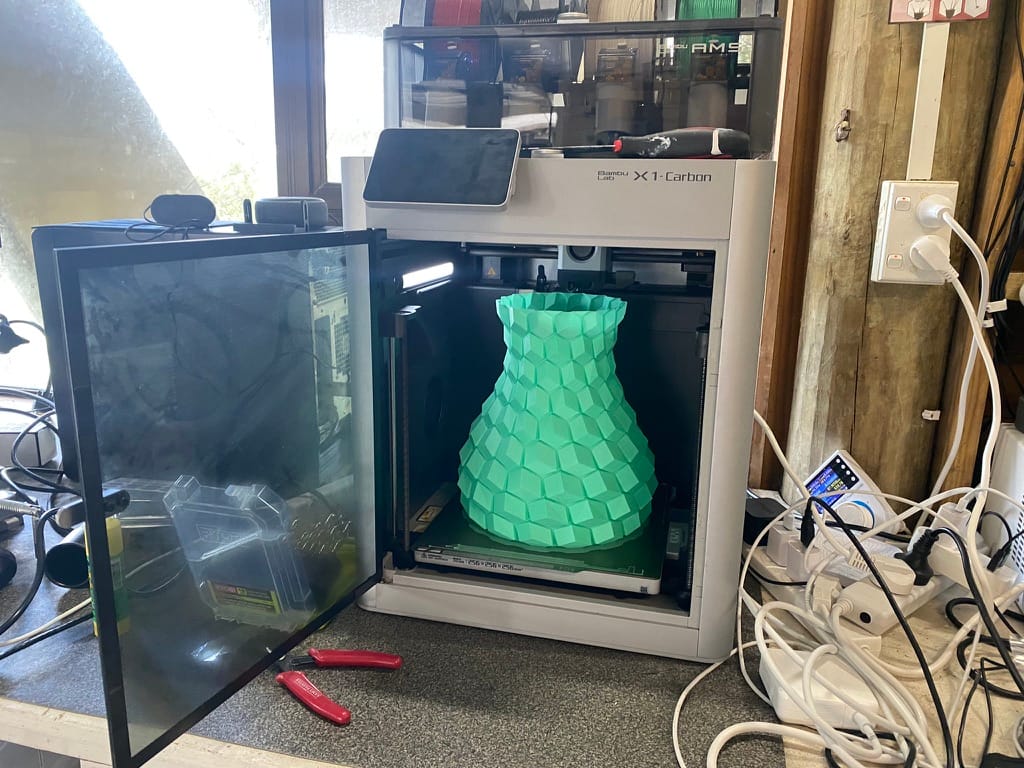
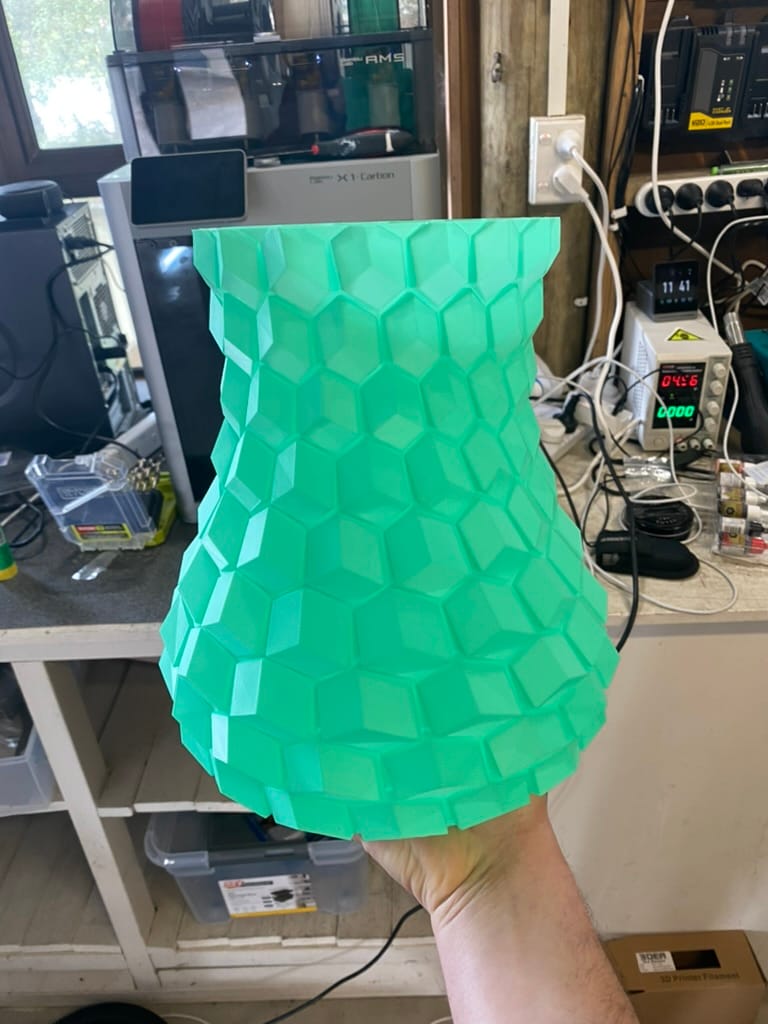
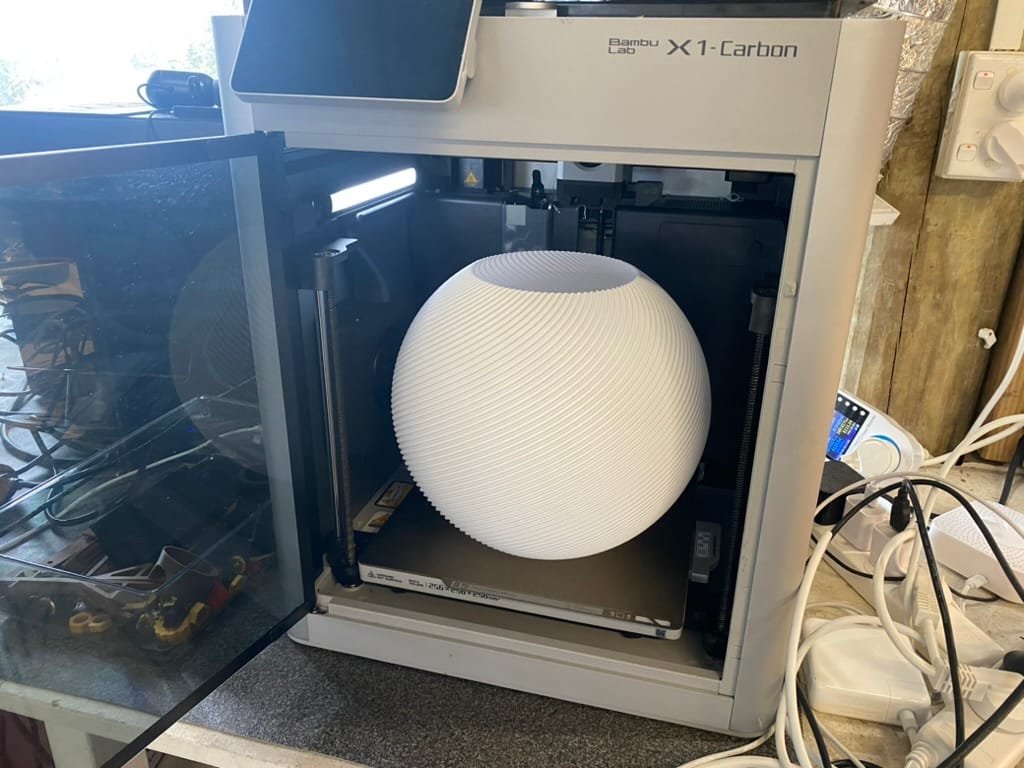
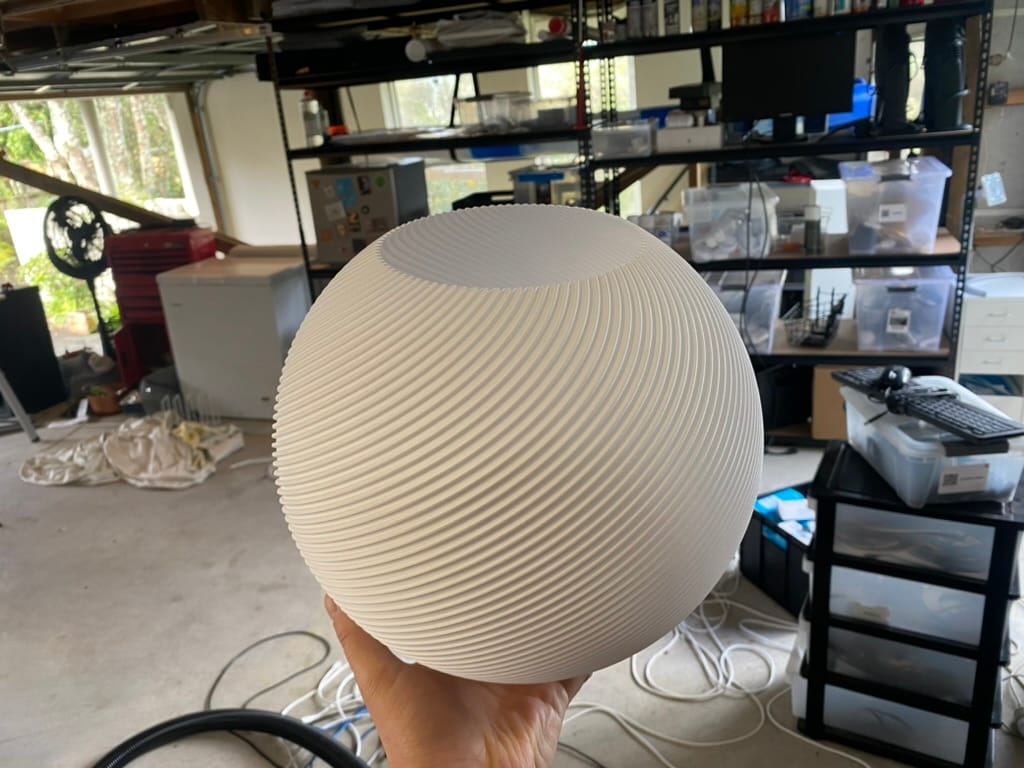
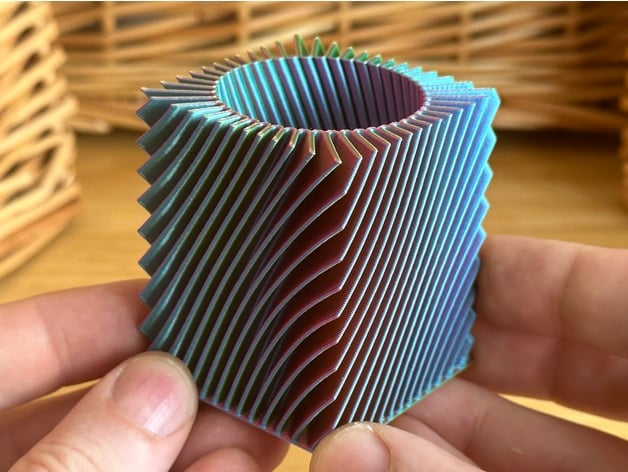
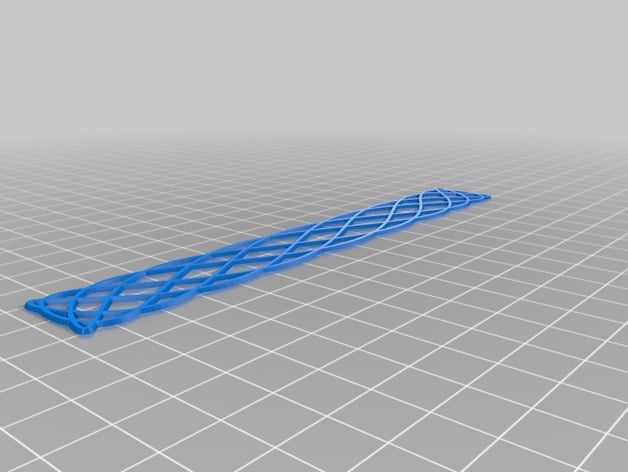
Curved Honeycomb Vase
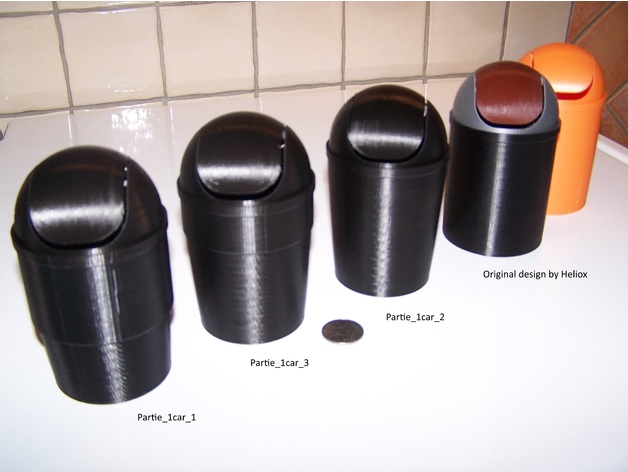
I printed this to try out "Spiral vase" mode, where it prints in one continous line (instead of printing one layer at a time.)
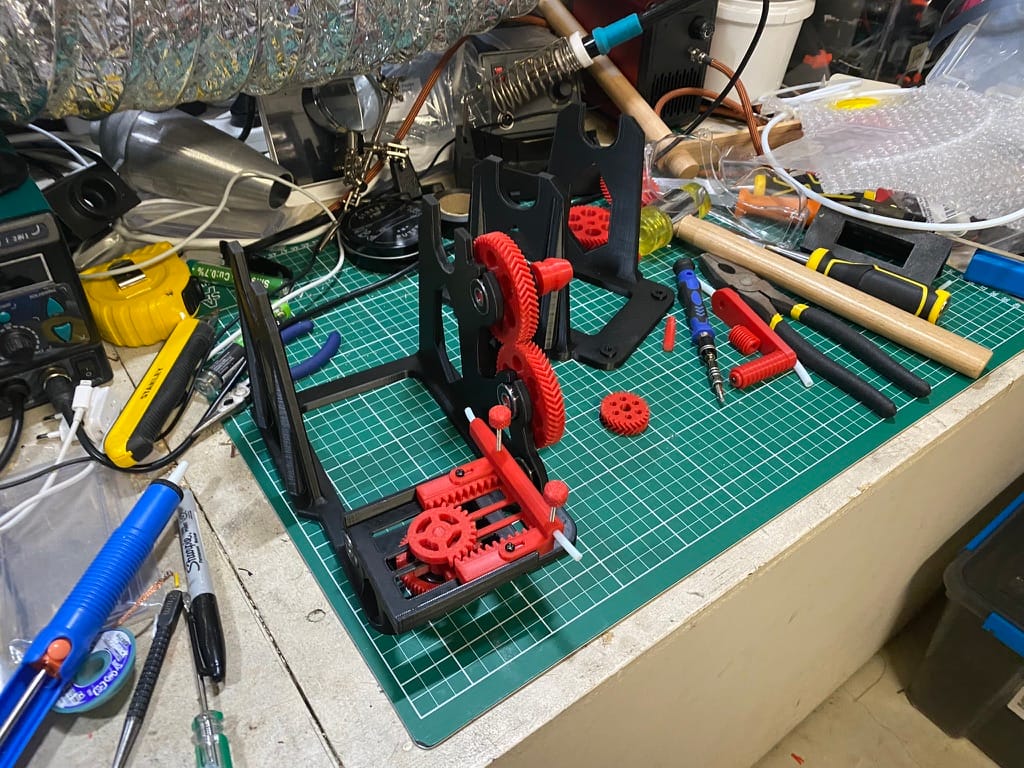
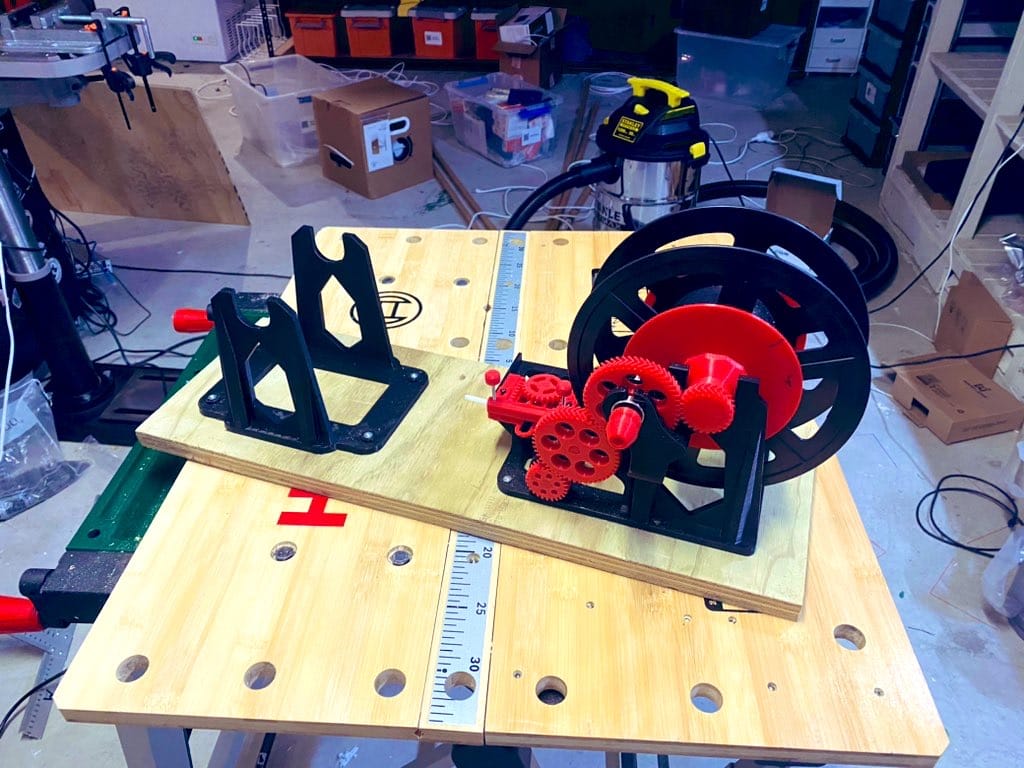
Filament Spool Switcher & Winder
This machine can be used to wind filament onto a new spool.
Bambu Lab P1 / X1 / X1C / X1CC Filament Spool Switcher & Winder on Printables
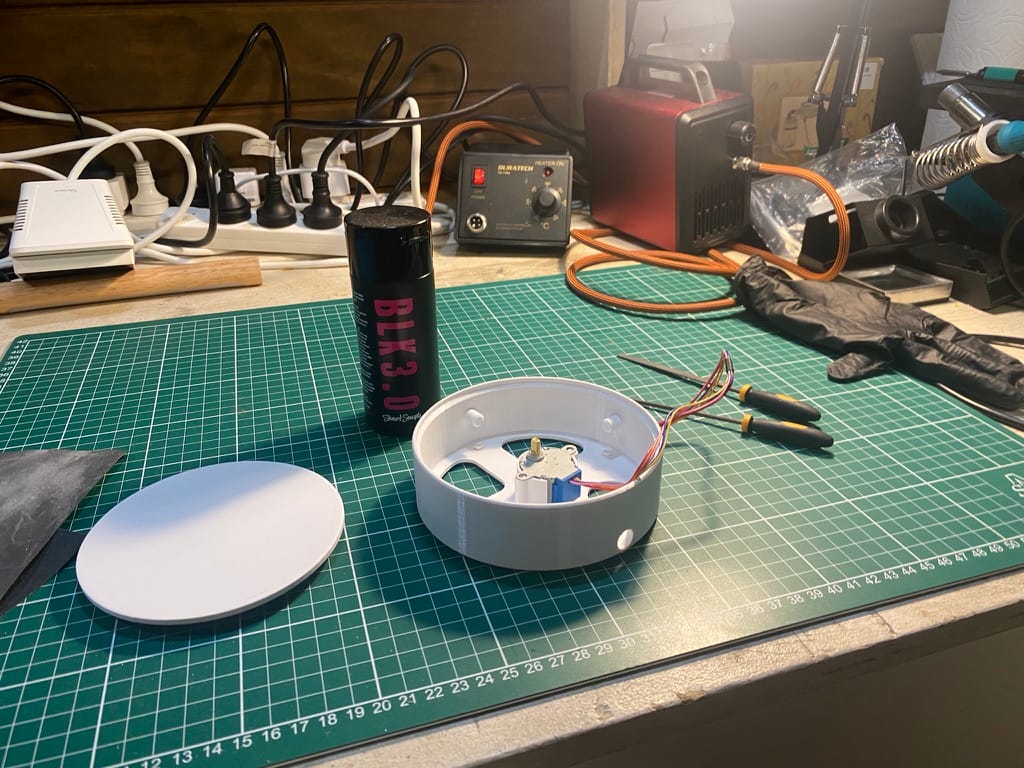
Turntable for 3D Scanning
I ended up using this for airbrushing.
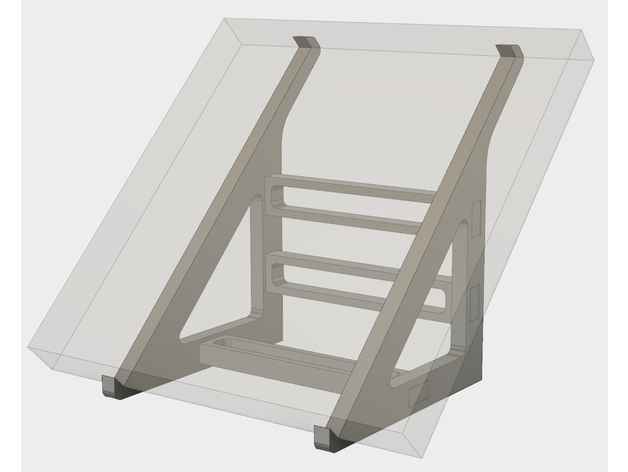
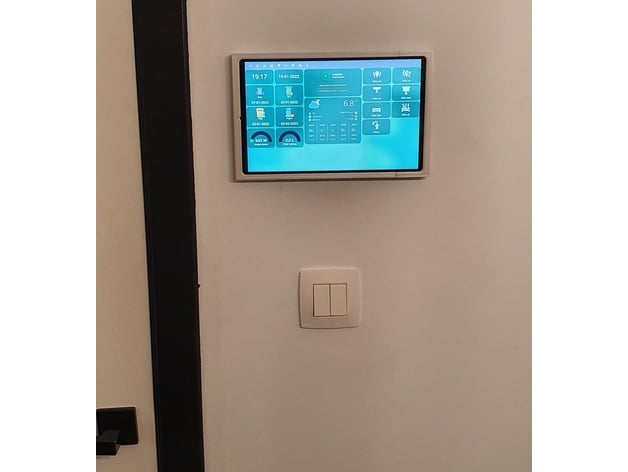
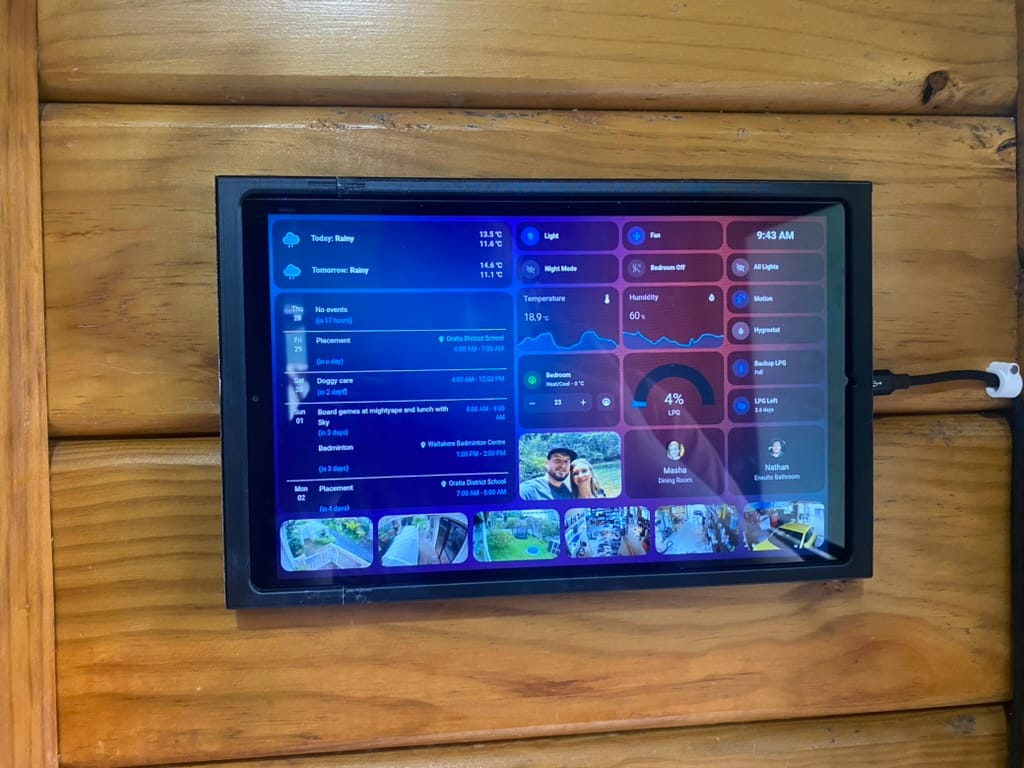
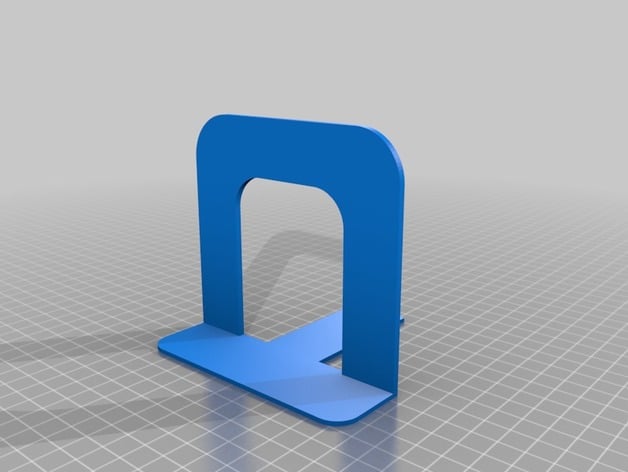
Tablet Wall Mount
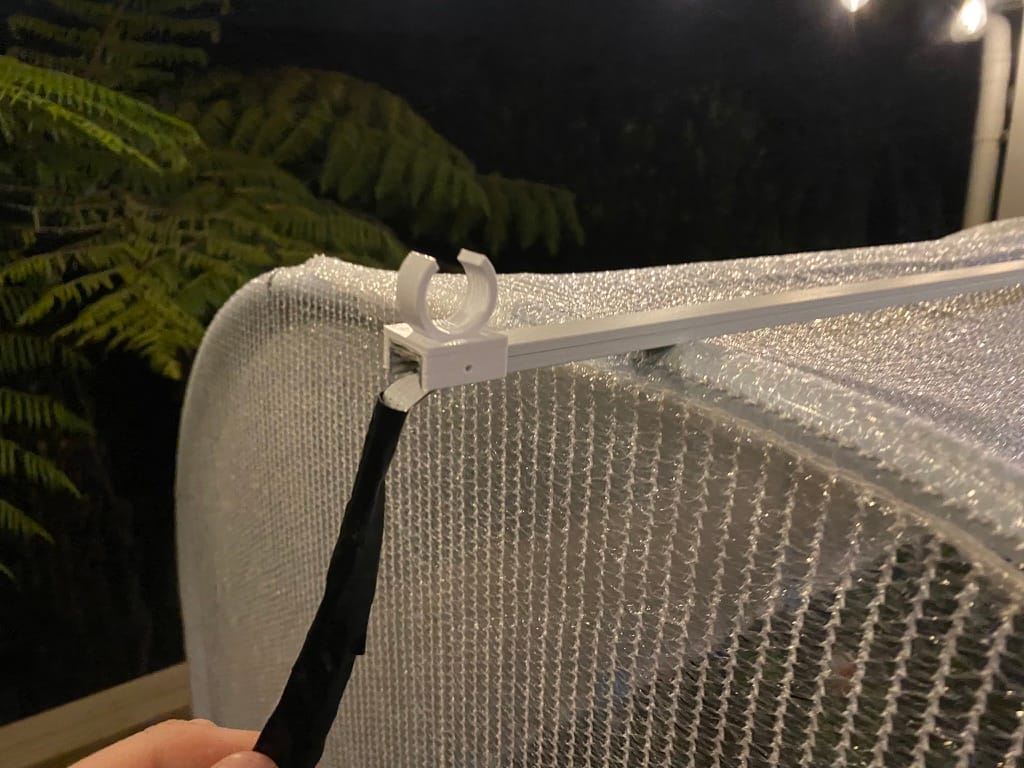
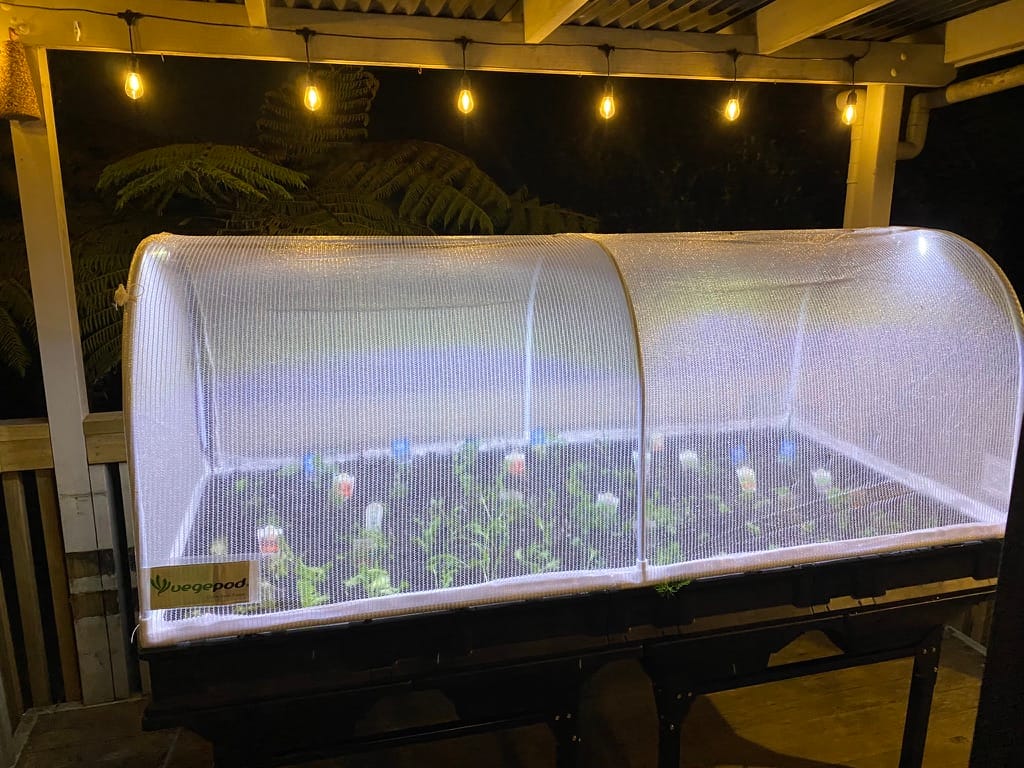
LED Strip Channel Holders for Vegepod
I designed and printed these clips to hold an LED strip grow light.

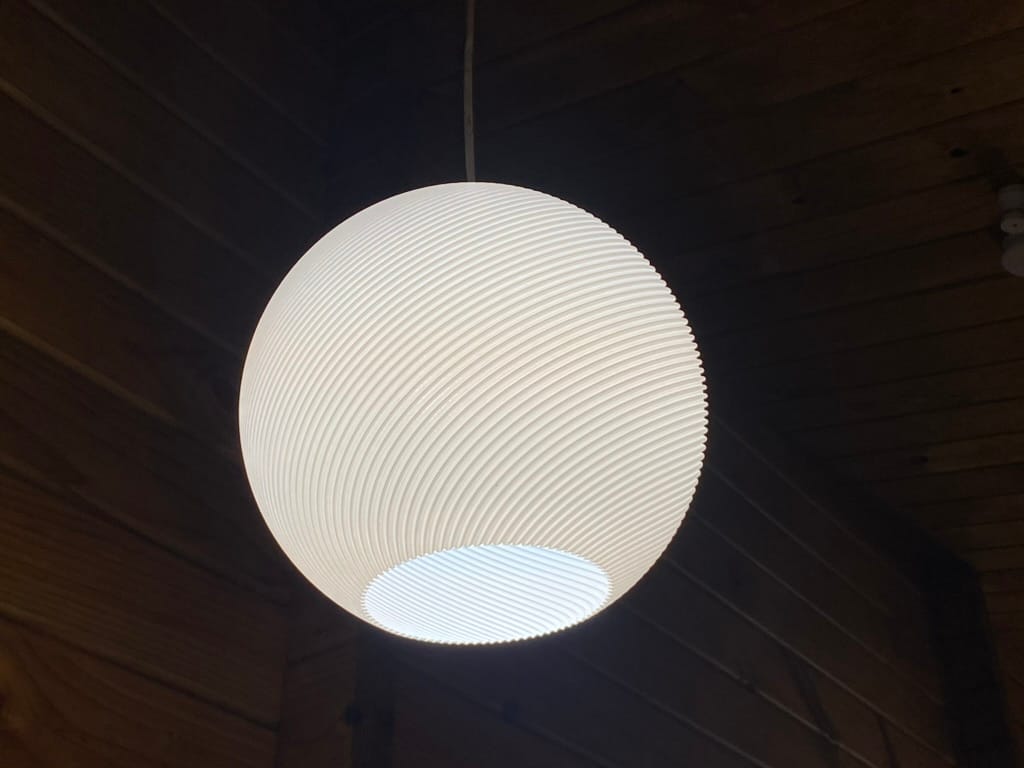
Pendant Lamps
I printed 8 of these for lights around our house. They look really nice.
小厮工作室
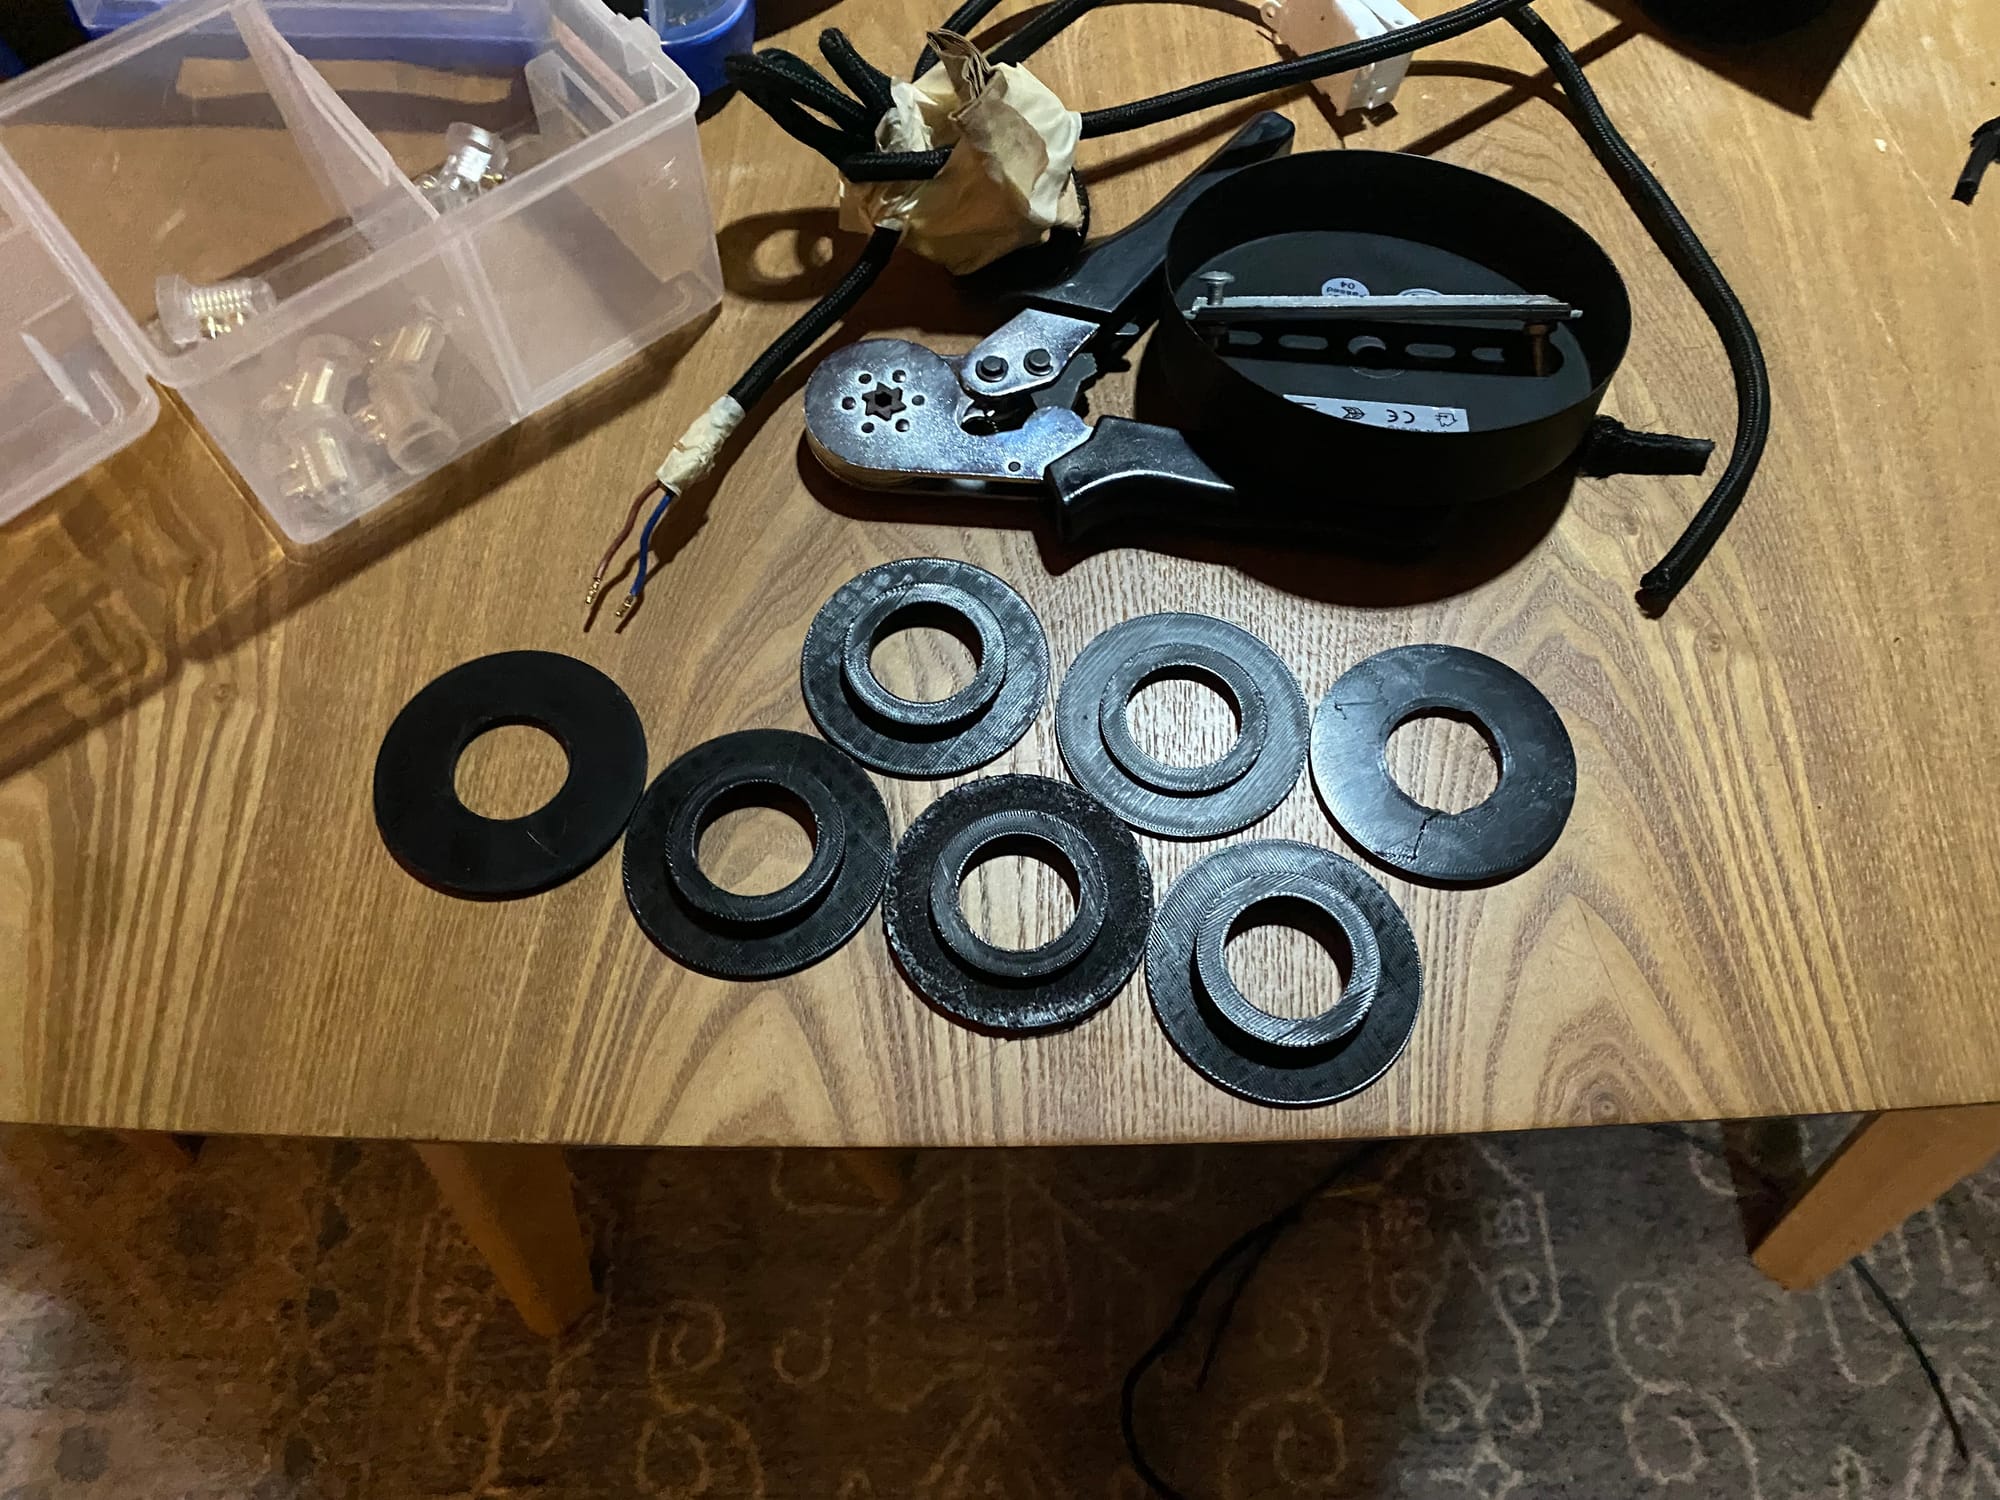
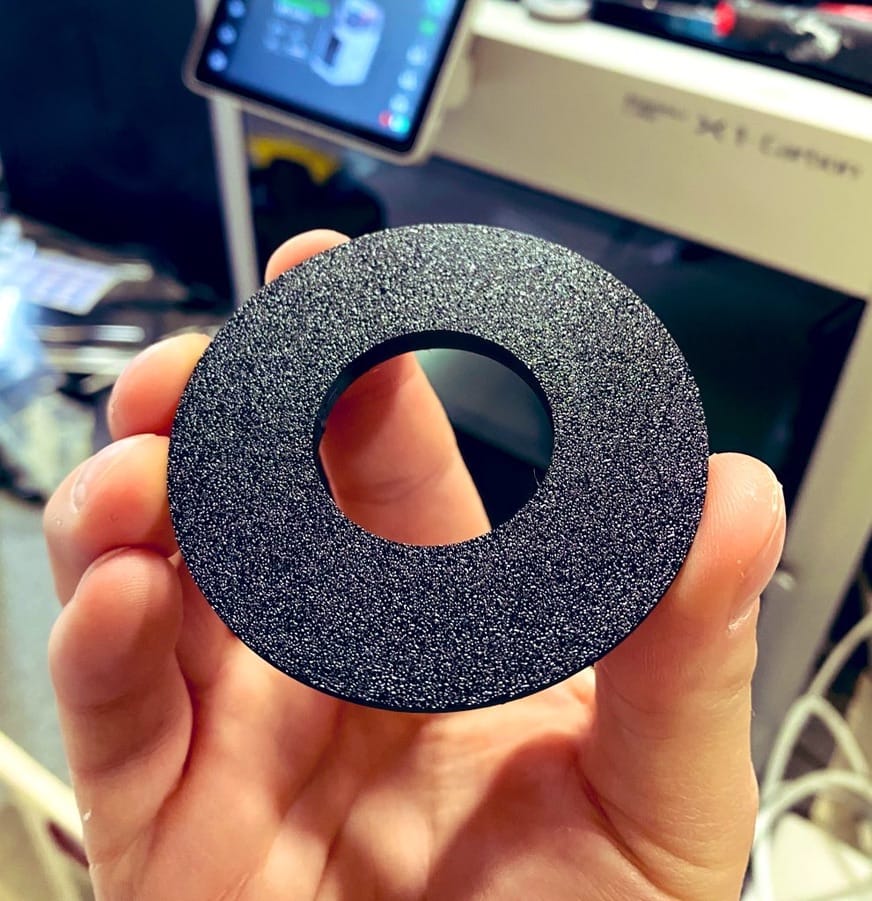
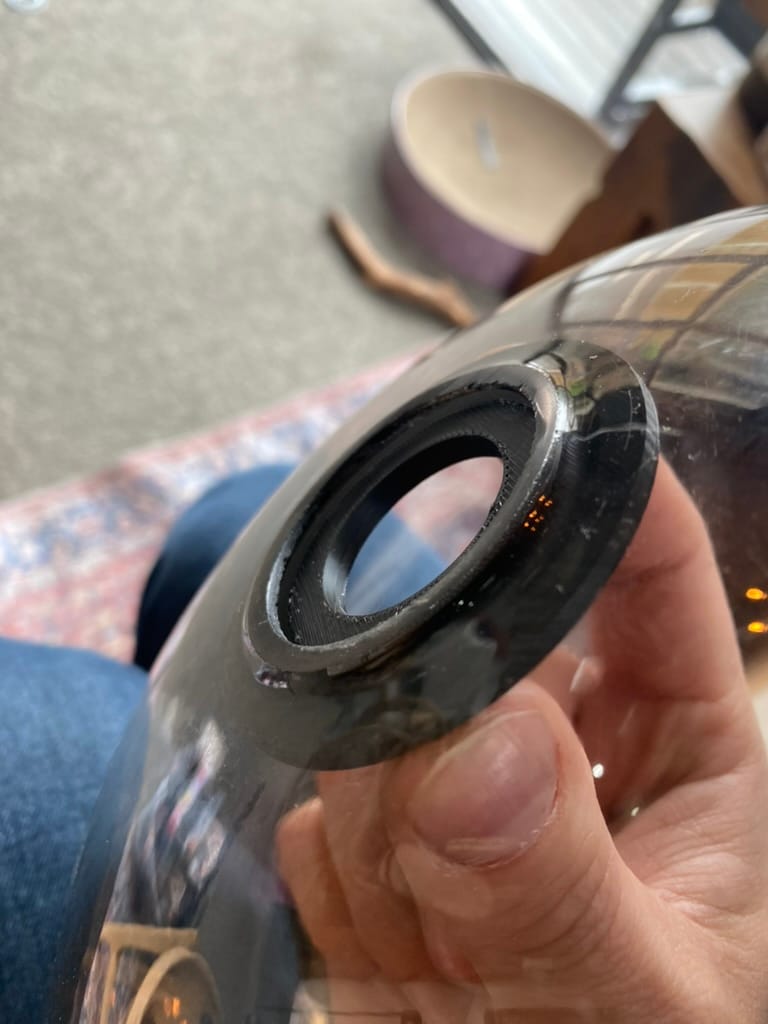
Glass Sphere Lamp Adapters
I printed these adapters so that an existing light socket would fit into a new spherical glass lampshade.

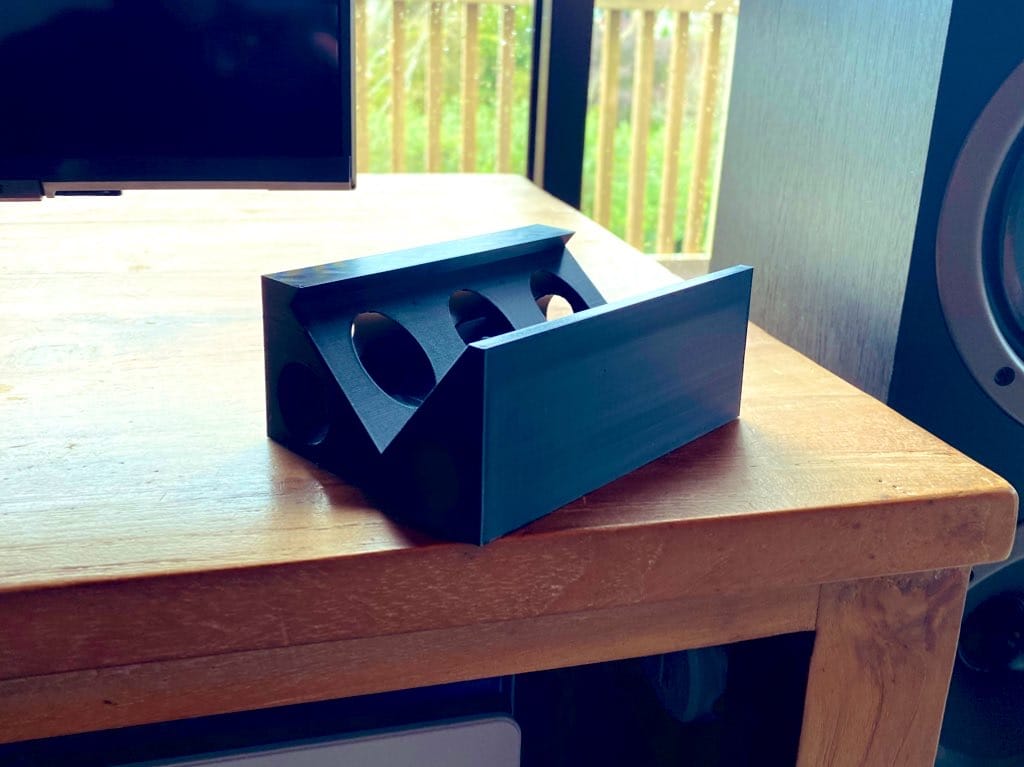
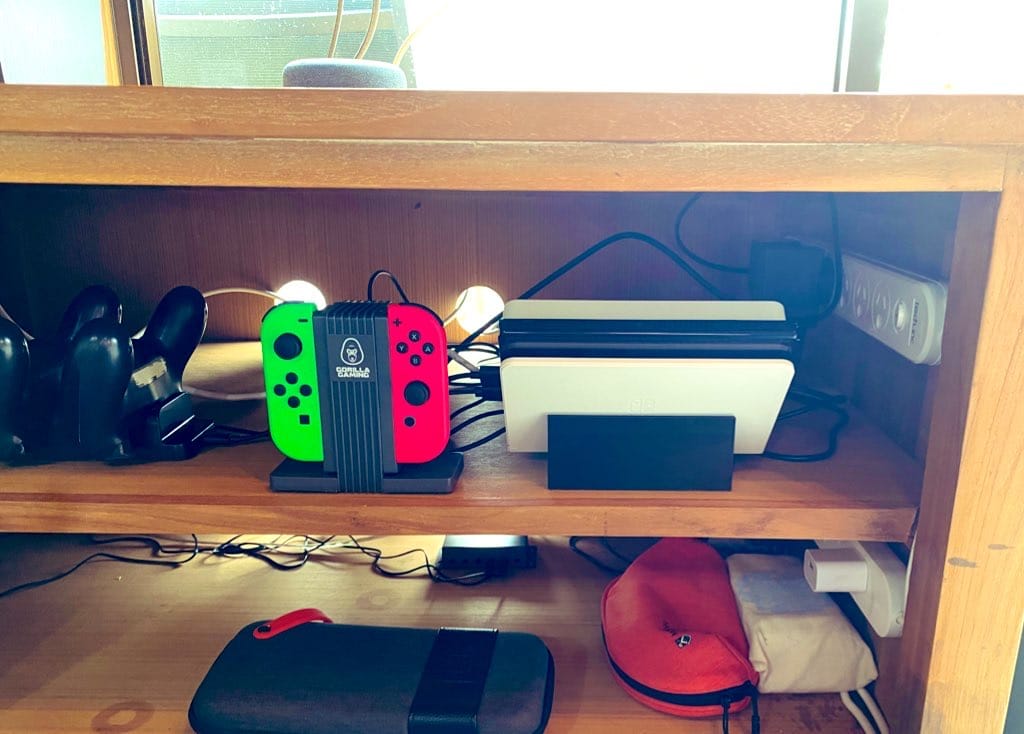
Angled Holder for Nintendo Switch Dock
This dock holder makes it a easier to take out my Nintendo Switch from the TV cabinet.
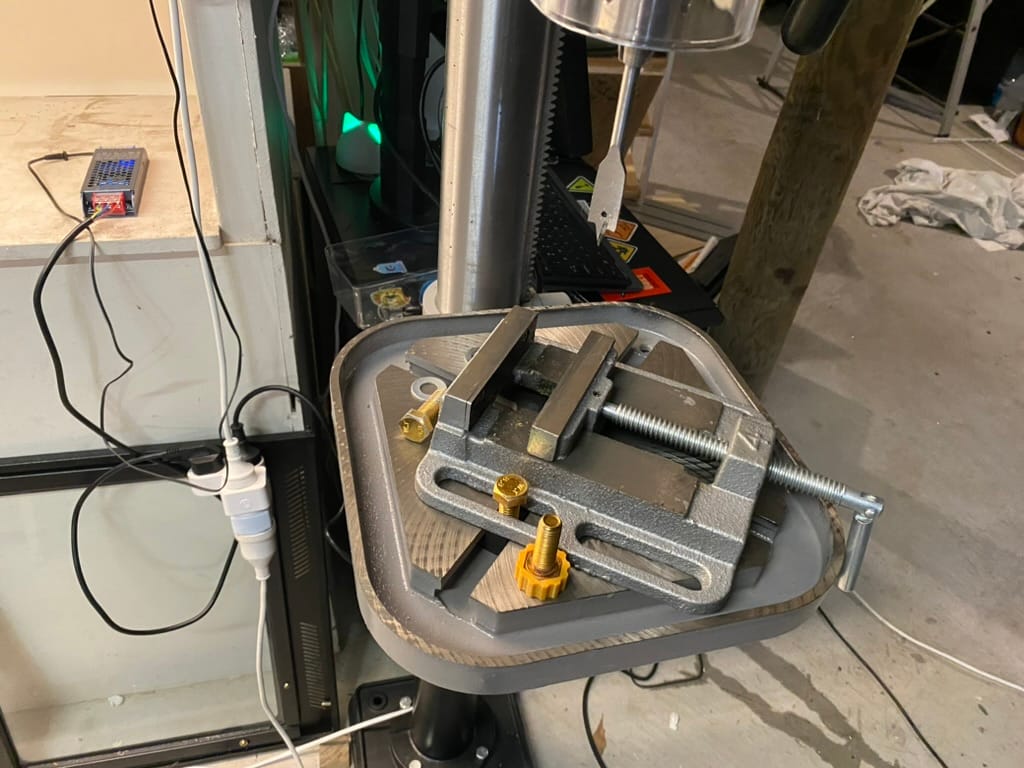
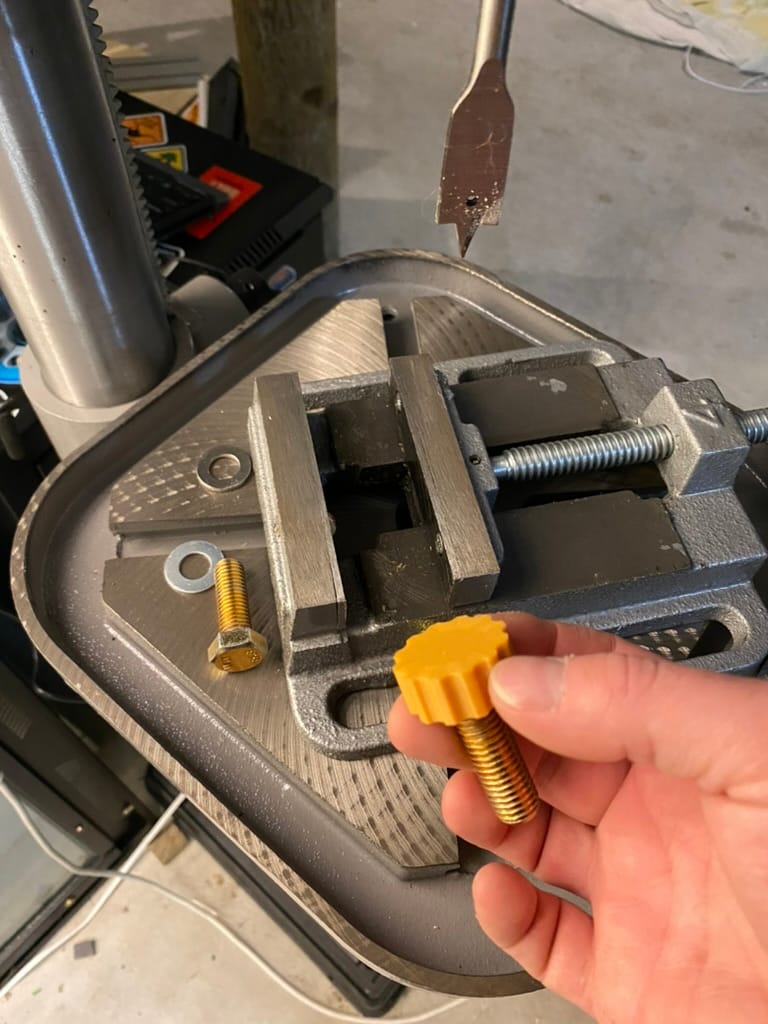
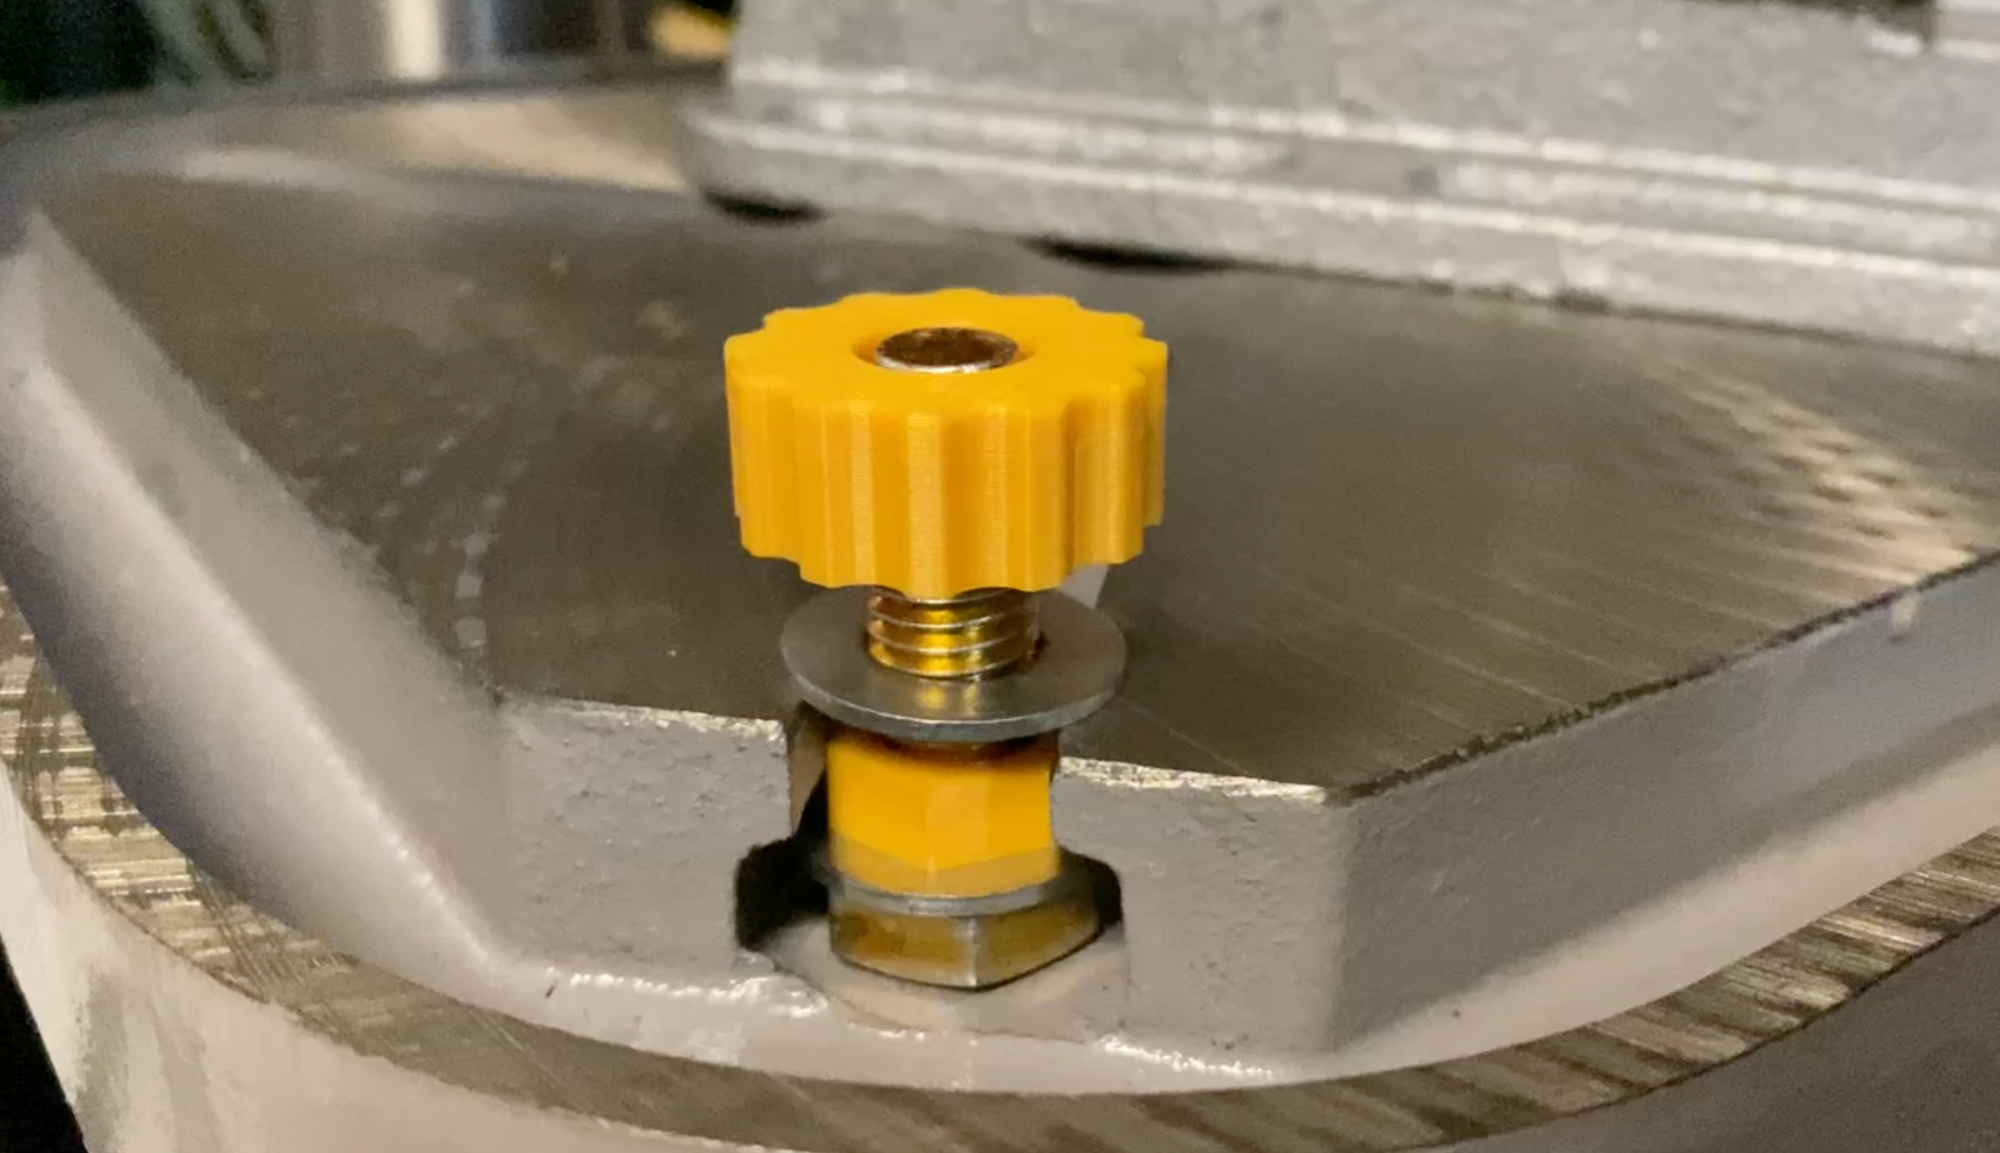
Bolt Thumb Screws for Drill Press Vise
I use these to quickly reposition or remove a vise from my drill press.
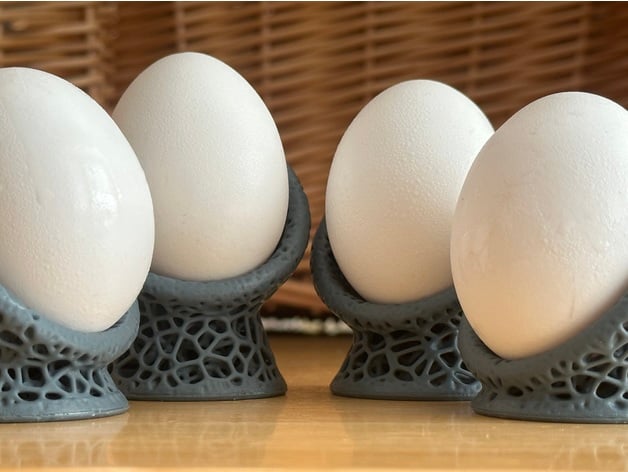
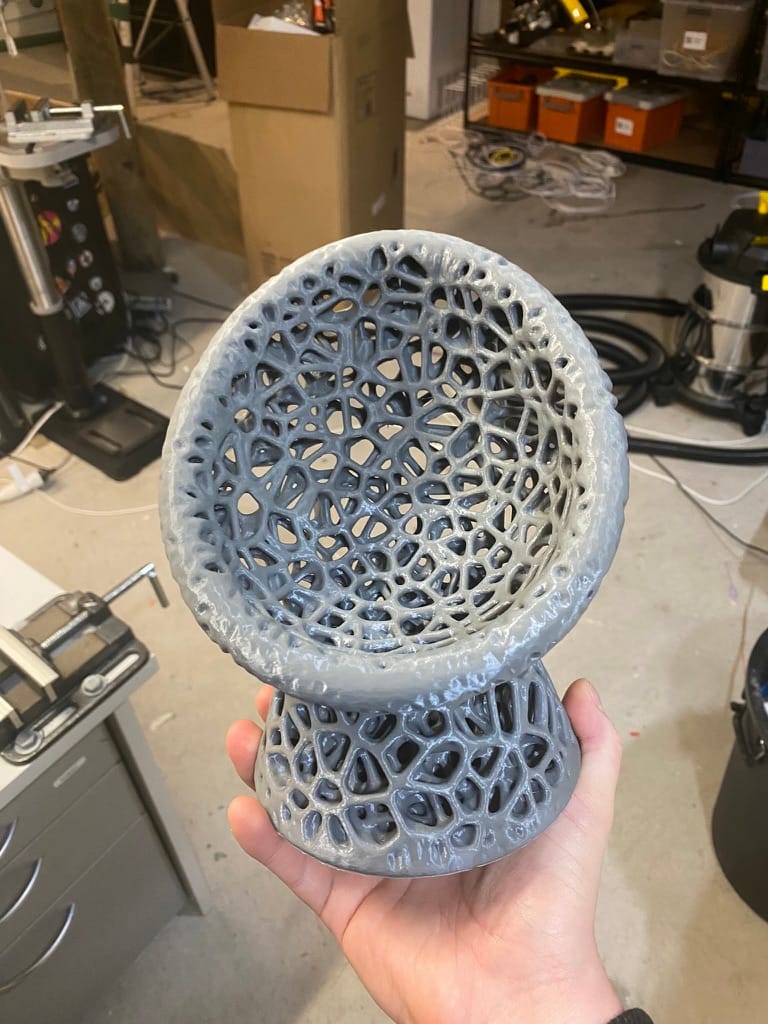
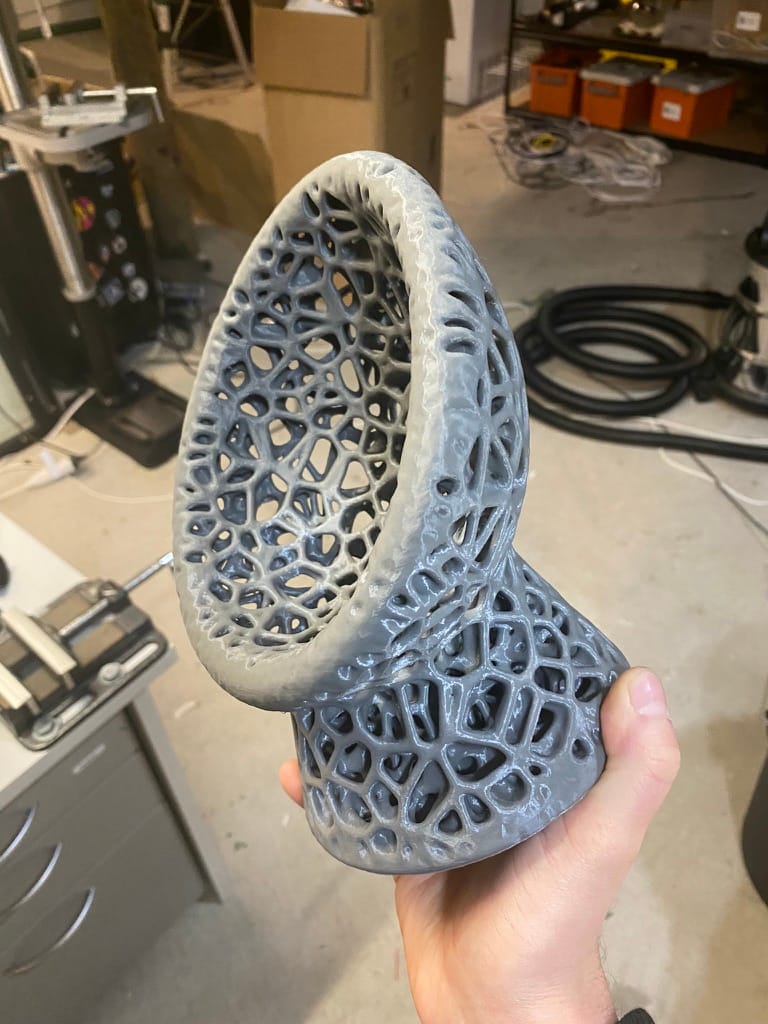
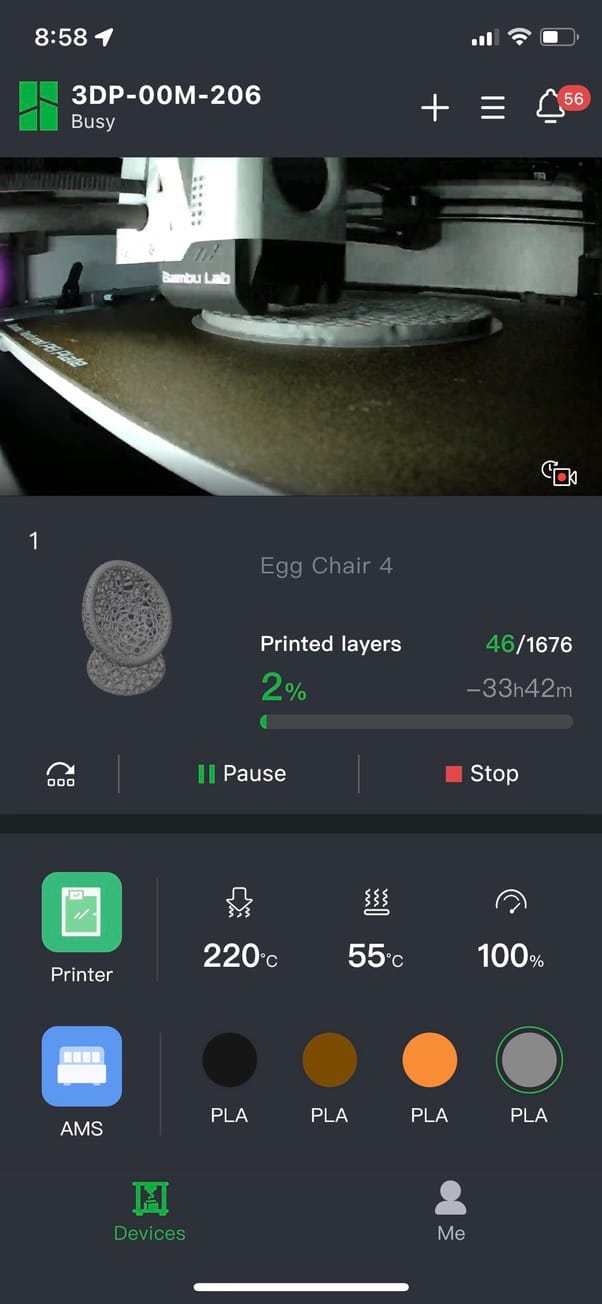
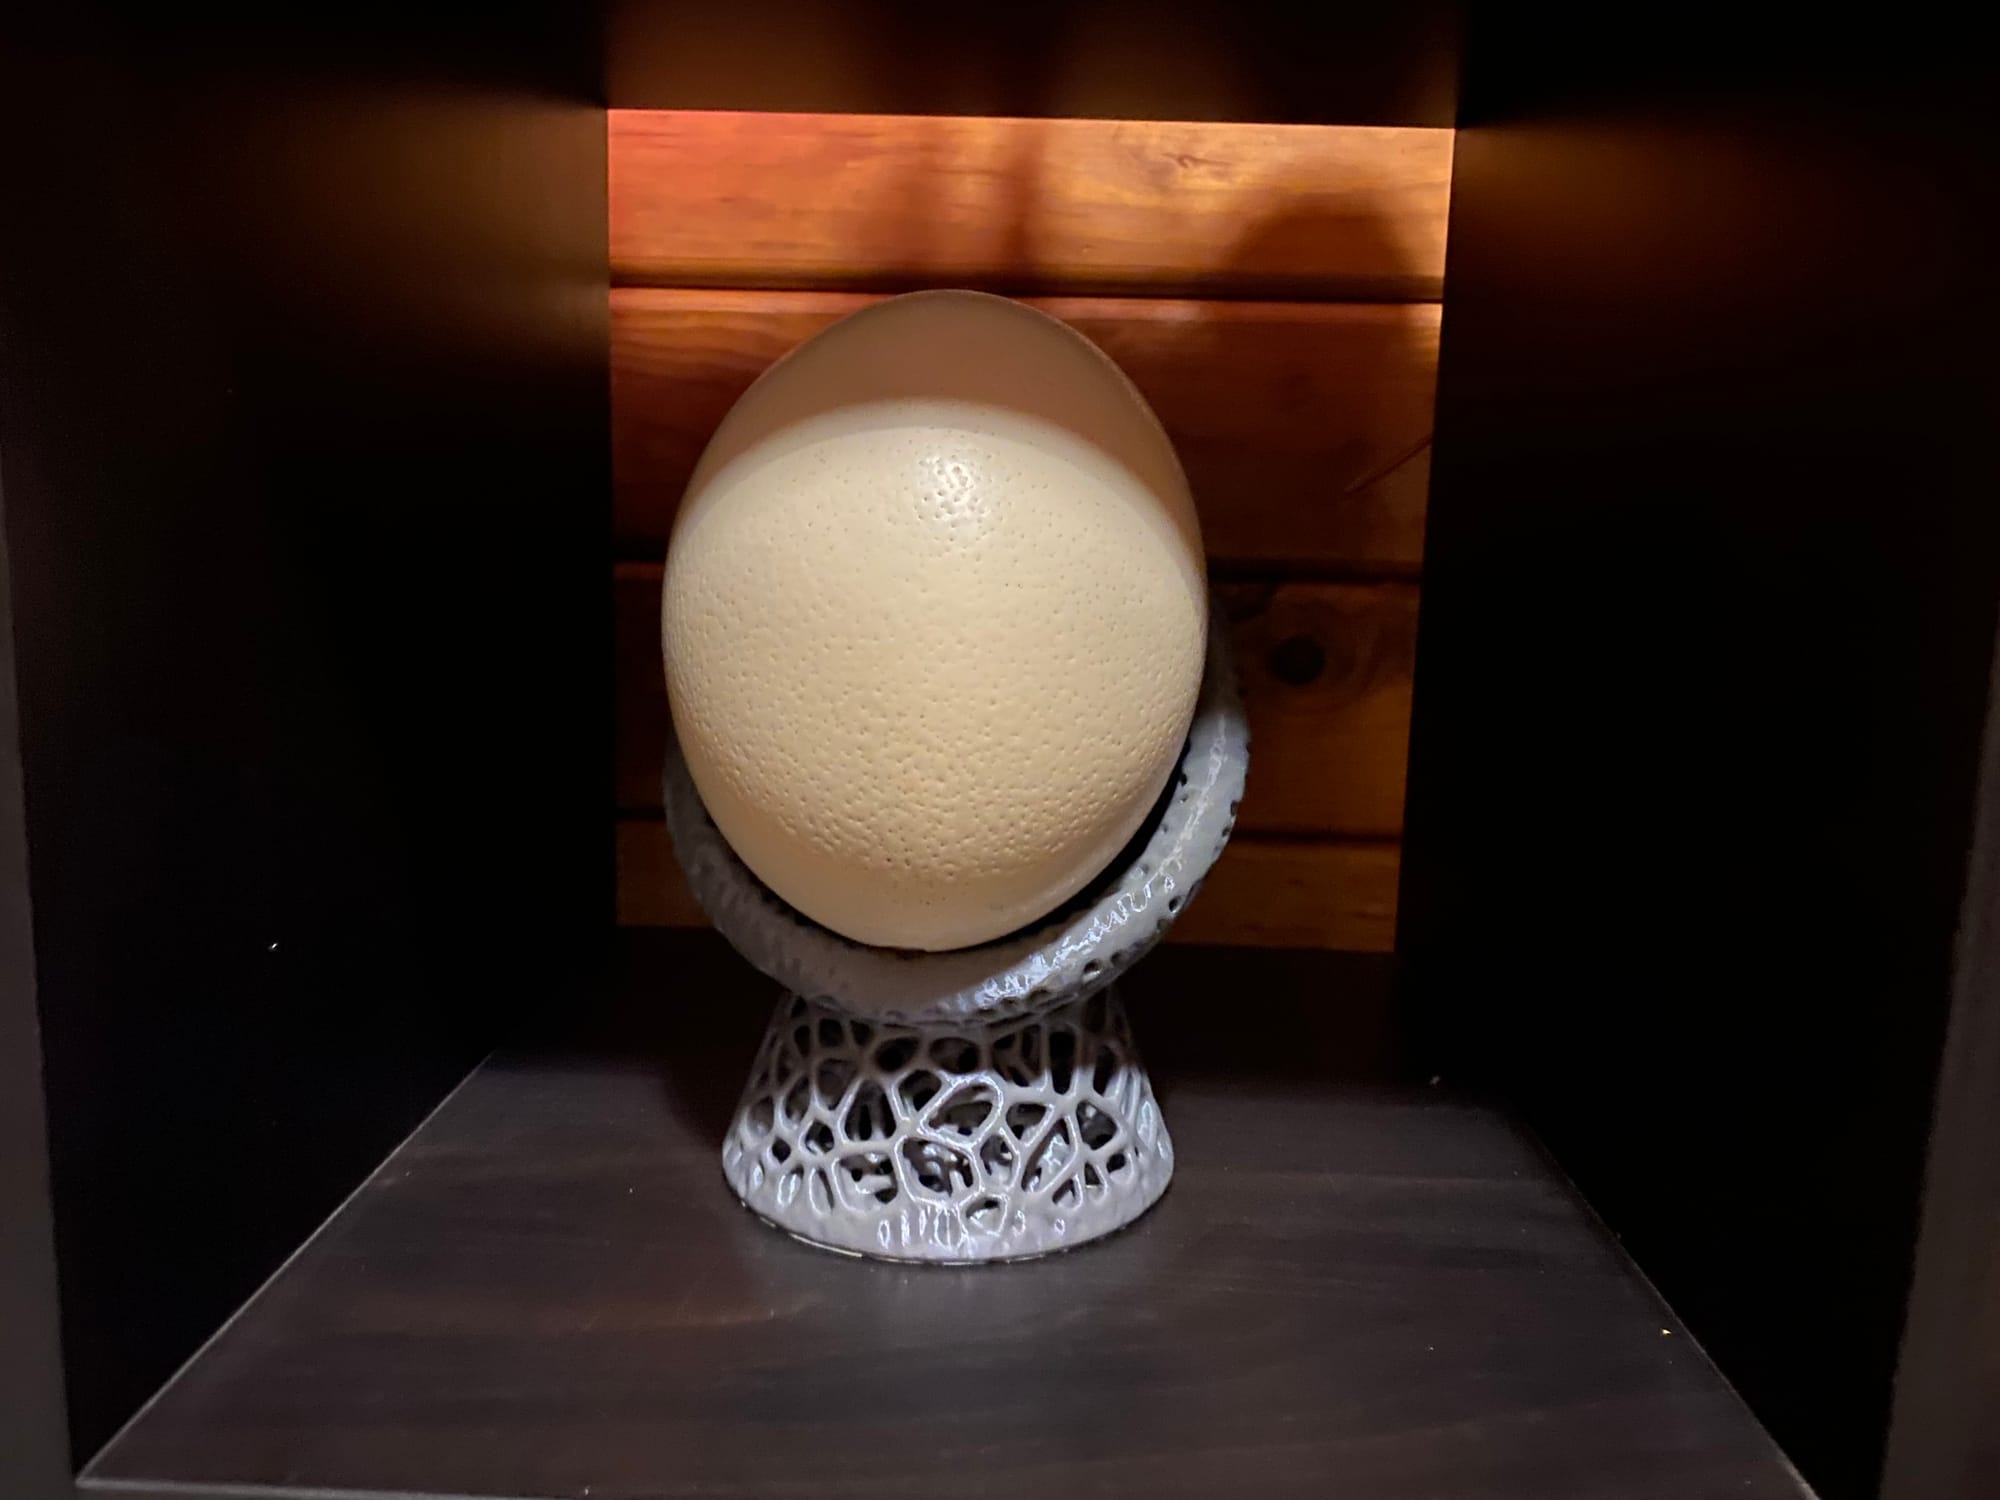
Alien Egg Chair
This was designed for a chicken egg, but I scaled it up to fit an ostrich egg. Now my wife can display her ostrich egg on a shelf in her office.

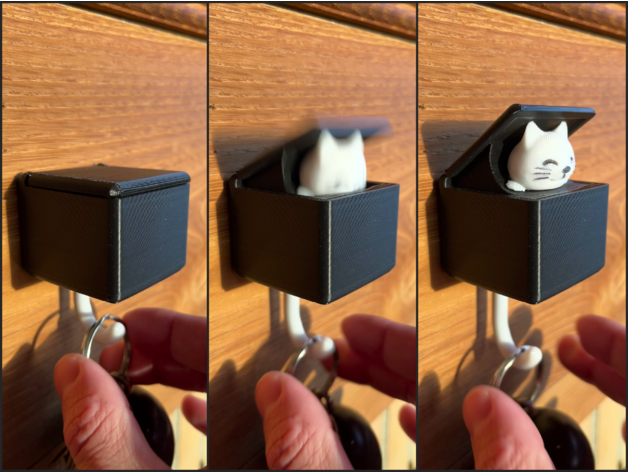
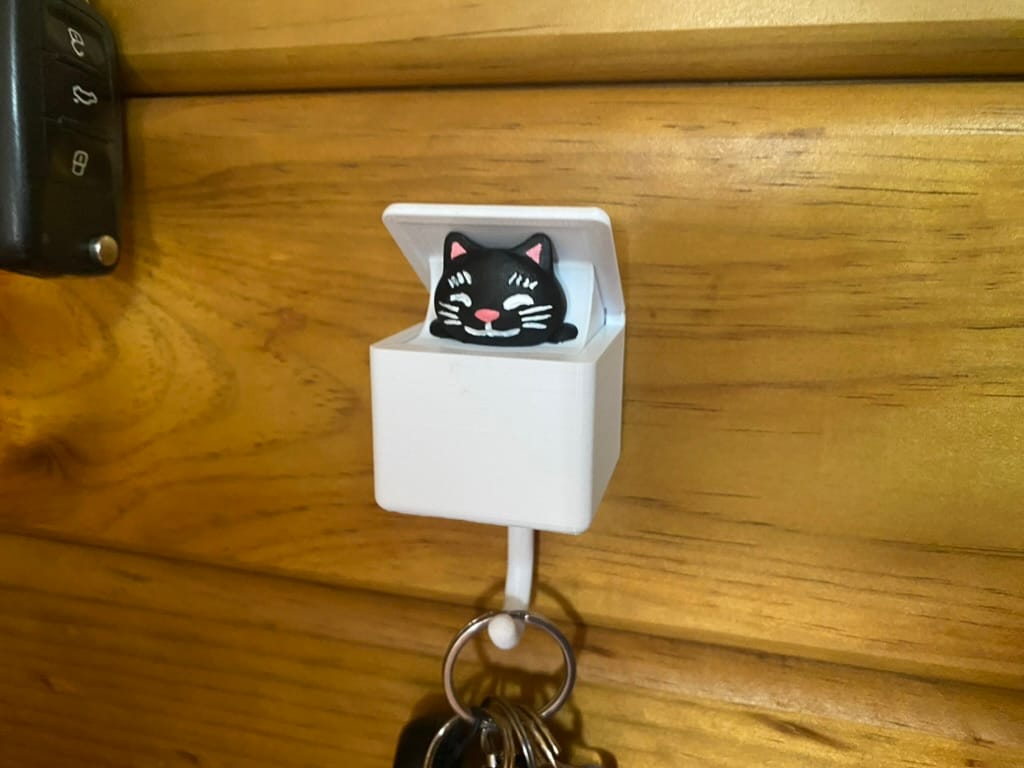
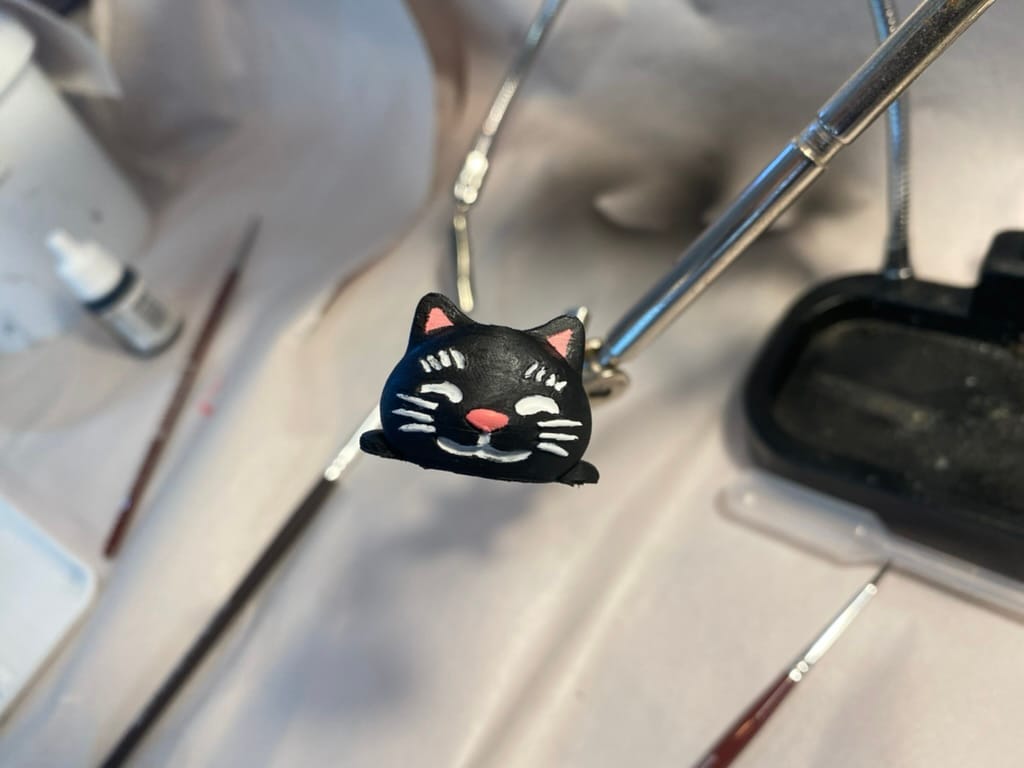
Cat Key Hook
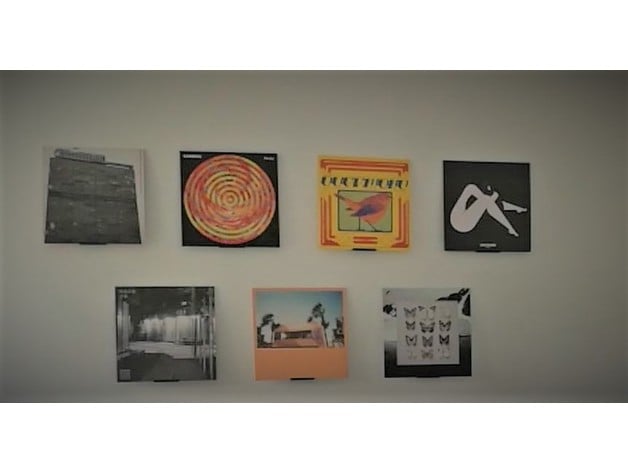
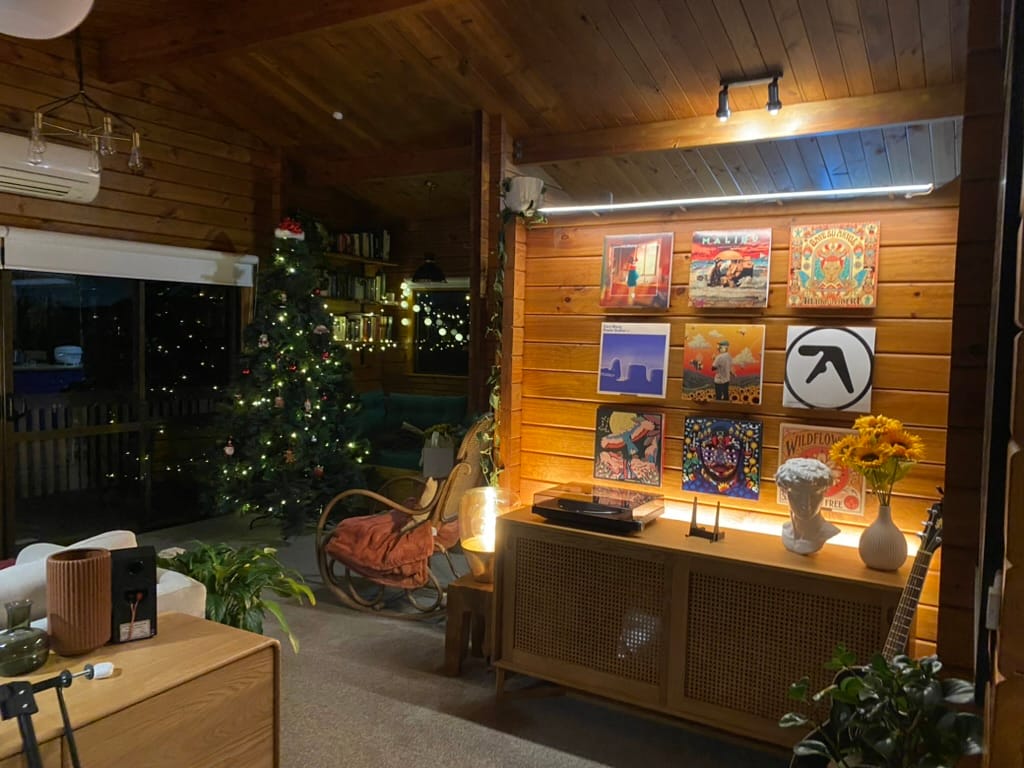
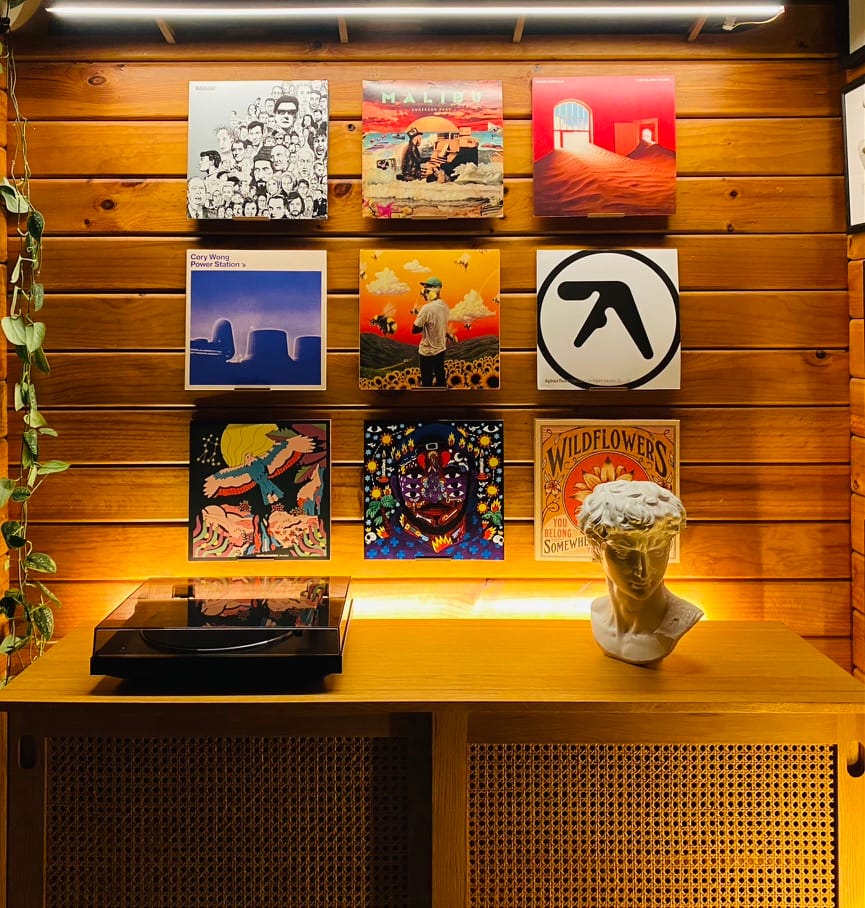
Vinyl Record Wall Brackets
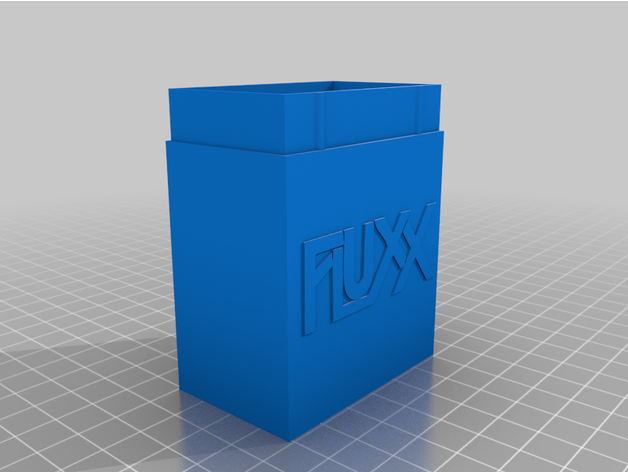
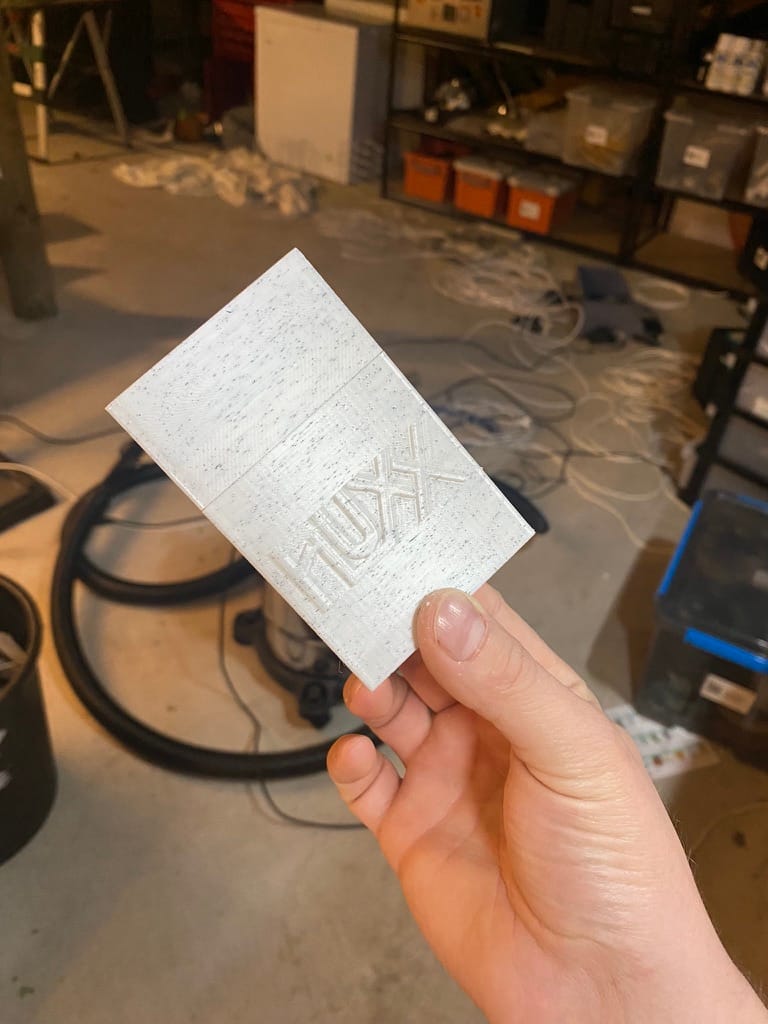
Fluxx Card Game Box
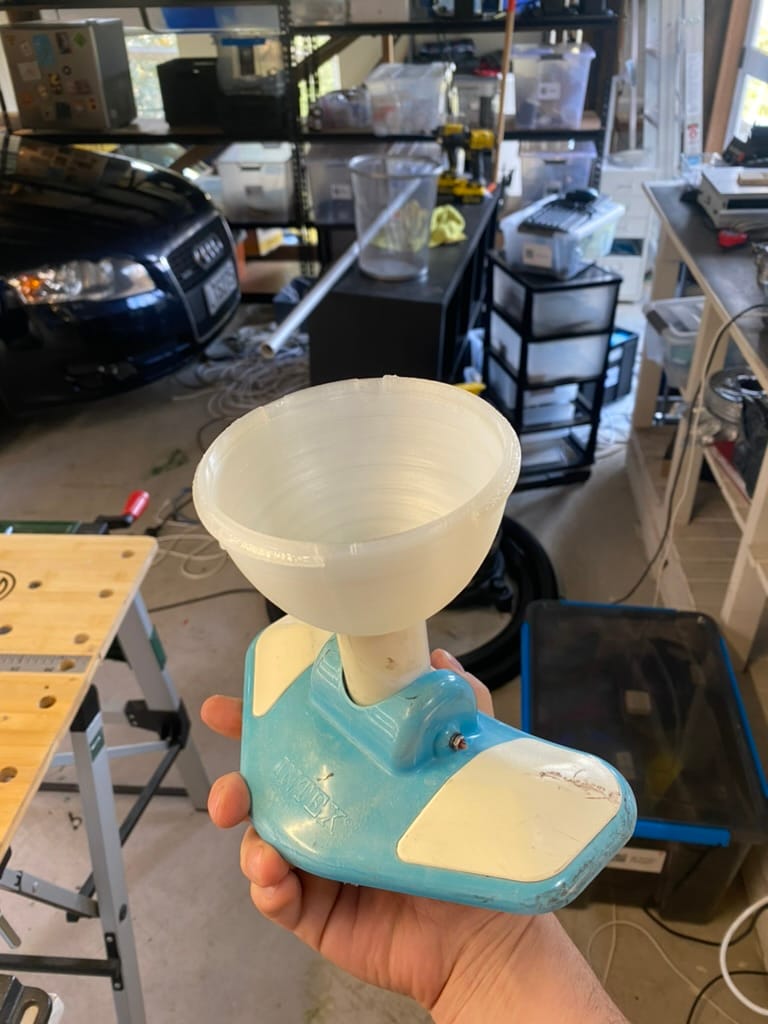
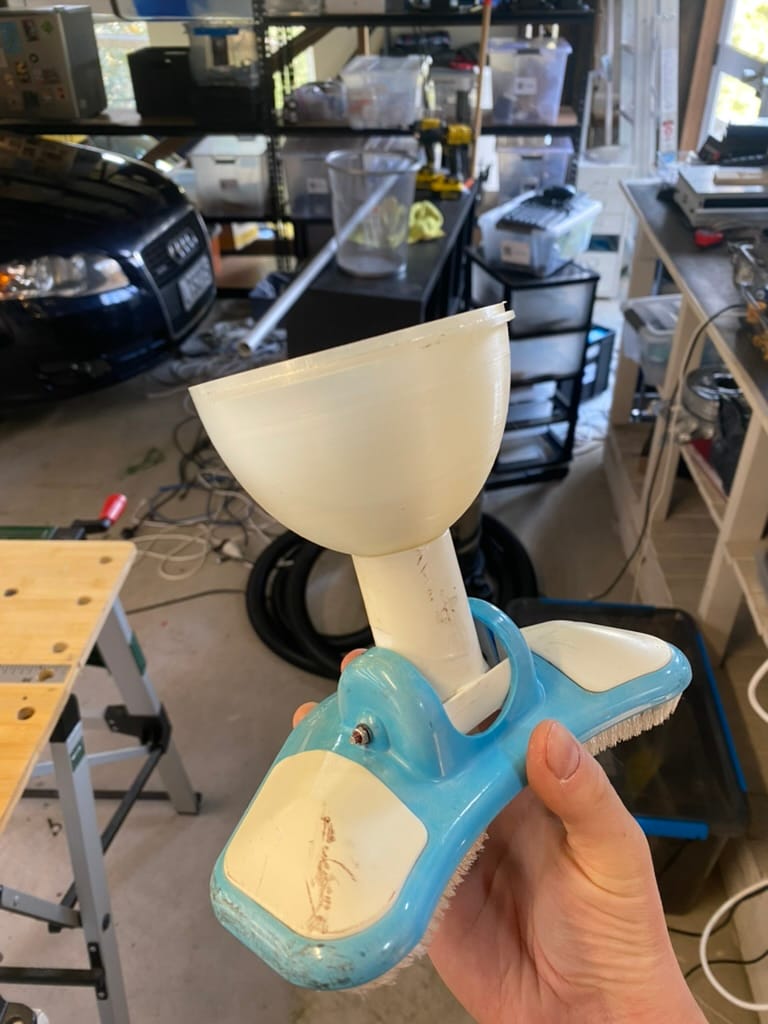
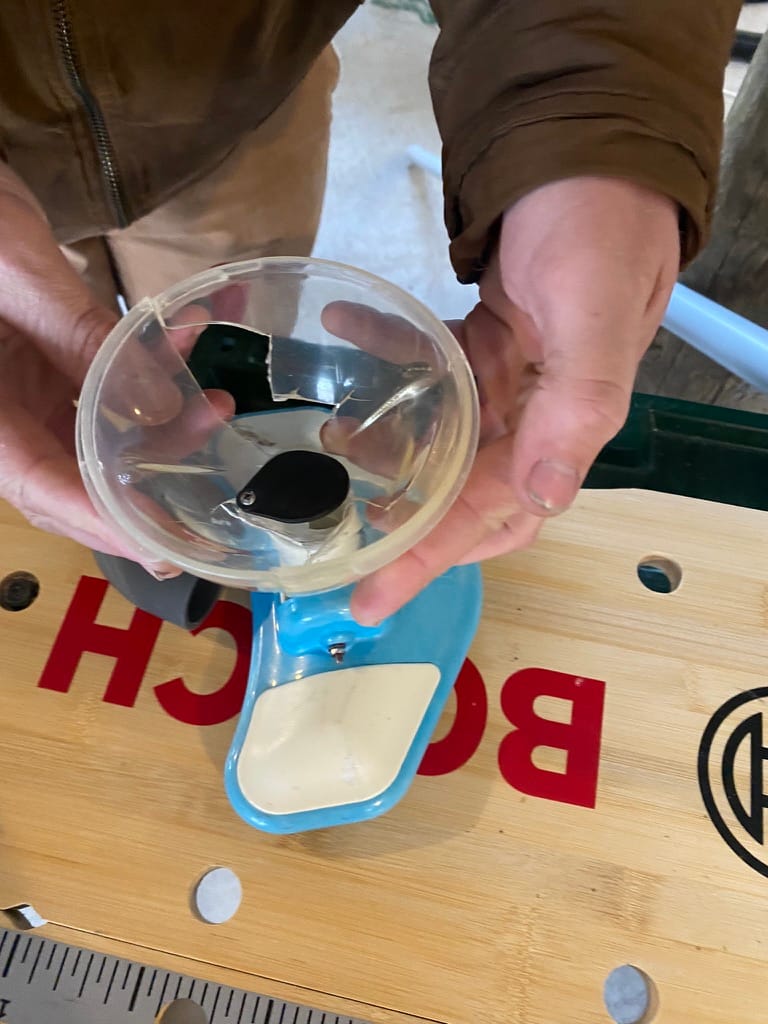
Replacement Pool Vaccum Adapter
My cousin asked me to fix this thing for his pool vacuum.
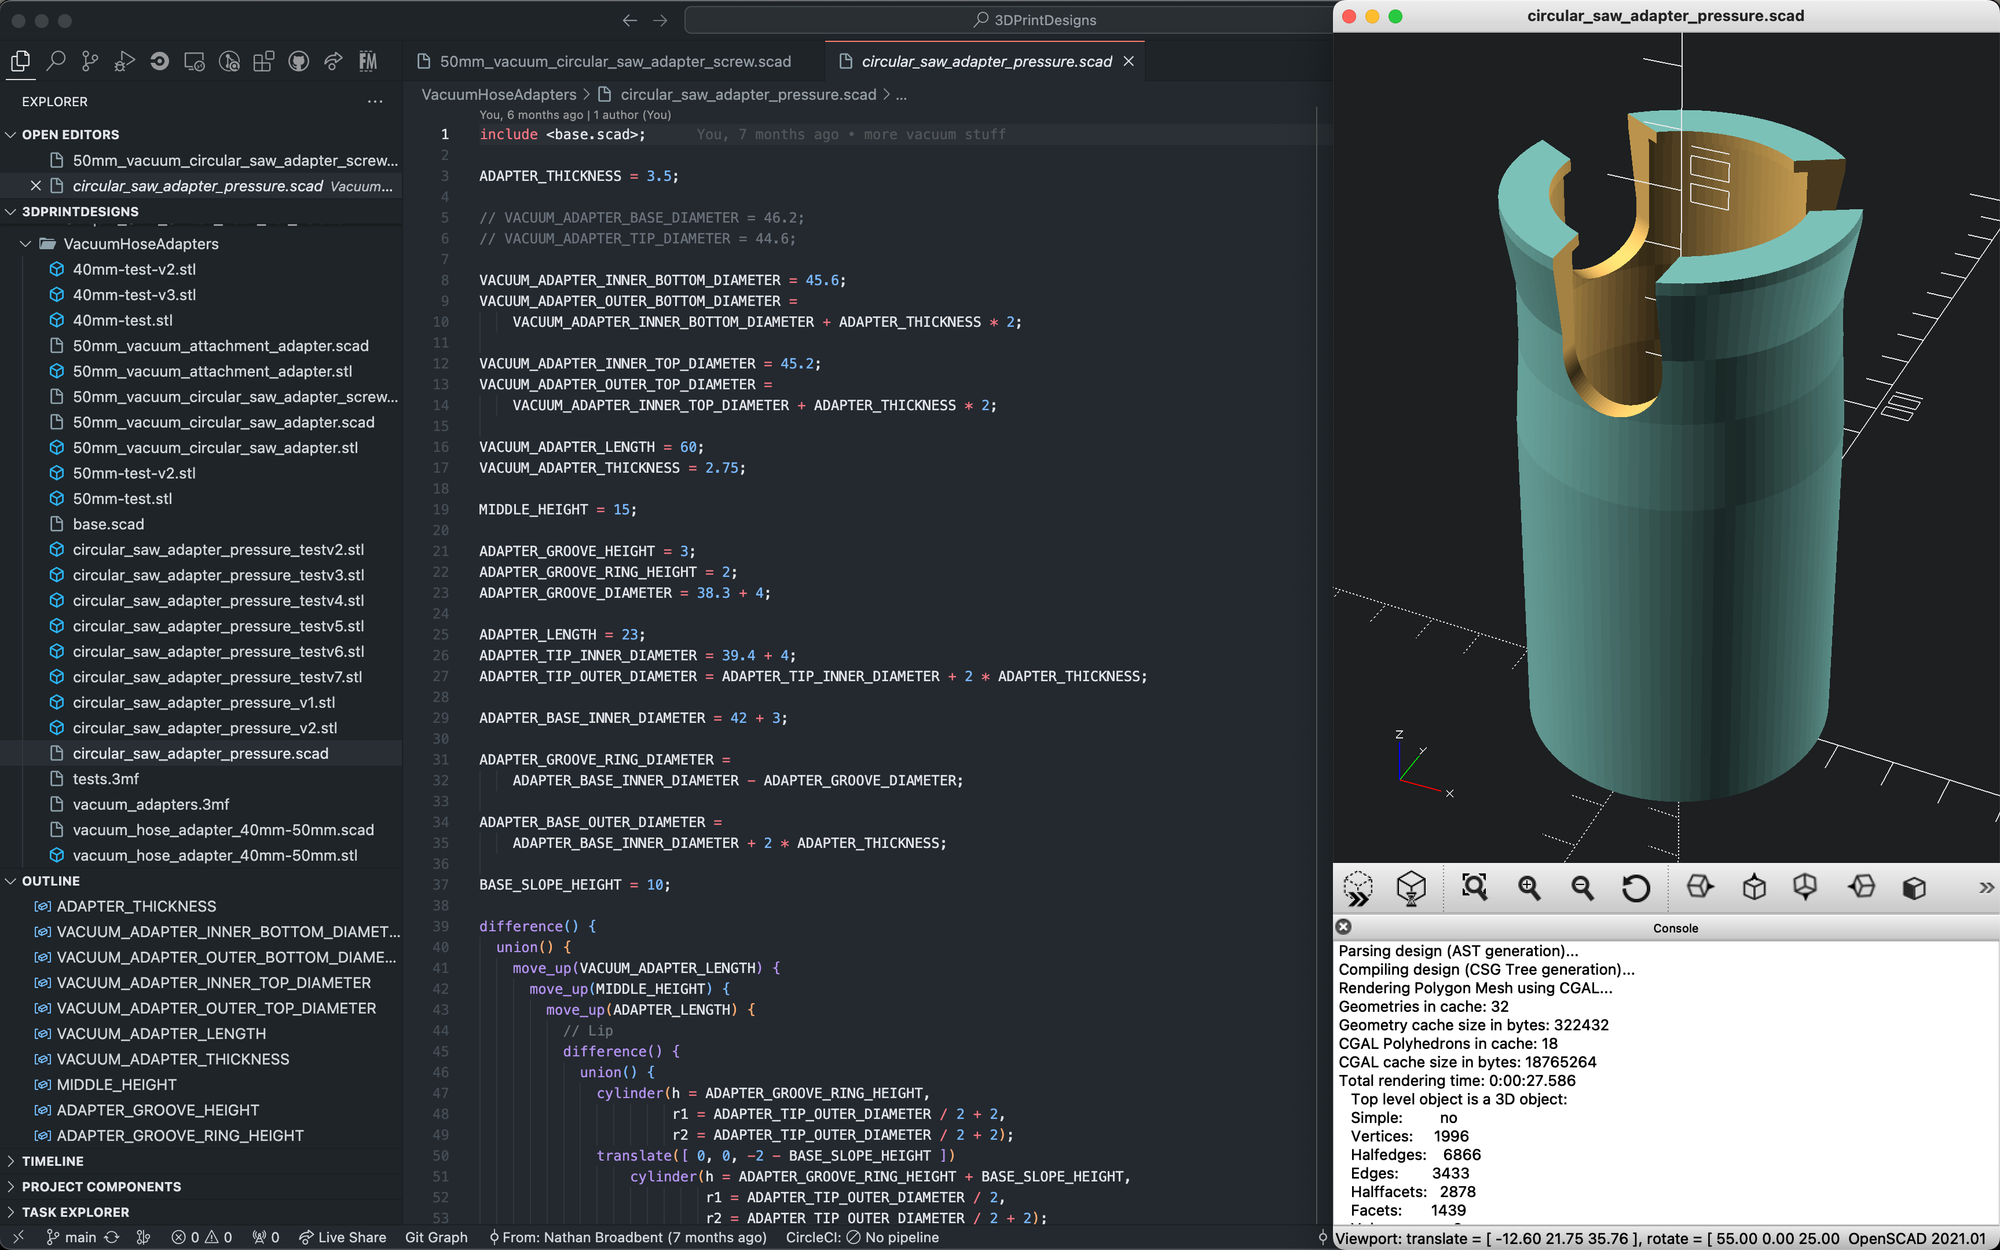
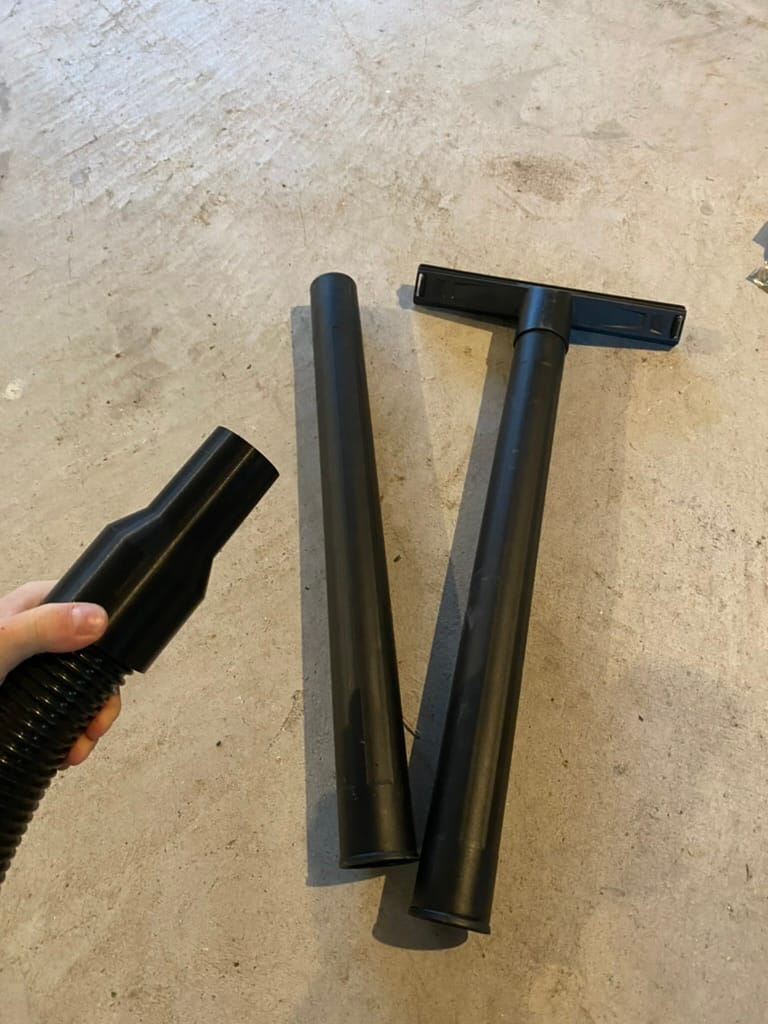
Vaccuum Hose Adapters
I designed some adapters for my shop vac so that I could extend the hose. I also printed adapters for my circular saw and cyclonic separator.


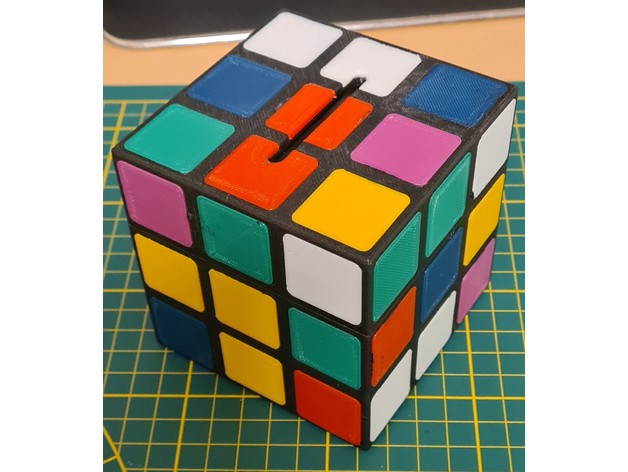
Rubik's Cube Tissue Box
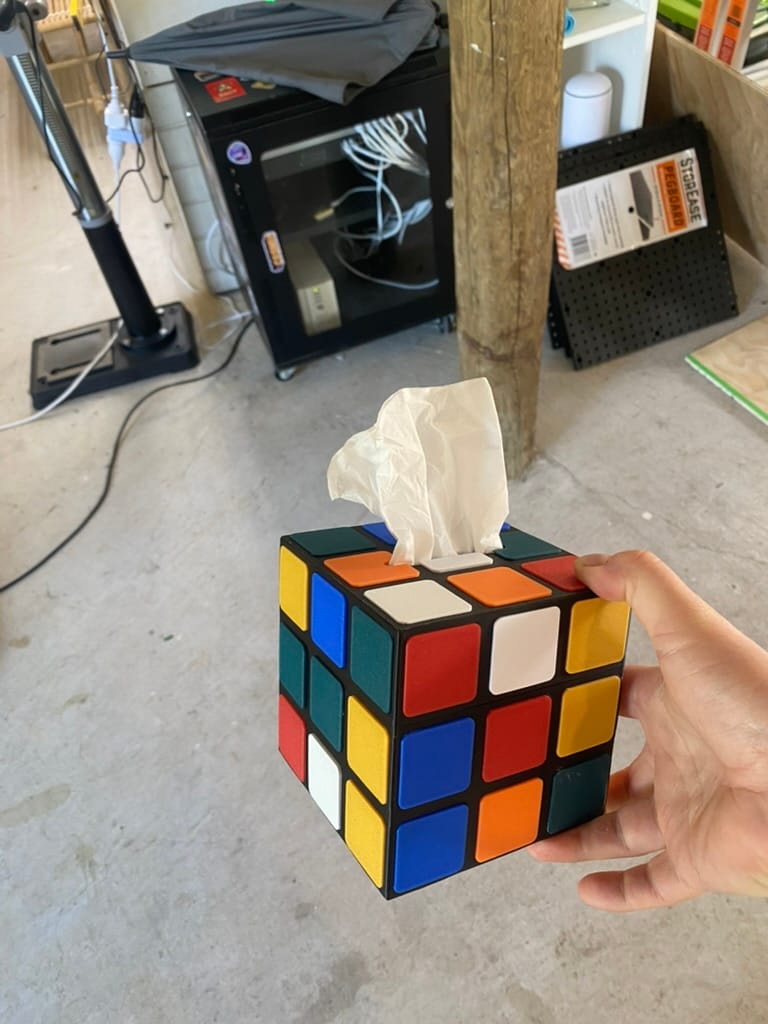
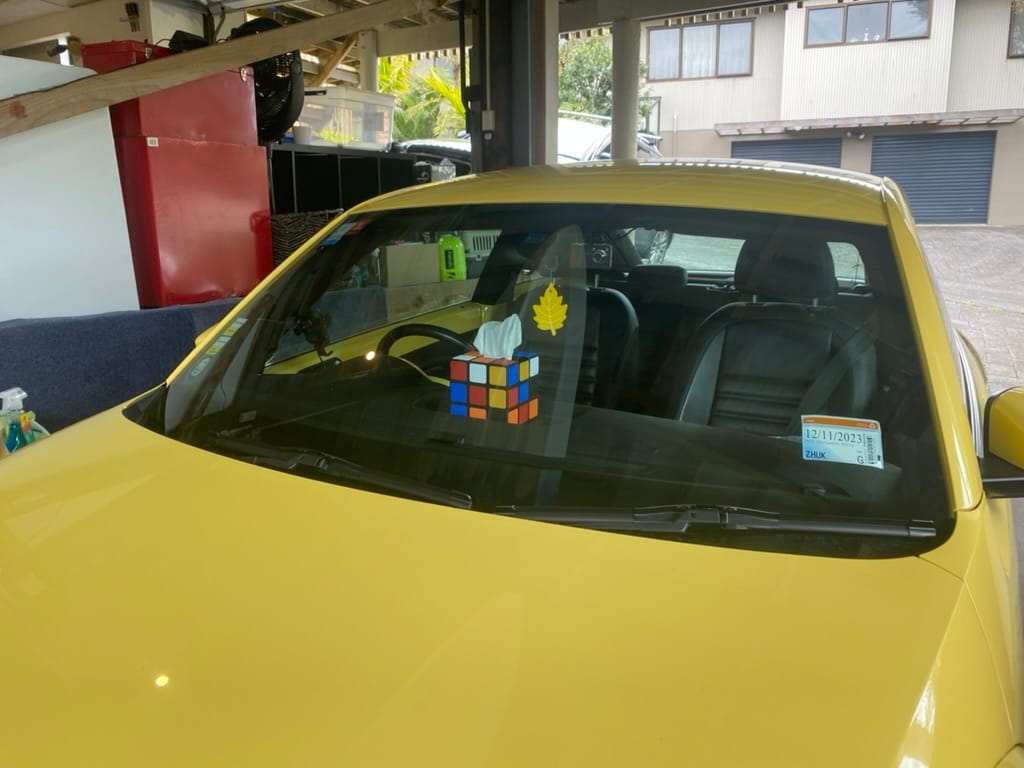
PLA was a bad choice. The tissue box started warping and the color pieces fell off when my wife parked her car in the sun. I might try printing this again using ASA filament (UV resistant.) I might also print the color pieces slightly smaller and super glue them (instead of hammering them in.)
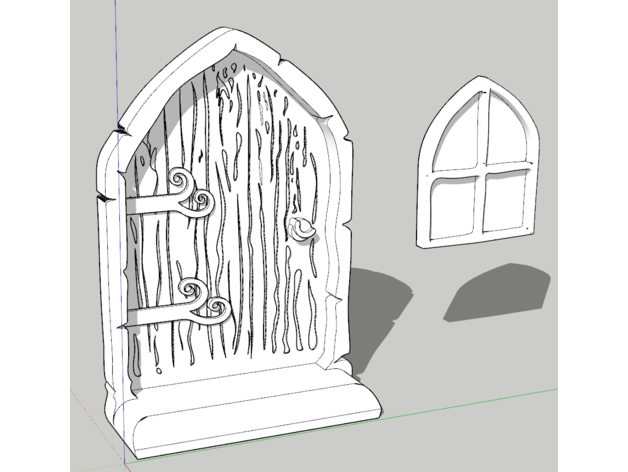
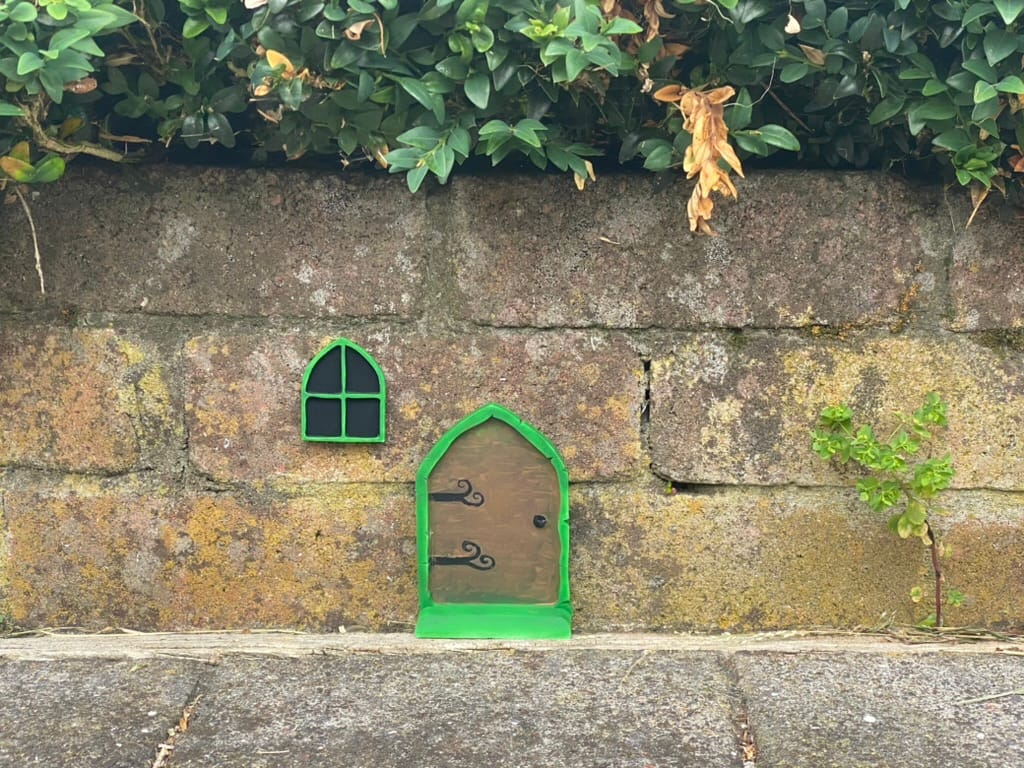
Fairy Door & Window
Raspberry Pi 4 Cases
I really like this Raspberry Pi case design.
NodeMCU ESP-32S Case
I've printed lots of these cases for ESP-32s around my house running ESPresense.
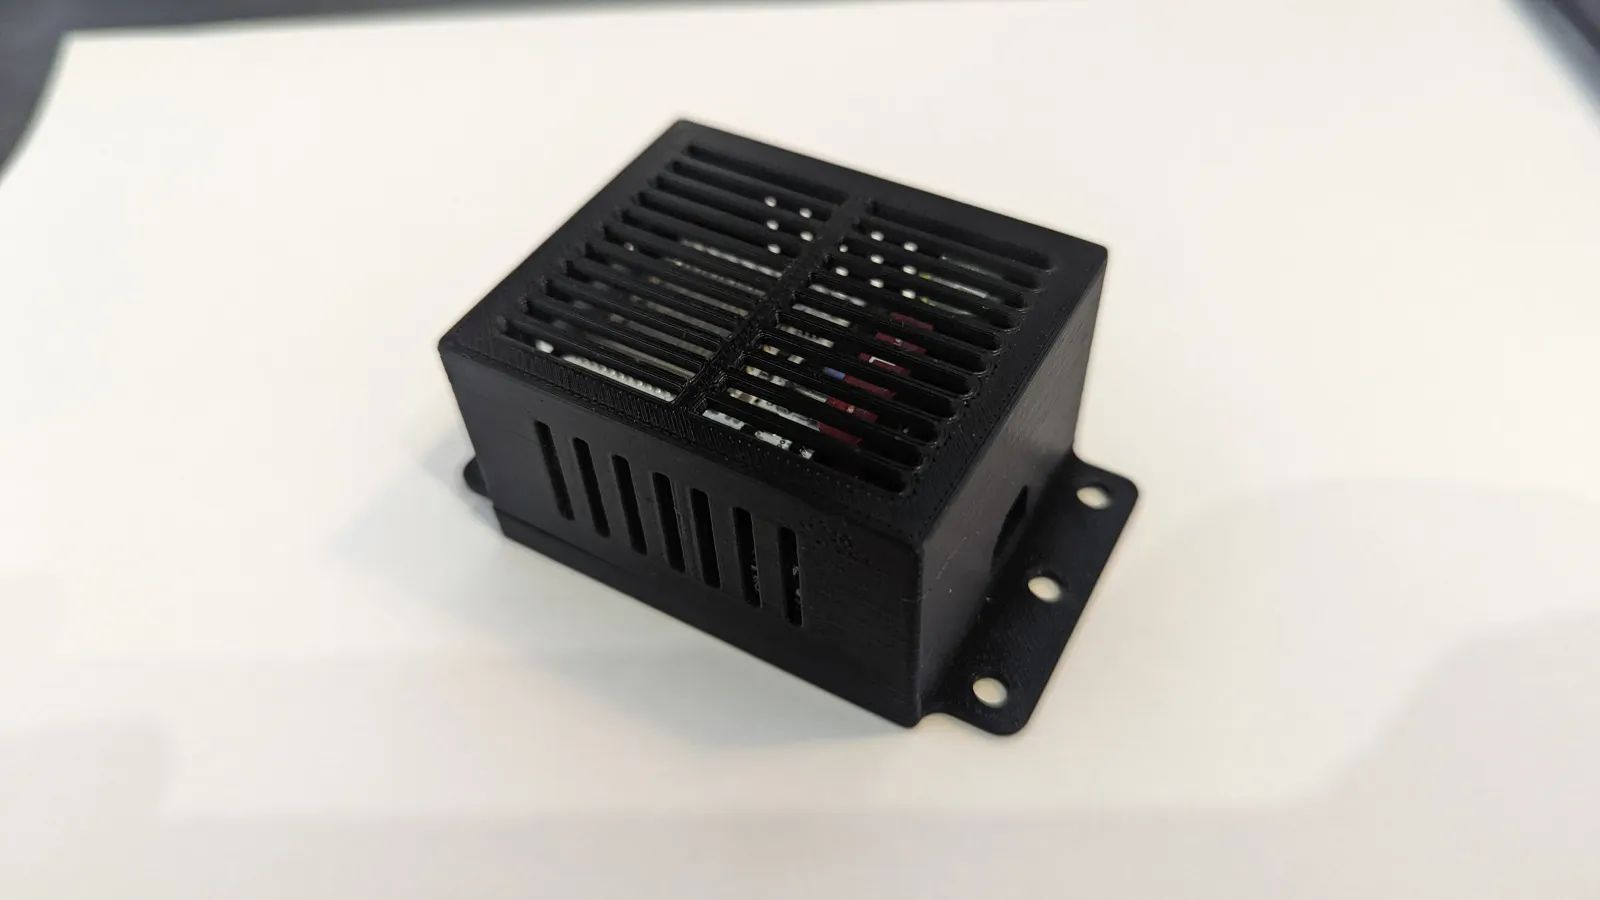
QuinLED Dig Uno Case
QuinLED Dig Uno v3.1 on Printables
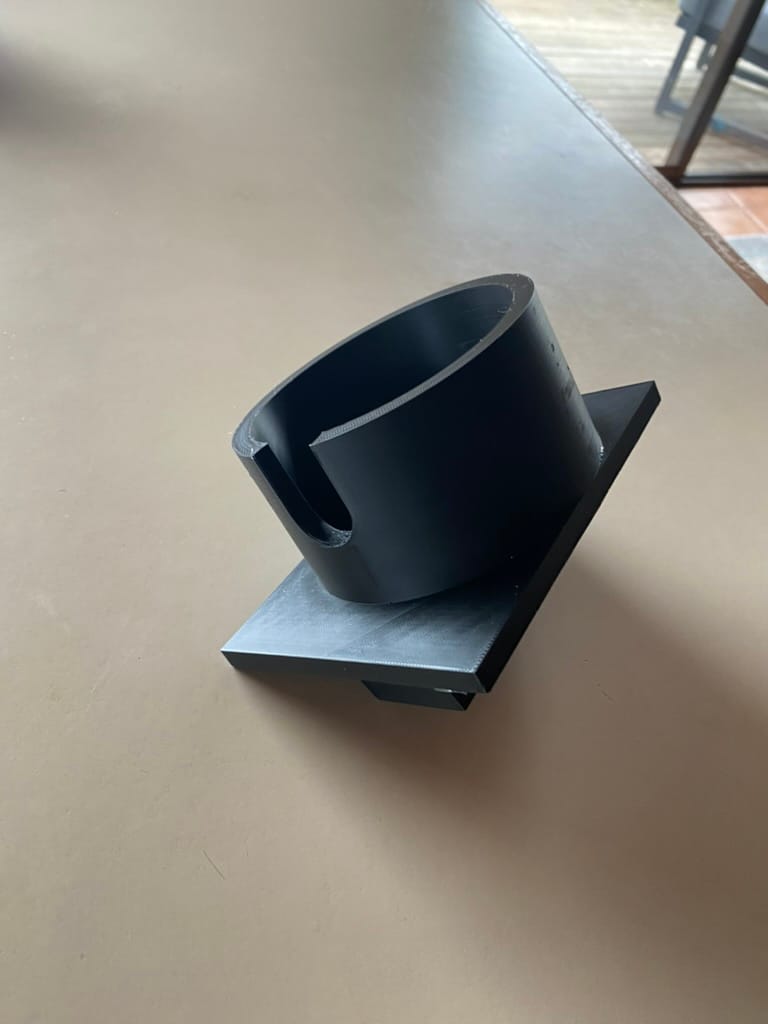
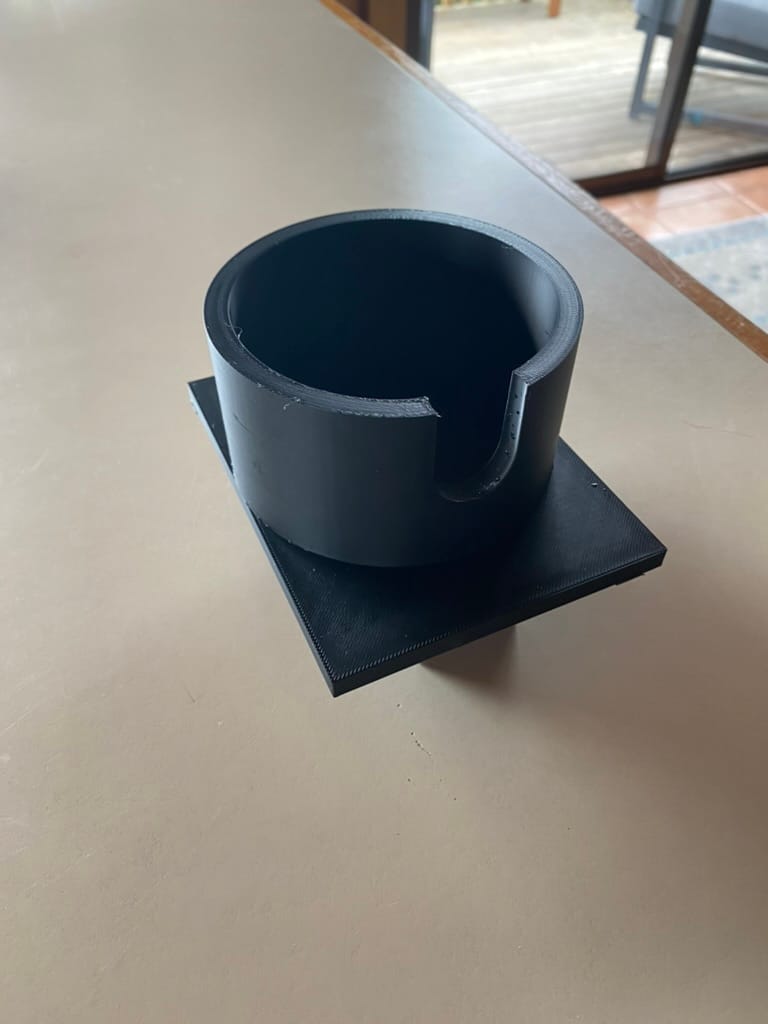
Car Water Bottle Holder
I designed this water bottle holder for my car in OpenSCAD.

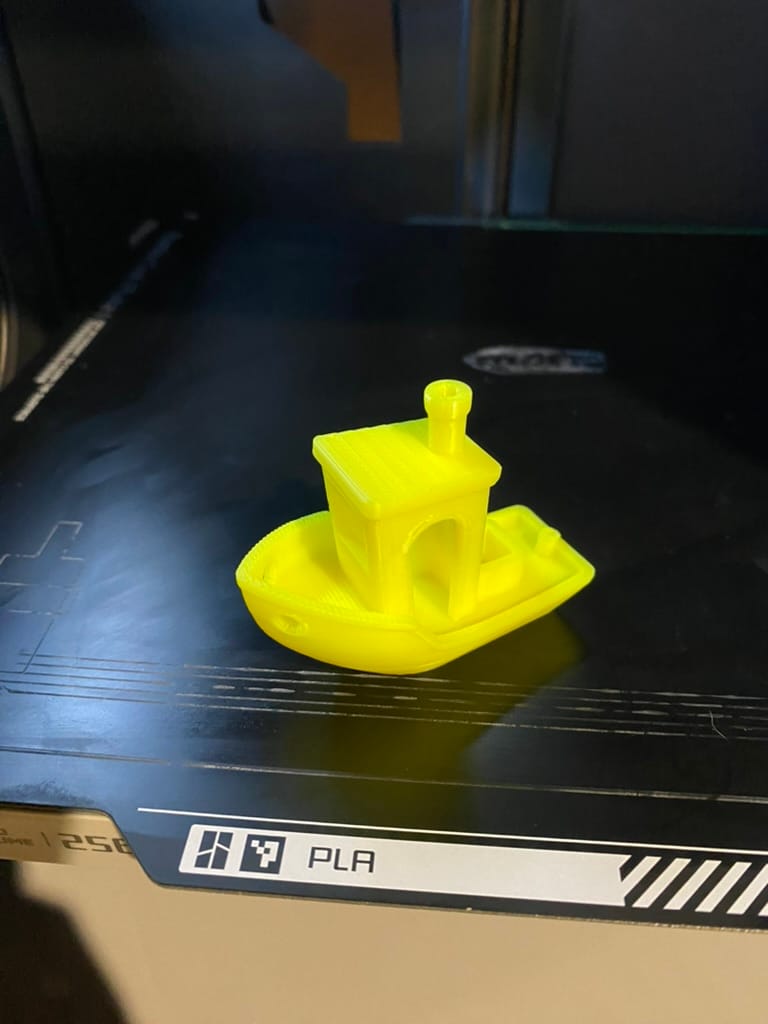
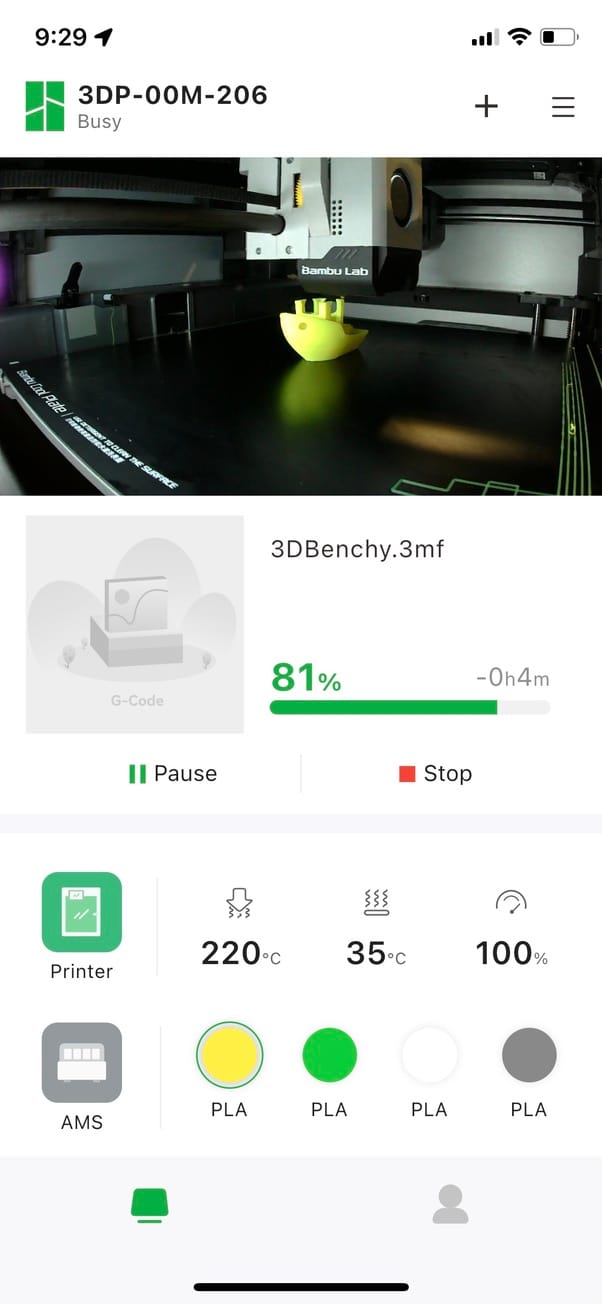
Benchy
The "Hello World" of 3D printing!
Other Stuff
James Tai Vision2Design


 MasterCake